Create Offers for Your Products
Whether your Products are free or paid, Offers are how people access your Membership courses. You will create an Offer for one or more Products that require clients to opt in (and pay, if needed) for the course. Upon opting in, clients will be able to view their Product (course) library, and first-time users will receive a Welcome Email with a username, password, and link back to their course.
Creating Offers for your courses
If you want to collect payments for your products you will need to integrate with Stripe. If you don't plan to collect payments for your Membership courses, you can make free Offers without connecting to a payment portal.
-
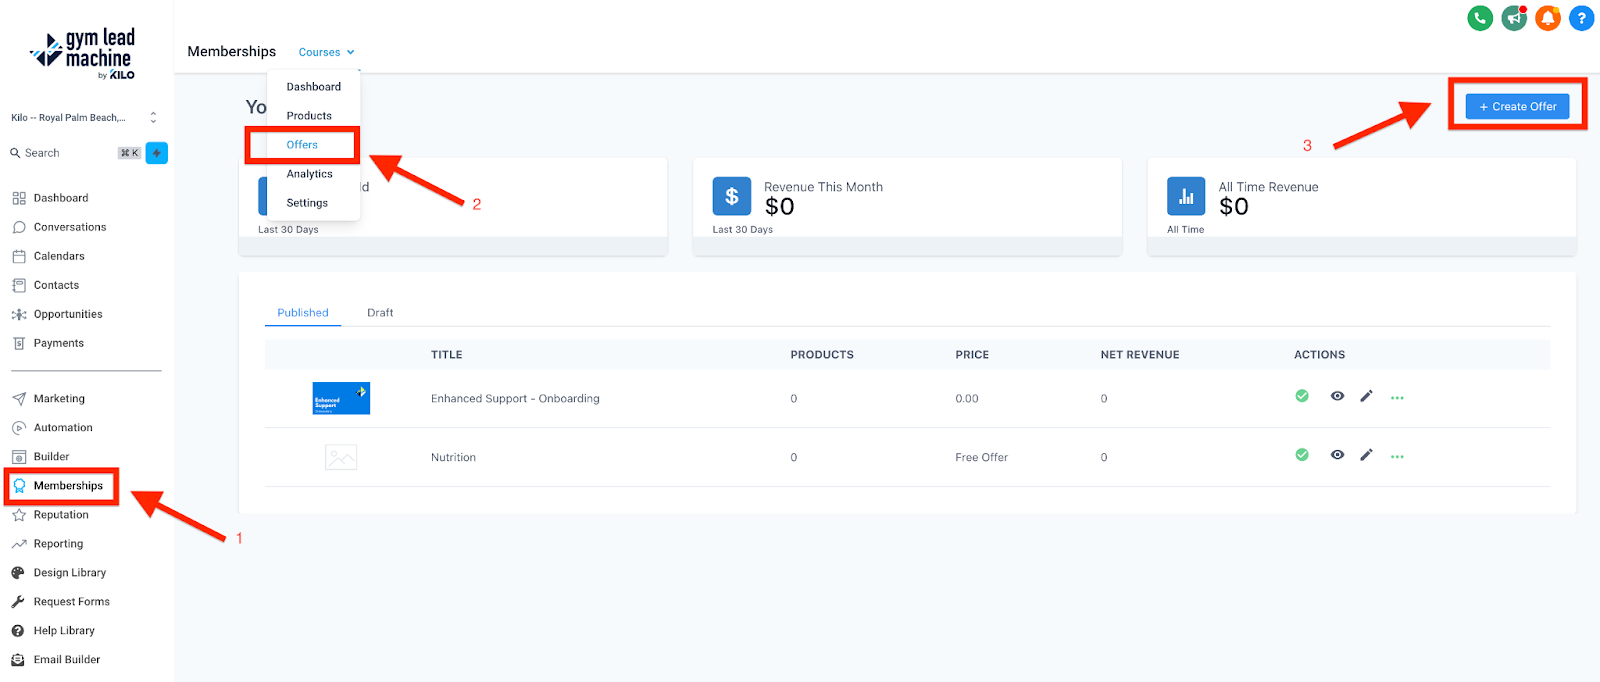
Go to Memberships in the left menu → hover over Courses and select 'Offers' → click the 'Create Offer' button in the upper right.
- Fill in the general offer details.
- Name the offer.
- Select the main product you want to include in the offer (more products can be added later if you wish).
- Set the price (it can remain zero and you can change it later). Again, you must have a payment portal connected to change this number to anything but 0.
- Ensure the mode is 'Live.'
- Click 'Create.'

-
You will be taken to the more specific details of the offer after creation.
Here you can do the following:
- Add an offer description
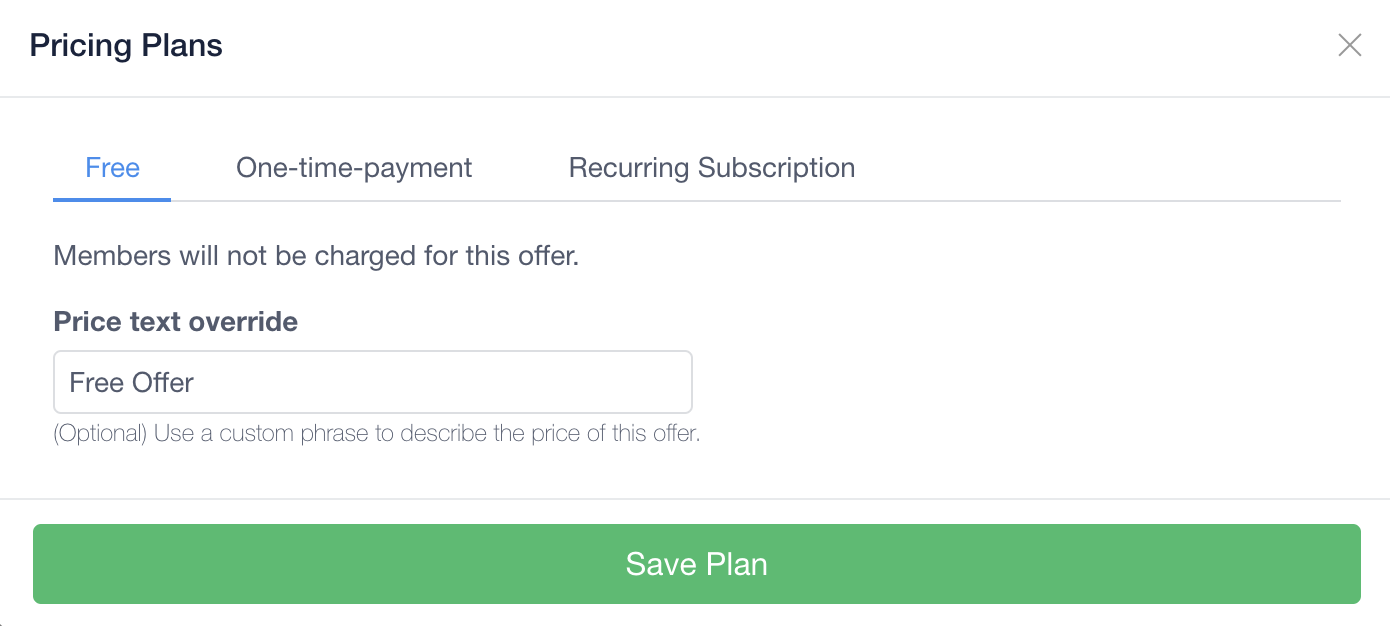
- Add more products to your offer
- Adjust the price and type of offer
-
And more!

- Make sure your offer is set to “Published” before it goes live.
- When done, click “Save” then “Edit Checkout.”
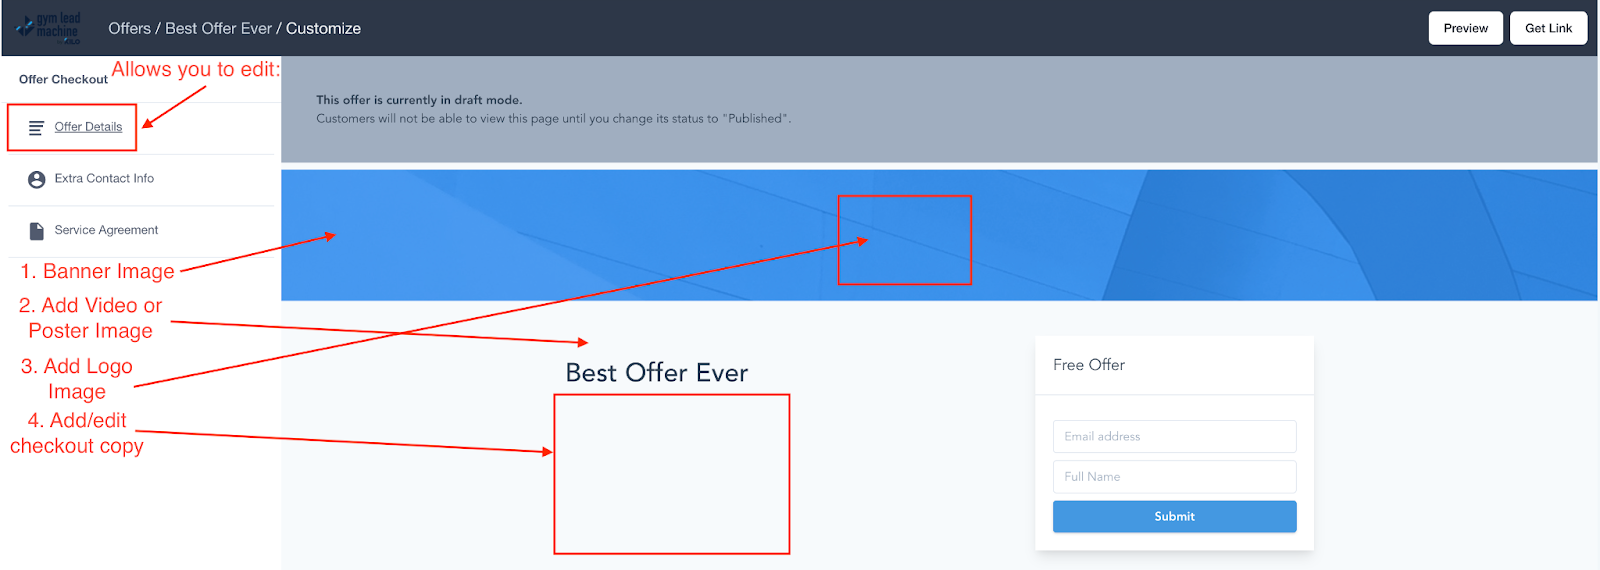
Edit the checkout page
- On the checkout page, you can edit the following via the Offer Details options:
- Edit the Banner Image and the banner image height
- Add a Video or Poster Image
- The Image or Video will go above the offer title
- A Video will trump an Image if both are added
- Edit Logo Image
- This image will go in the middle of the banner
- Edit Checkout Copy
- This will go below the offer title
- Via the Extra Contact Info option, you can add the address or phone number option, or both, to the form.
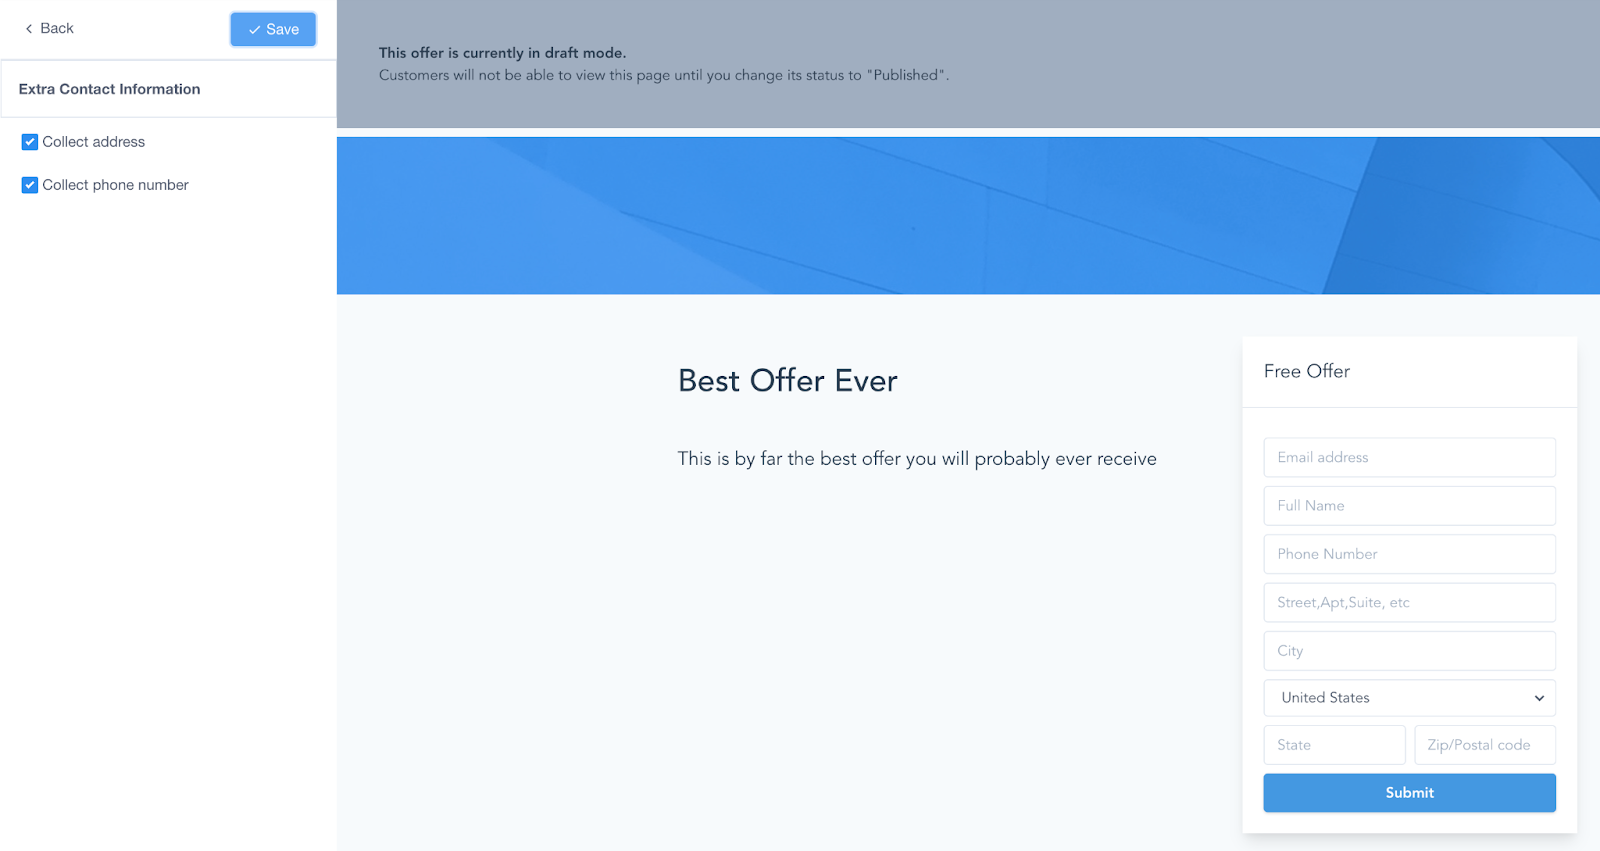
- In the Service Agreement section, you have the following options:
- Choose whether the service agreement is required or not.
- Keep the default text or customize it.
- Add in your service agreement link.

While working on the checkout page, you are encouraged to Preview regularly to see how your updates are reflected.
If you have further questions about Offers or checkout options, please contact the Support team at hello@usekilo.com.