Create Products in Memberships
Creating a new membership product (course)
- Log in to your GLM account and go to Memberships → Courses → Products → Create Product
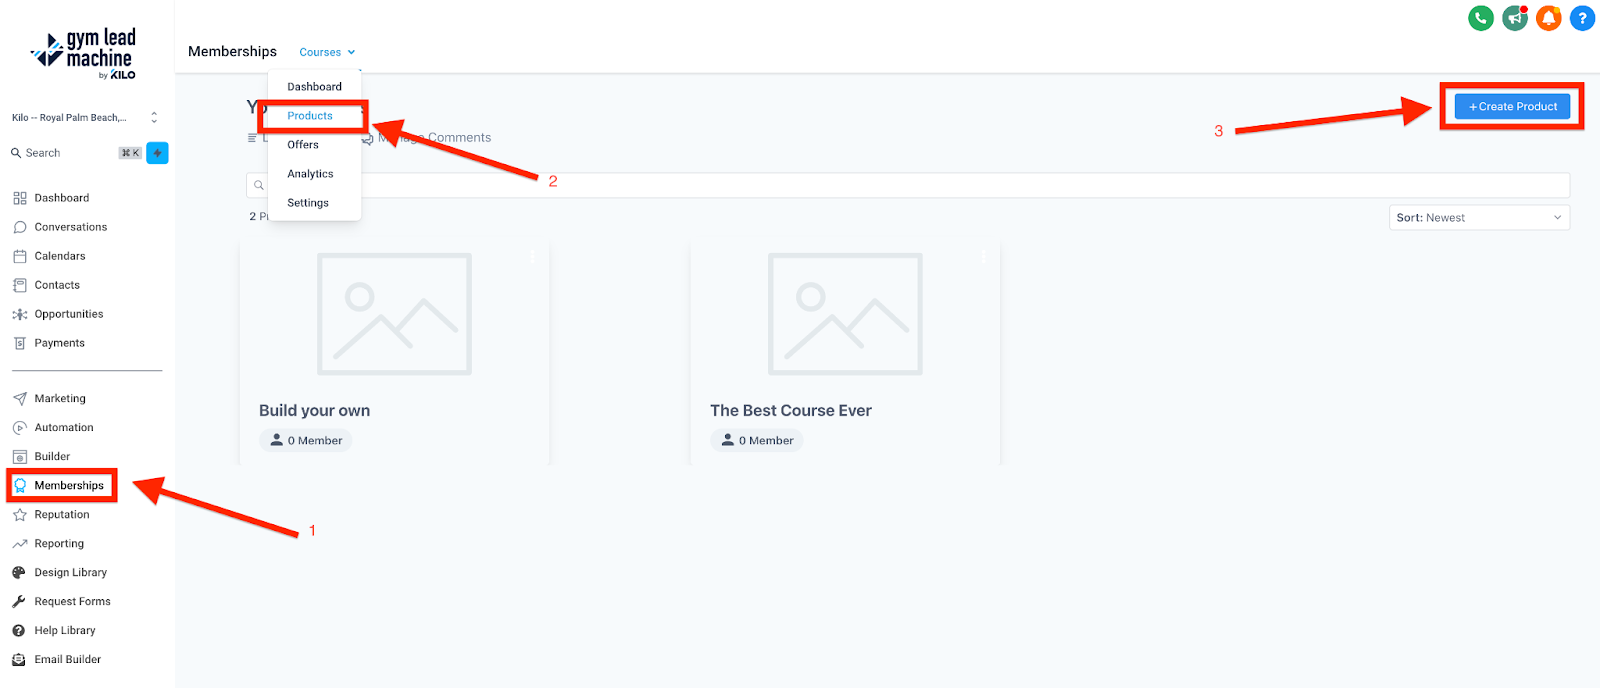
- Here you will have 4 options to choose from
- Sprint Course - templated short course with 1 category and 5 lessons (ex: short courses to build a gateway to memberships)
- Marathon Course - templated longer course with 5 different categories (ex: train and upskill your audience within your niche)
- Membership - templated Membership site blueprint (ex: nurture and mentor your network)
-
Build Your Own - Start from scratch (build a custom product that matches your content)
- For this example, let’s select the Marathon Course template.
- Once you select the type of course you want to create you can edit the name of the course, then hit 'Create Product.'


Creating the outline of your course

- Once you’ve created the new product you’ll be taken to the product’s outline page.
-
Here you can add new Categories. Within each category, you may add:

- Subcategories by clicking the + next to the category name and selecting 'Add subcategory.'
- Lessons by clicking the + and selecting 'Add lesson.'
- Assessments lessons by clicking the + and selecting 'Add assessment.'
- Adding these elements is how you set up the skeleton of your course.
- We will go into more detail on what you can all do with Lessons & Assessments later, but for now, just focus on setting up the outline of your course..
-
- Also on the outline page, you will see a few options for each category and subcategory.
- Published - the category is live
- Draft - the category is not visible
- Note - if the category is in Draft, all published lessons, subcategories, and assessments within that category will not be visible.
- Lock - This allows you to lock a certain category until a specific lesson is completed
- Drip - This allows you to have the next category come out a chosen amount of days after the previous category has been completed.


- For lessons, this drop-down allows you to have that specific lesson in published mode, draft mode, or to delete it altogether.
Making edits on the Details page
As you create and edit the outline of your Membership course, we encourage you to save and preview your work regularly to help you understand how your updates are reflected in the course.
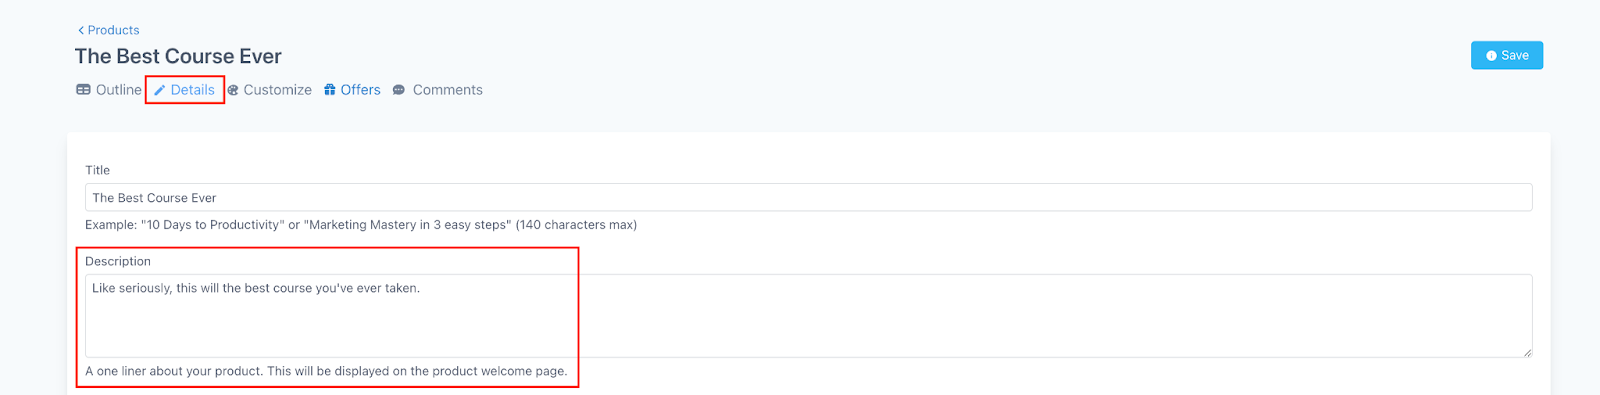
- From the outline page, click 'Details' under the course title.
- This is where edits will be made to the information on your product’s welcome page
- You should see the title of your course
- And the option to add a product description
- When you scroll down you will find the option to upload your own product thumbnail
- This will be what the client sees in their product library (the courses to which you have given them access or that they have purchased)
- Take note of the recommended image dimensions for this thumbnail,1280x720px

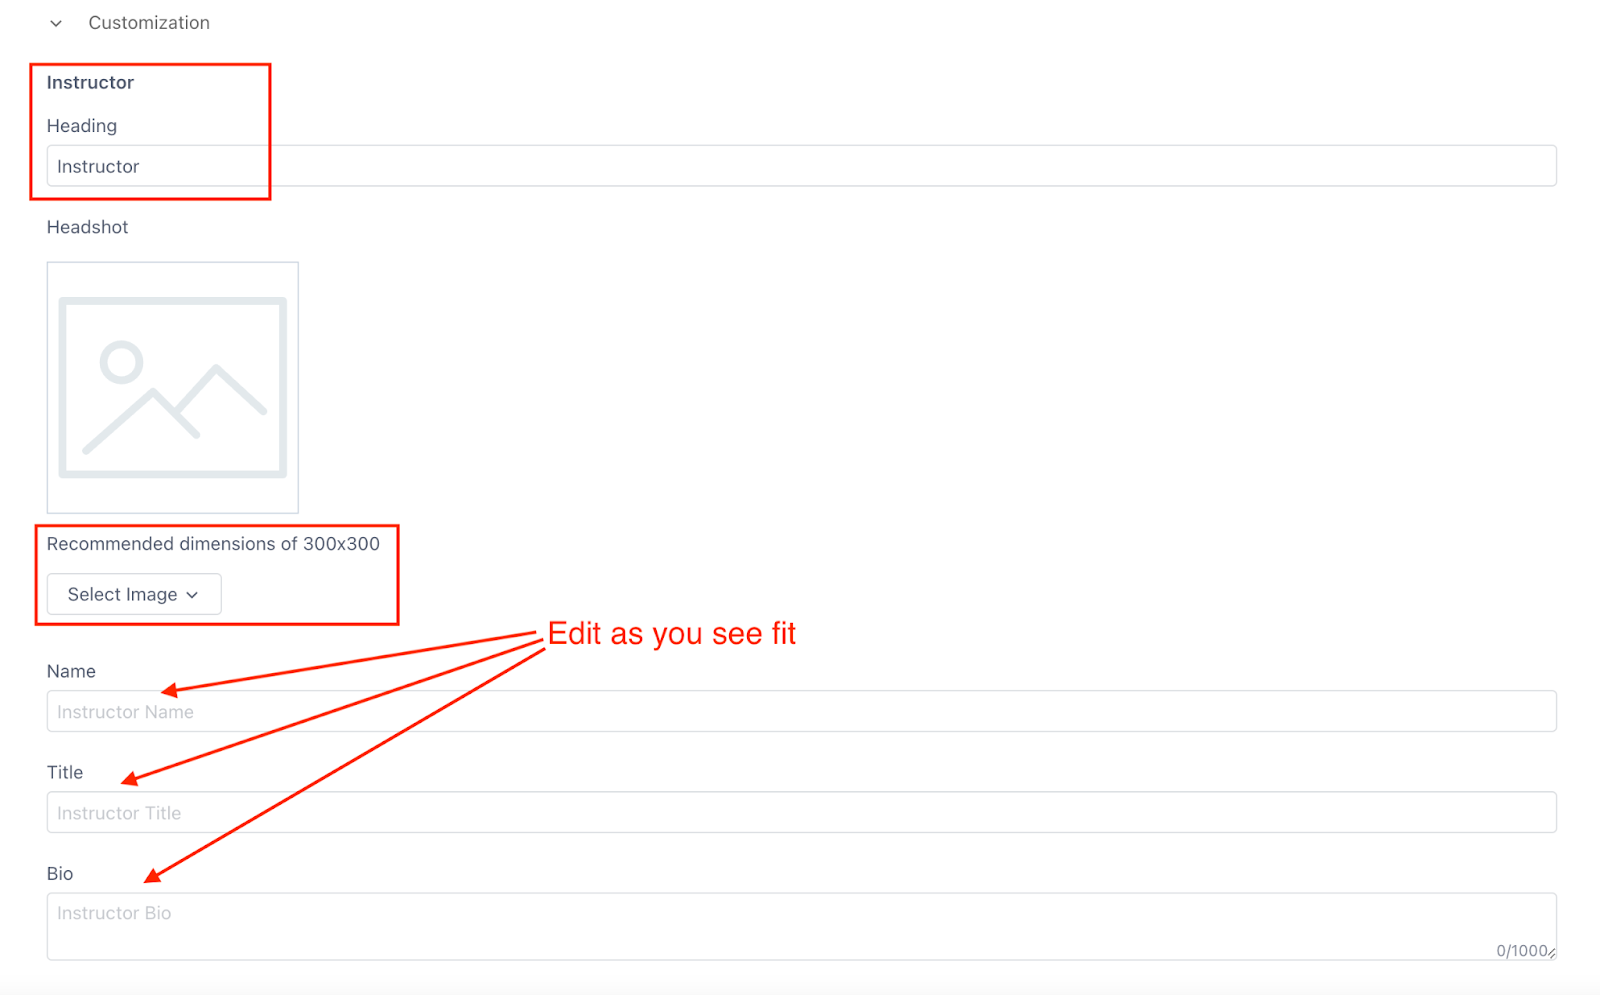
- If you keep scrolling down and click on “Customization” you will find the section about the course’s instructor
- Here you could change the word Instructor out for “coach”, “teacher” or whatever you see fit.
- You can also upload a headshot of the course instructor
- This is nice if the instructor is going to be appearing in videos regularly throughout the course
- Lastly, you can edit the Instructor’s name, title (Head Coach, COO, CEO, Kids Coach, Group Coach, etc.), and add a short bio.
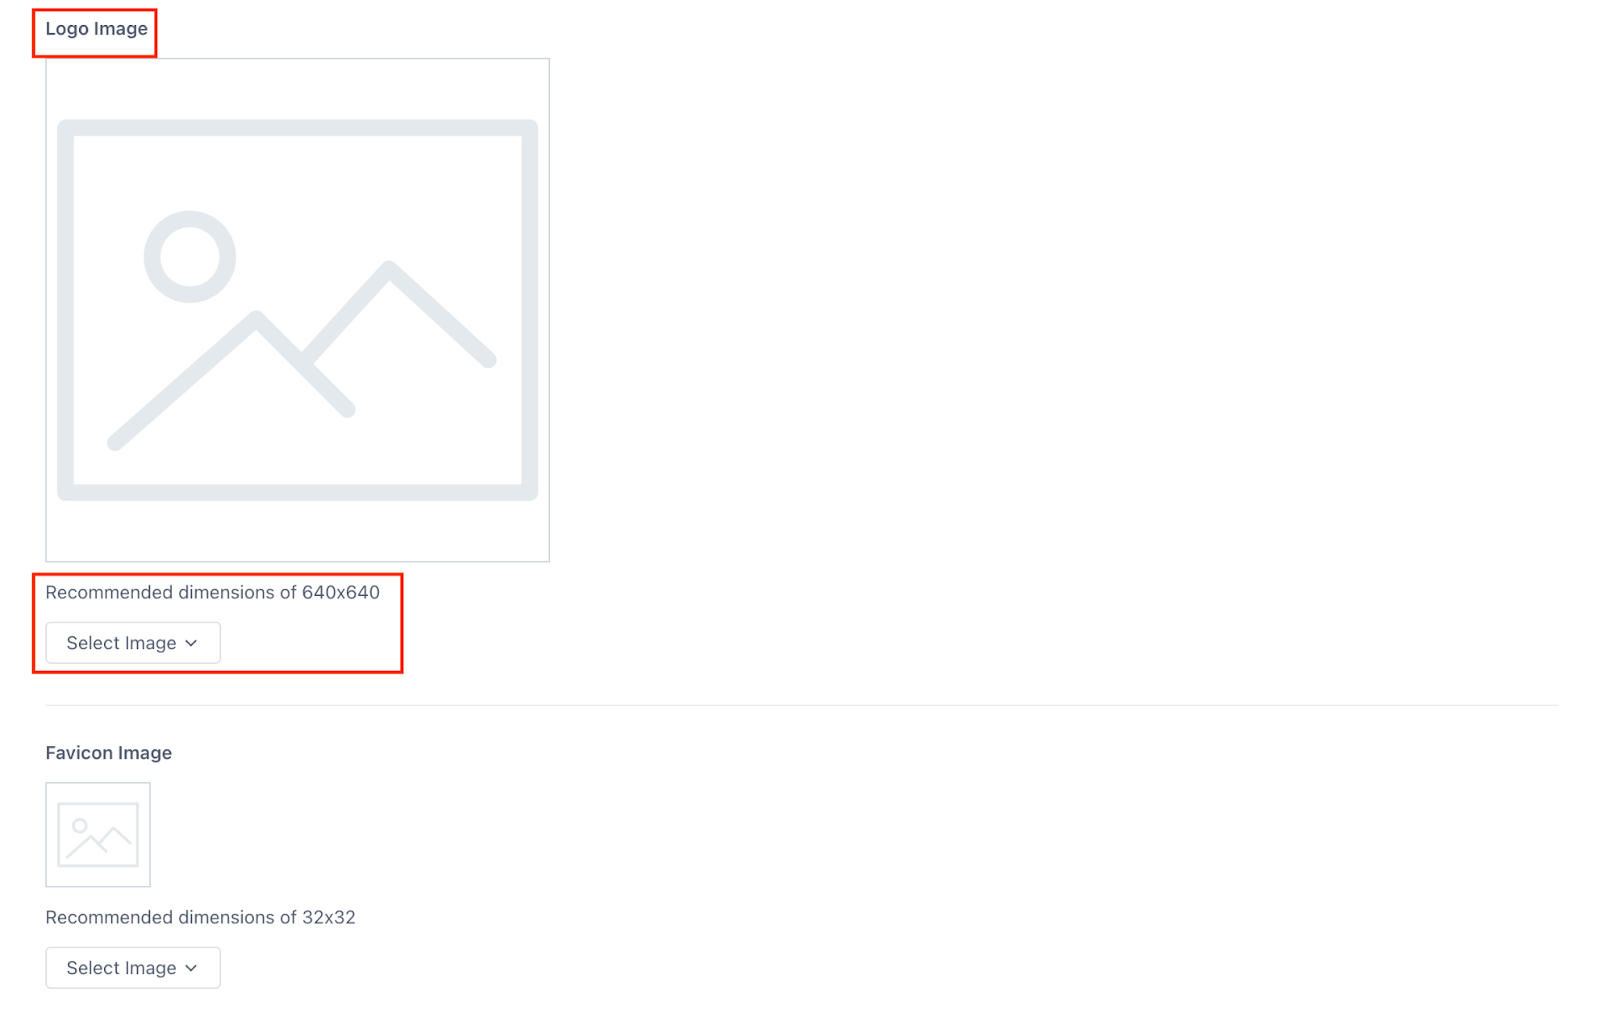
- Further down in the customization section is the option to upload your gym’s logo
- Once again pay attention to the recommended image size, 640x640px
-
You may also opt to add a Favicon image, which is the small image that displays on the browser tab when your Membership site is open. The screenshot below shows you GLM's favicon image when you open app.gymleadmachine.com in your browser.

GLM favicon image

Customizing the course layout
- From the outline page, click 'Customize' under the course title. You can customize your product and lesson pages to have a specific look or to better reflect your branding.

- Choose from one of the available templates.

- Hover over the template you would like to use and hit customize

- Once you’ve selected the template you would like to customize you should be able to see a few things you’ve already uploaded.
- Your Logo
- The Instructors Information
- Category Names
- Lesson Names

- You will also see a progress bar and a preview button to see what all of your changes will look like.
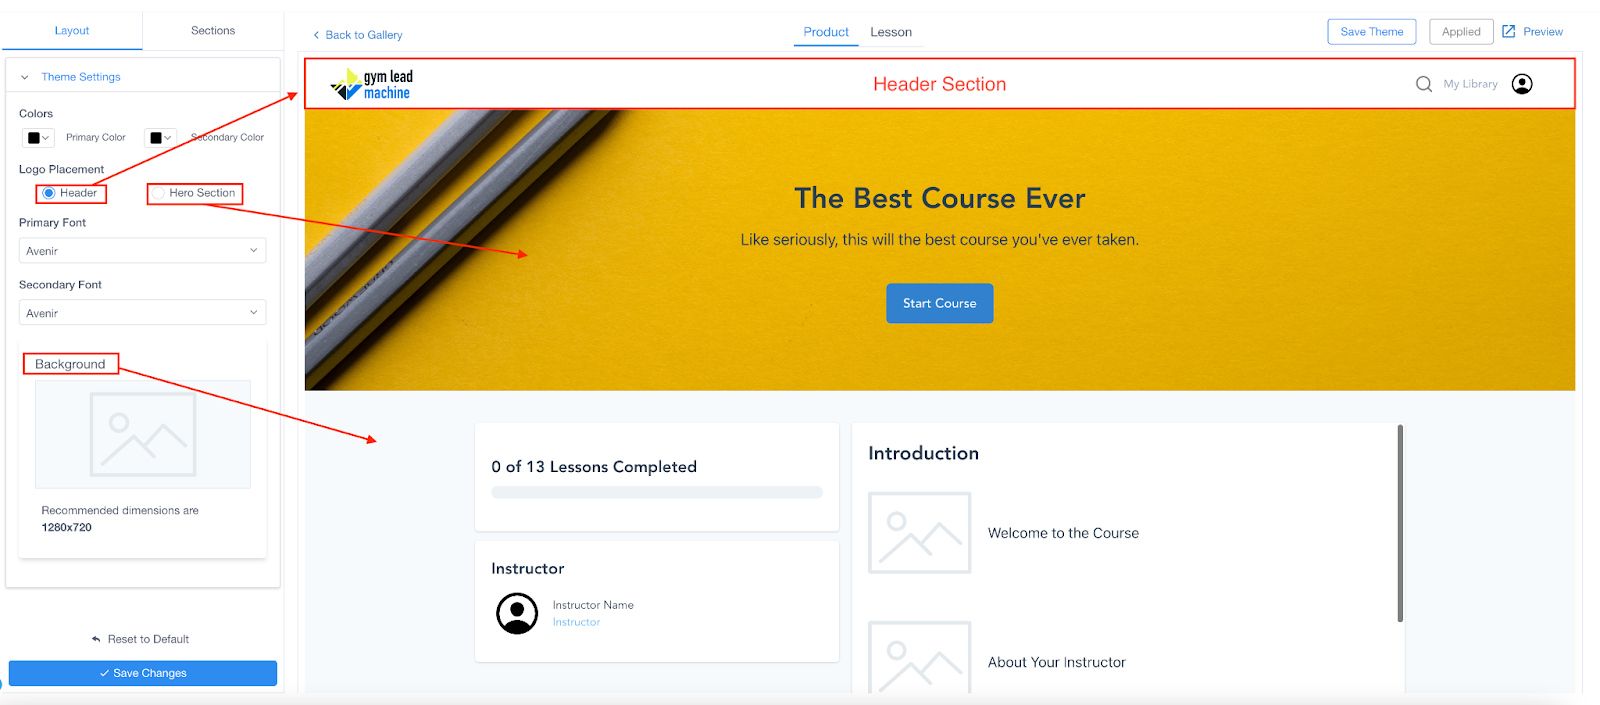
How to customize the product page
- Click 'Layout' → Theme Settings. Here you can change:
- Primary and secondary font colors
- Change the primary and secondary fonts
- Decide if you want the logo in the header or Hero Section
- Change the background image
- Move to the 'Sections' tab. Here you can customize each section to your liking.

How to edit the individual lesson page
- Head over to the 'Lesson' Section and edit the same sections as described above.


Congratulations! Your course now has the layout and customizations that make it yours. In the next lesson, we will talk about how to create and edit your lessons.
If you have additional questions regarding course creation and customization, please reach out to the Support team at hello@usekilo.com.