Create or Edit a Form
Creating or editing a form in GLM
-
In the Gym Lead Machine left menu, click on the option that says, Sites.
On this new page, click on the Forms tab in the upper menu.
The page that loads will show you the various forms within your GLM account. Most of these forms exist on your website or your landing pages.
To create a form click on the blue button that says + Add Form. To edit an existing form, click on its name in the list.

For general form settings, go to the "Styles & Options" icon to open the menu. Then select the tab titled "Options."

Styles & Options icon 
Options tab - In Options, you can change the form name and control the 'On Submit' action - telling the system what should happen next after the form is submitted.
- For 'On Submit' you can have the form direct to a website URL. For your website form, we have set this already so the form redirects leads to your Free Intro page for booking.
-
Forms can also display a "thank you" message instead of redirecting to a site. Your Cancellation, Lead Magnet, and Drop In forms all thank the contact for opting in and tell them to be on the lookout for more info.
For Style changes to the form, go to the tab titled "Styles."

Styles tab
- In Styles, the most common updates include showing or hiding the field label, adjusting the form's background, and updates to font including size and style.
- In Options, you can change the form name and control the 'On Submit' action - telling the system what should happen next after the form is submitted.
-
To add or update the fields on your form, select the + icon button on the left side of your screen.

-
The Quick Add tab offers you all of the standard form fields (i.e. First Name, Email, Phone, etc.). From the left-hand side menu, click and drag any standard field that you wish to collect on the form.

Drag and drop new fields to the form The Quick Add field options are ones that the system already has in place, as well as a field within the contact card in which to store the information. Below, we'll discuss adding Custom Fields to your forms for new questions.
The Standard field options also include elements like Buttons and Text (adding copy to your form). You can edit the appearance of the button or text by, first, dragging it over to the form and then clicking on the element. The editor will appear on the right-hand side of your screen. We recommend toggling on "Full width" in the button editor for the most professional look.


- To edit these fields, you can select them by clicking on them, and the options in the side menu will change to be specific to that field. Click in a blank area of the form to have the side menu options return to default.
-
If you want to make a field a required field, click on the field and then select the checkbox that says "Required."

- Once you're satisfied with your form, you'll need to click the button that says "Save" in the upper right.
-
To share your form, select the "Integrate" option just next to Save.
There are several appearance options in the Integrate Form pop-up and we ask that you do not adjust these for the forms that appear on your website.
The two most pertinent options here are the "Copy Embed Link" (to embed the form on a landing page) and "Copy Form Link" (to share the form via a URL.


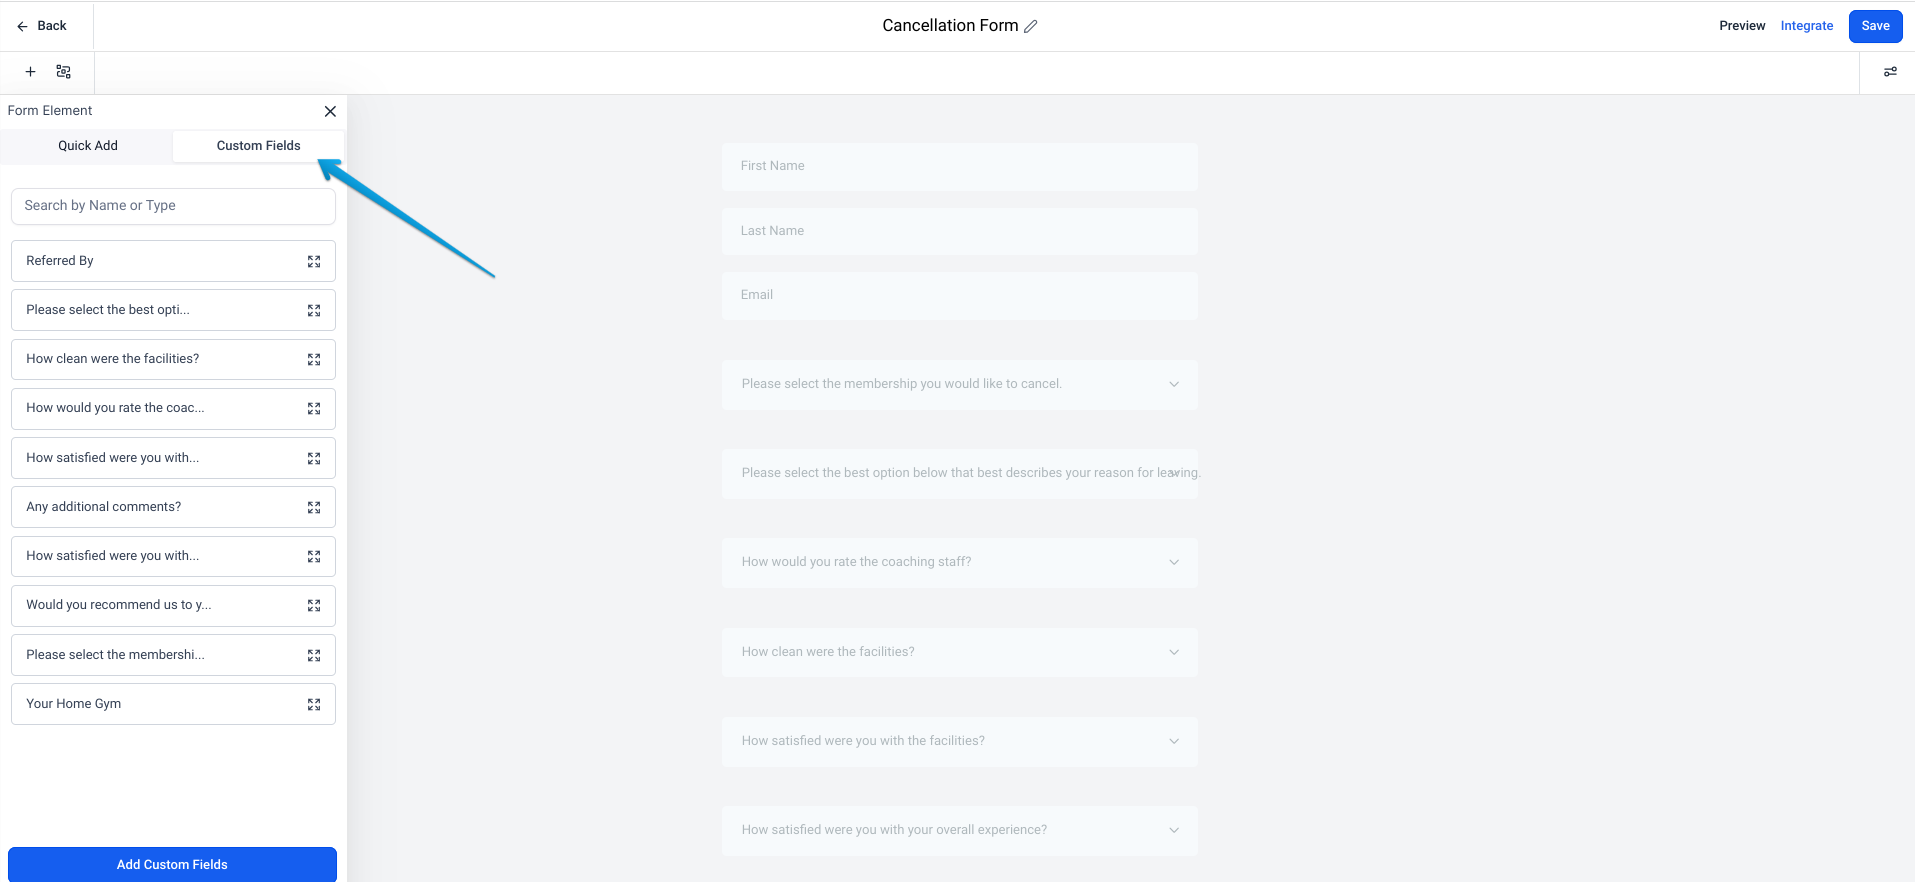
Adding and editing Custom Fields for forms
If you wish to add questions to the form that you don't see in the Quick Add field list you will need to create a new field. You can do this by selecting the Custom Fields option in the left side menu. Here when you scroll to the bottom, you will see an option to add a custom field.
- Click the "Add Custom Field" button and a pop-up will appear.
-
You have a selection of different ways you can format your form questions. Options include short and long text, checkboxes, date picker, drop-down, or even a section to upload a file in your form.
Please note that after you select the field type and save it, you cannot change the field type. A new custom field would need to be created if you aren't satisfied with the selection.
-
The Field Name field is where you enter your question.

-
Under Group, you are determining where the answers to this question will appear in the contact card of the form submitter.
For example, if you select General Info, the answer will appear in the General Info section of the contact card highlighted below.

5. It is possible to add new groups to your contact cards to organize standard processes. In the screenshot above, "Goal Settings" is a custom group that was added to accommodate the answers to the Goal Setting Form. Learn more about this option in our Help Article Keeping Your Client Information Organized.


Workflows for post-form submission actions
- The standard forms in your GLM account have submission actions already added to Workflows. These may include internal staff alerts, tasks, adding & removing tags, and adding & removing campaigns.
- For new/custom forms, you can use the Workflow builder to create an automation that triggers based on form submission. You can find resources for how to create this automation here. You can also reach out to the support team at hello@usekilo.com.
If you have further questions regarding how to create or edit forms in GLM, please contact the support team at hello@usekilo.com.