How to Edit a Landing Page (Funnel) Template in GLM
Once you've created a landing page from a template (see How to Create a Landing Page (Funnel) in GLM), the next step is making it yours. This article walks through the most common edits: swapping in your copy, updating colors and logos, changing background images, setting your domain, configuring SEO, and customizing the form.
You don't need to do these in order. Use the section list below to jump to whatever you're working on.
What you can edit
- Logo
- Text content
- Colors
- Background images
- Button actions
- Domain and URL
- SEO settings
- Saving and publishing your changes
Opening the page editor
From Sites > Funnels, click the funnel you want to edit, then click the page name to open the editor.


Logo
Most templates have a placeholder logo at the top of the page. To replace it:
- Click the logo image on the canvas
- In the right sidebar, click the image source or replace option
- Upload your logo from your computer, or select one from the GLM media library

A few tips:
- Use a PNG with a transparent background so the logo sits cleanly on any section color
- Aim for around 200-400 pixels wide for a header logo
- Once you upload, the logo lives in your media library and can be reused on other pages
Text content
To edit any text on the page, click directly on it. The text becomes editable inline, and a formatting toolbar appears.

You can:
- Type to replace the existing copy
- Highlight text to bold, italicize, change font size, or add a link
- Click outside the element to deselect when you're done
For headlines and body copy in templates, you'll usually want to replace the placeholder text with your own messaging. The font and styling will carry over from the template, so you can focus on the words.
Colors
Colors are usually controlled in two places: the element itself (for one-off changes) and the page or funnel settings (for global changes that apply everywhere).
To change the color of a single element (a button, a section background, a heading):
- Click the element to select it
- In the right sidebar, find the color picker for that property (background color, text color, border color)
- Pick a color or paste a hex code

To match your brand colors throughout the page, paste your hex codes into the color picker. Keeping a list of your brand hex codes somewhere easy to copy from saves time when you're editing multiple pages.
Background images
Section backgrounds are one of the most impactful visual changes you can make. To swap a background image:
- Click the section (not an element inside it - click the outer edge or use the section selector at the top of the editor)
- In the right sidebar, find the background settings
- Click the image option and upload or select a new image


Tips for backgrounds:
- Use high-resolution images (at least 1920 pixels wide) so they don't look blurry on desktop
- If text sits on top of the background, add an overlay or darken the image so the text stays readable
- Mobile crops backgrounds differently than desktop - preview both views before publishing
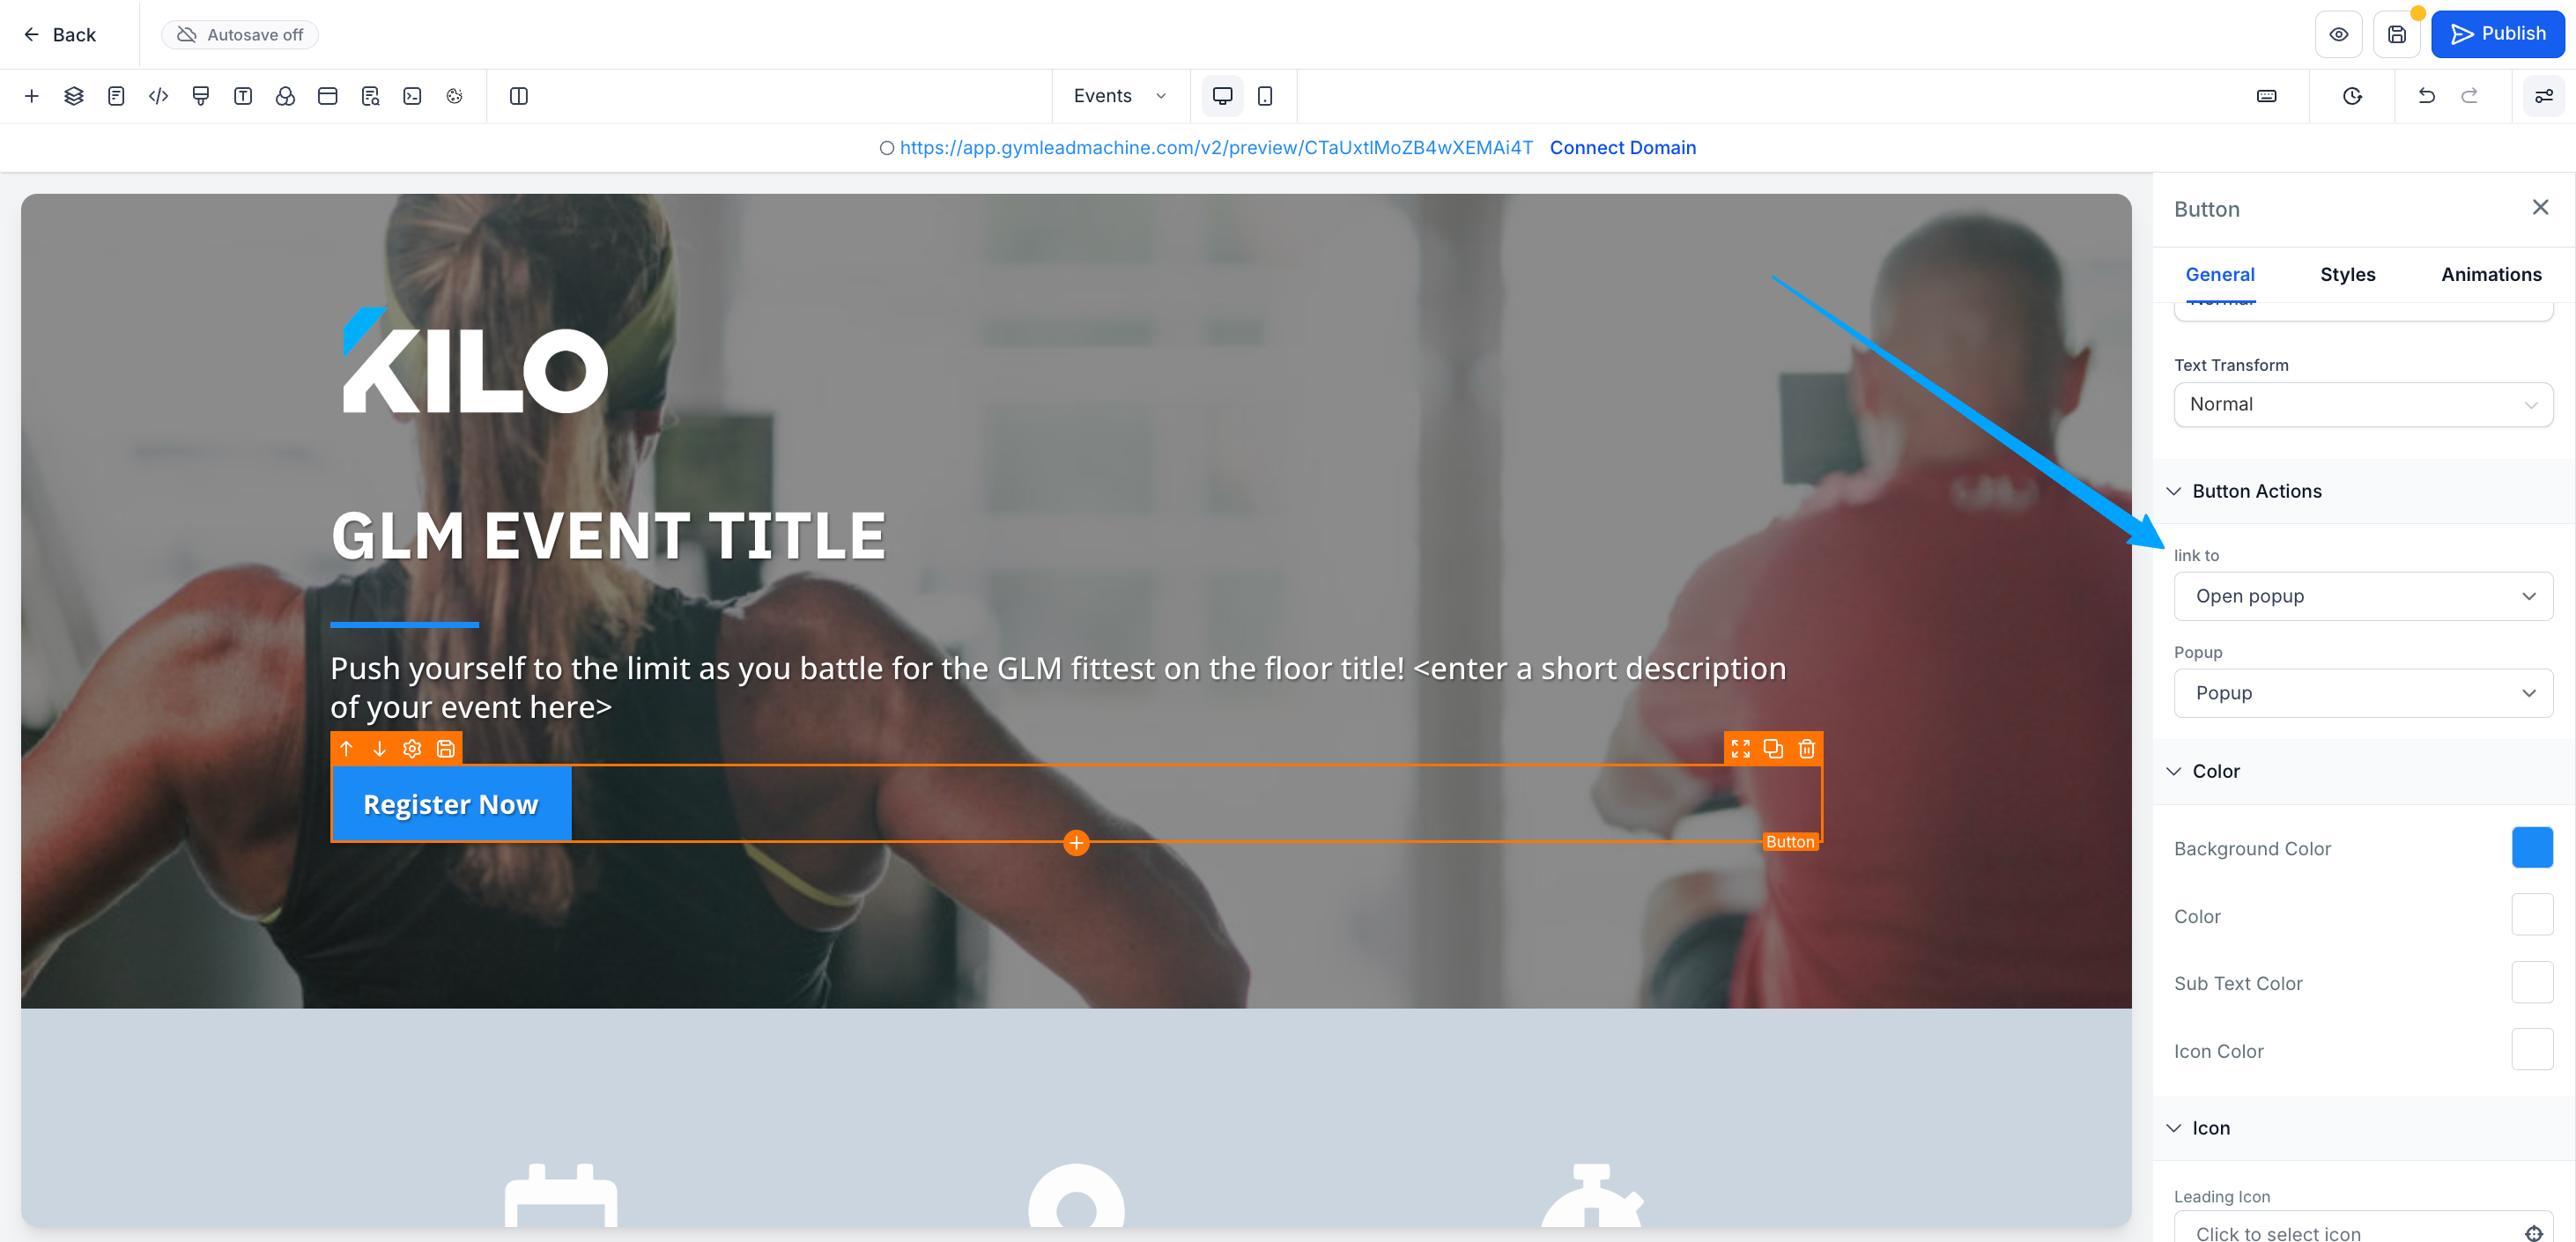
Button actions
When someone clicks a button on your page, something has to happen. The two most common actions are:
- Open a pop-up with a form - the visitor stays on the page and fills out a form in a modal window
- Link to another URL - the visitor is sent to a different page, usually, a sales portal or your website's booking page
Which one you choose depends on the goal. Pop-up forms work well when you want to capture a lead without losing the visitor to another page. Links work well when you're sending people to a calendar booking, a checkout, or a longer-form page.
To change a button's action:
- Click the button on the canvas
- In the right sidebar, scroll to the Button Action setting
- Choose the action type from the dropdown
- Configure the action:
-
For a URL link: paste the destination URL and choose whether it opens in the same tab or a new tab
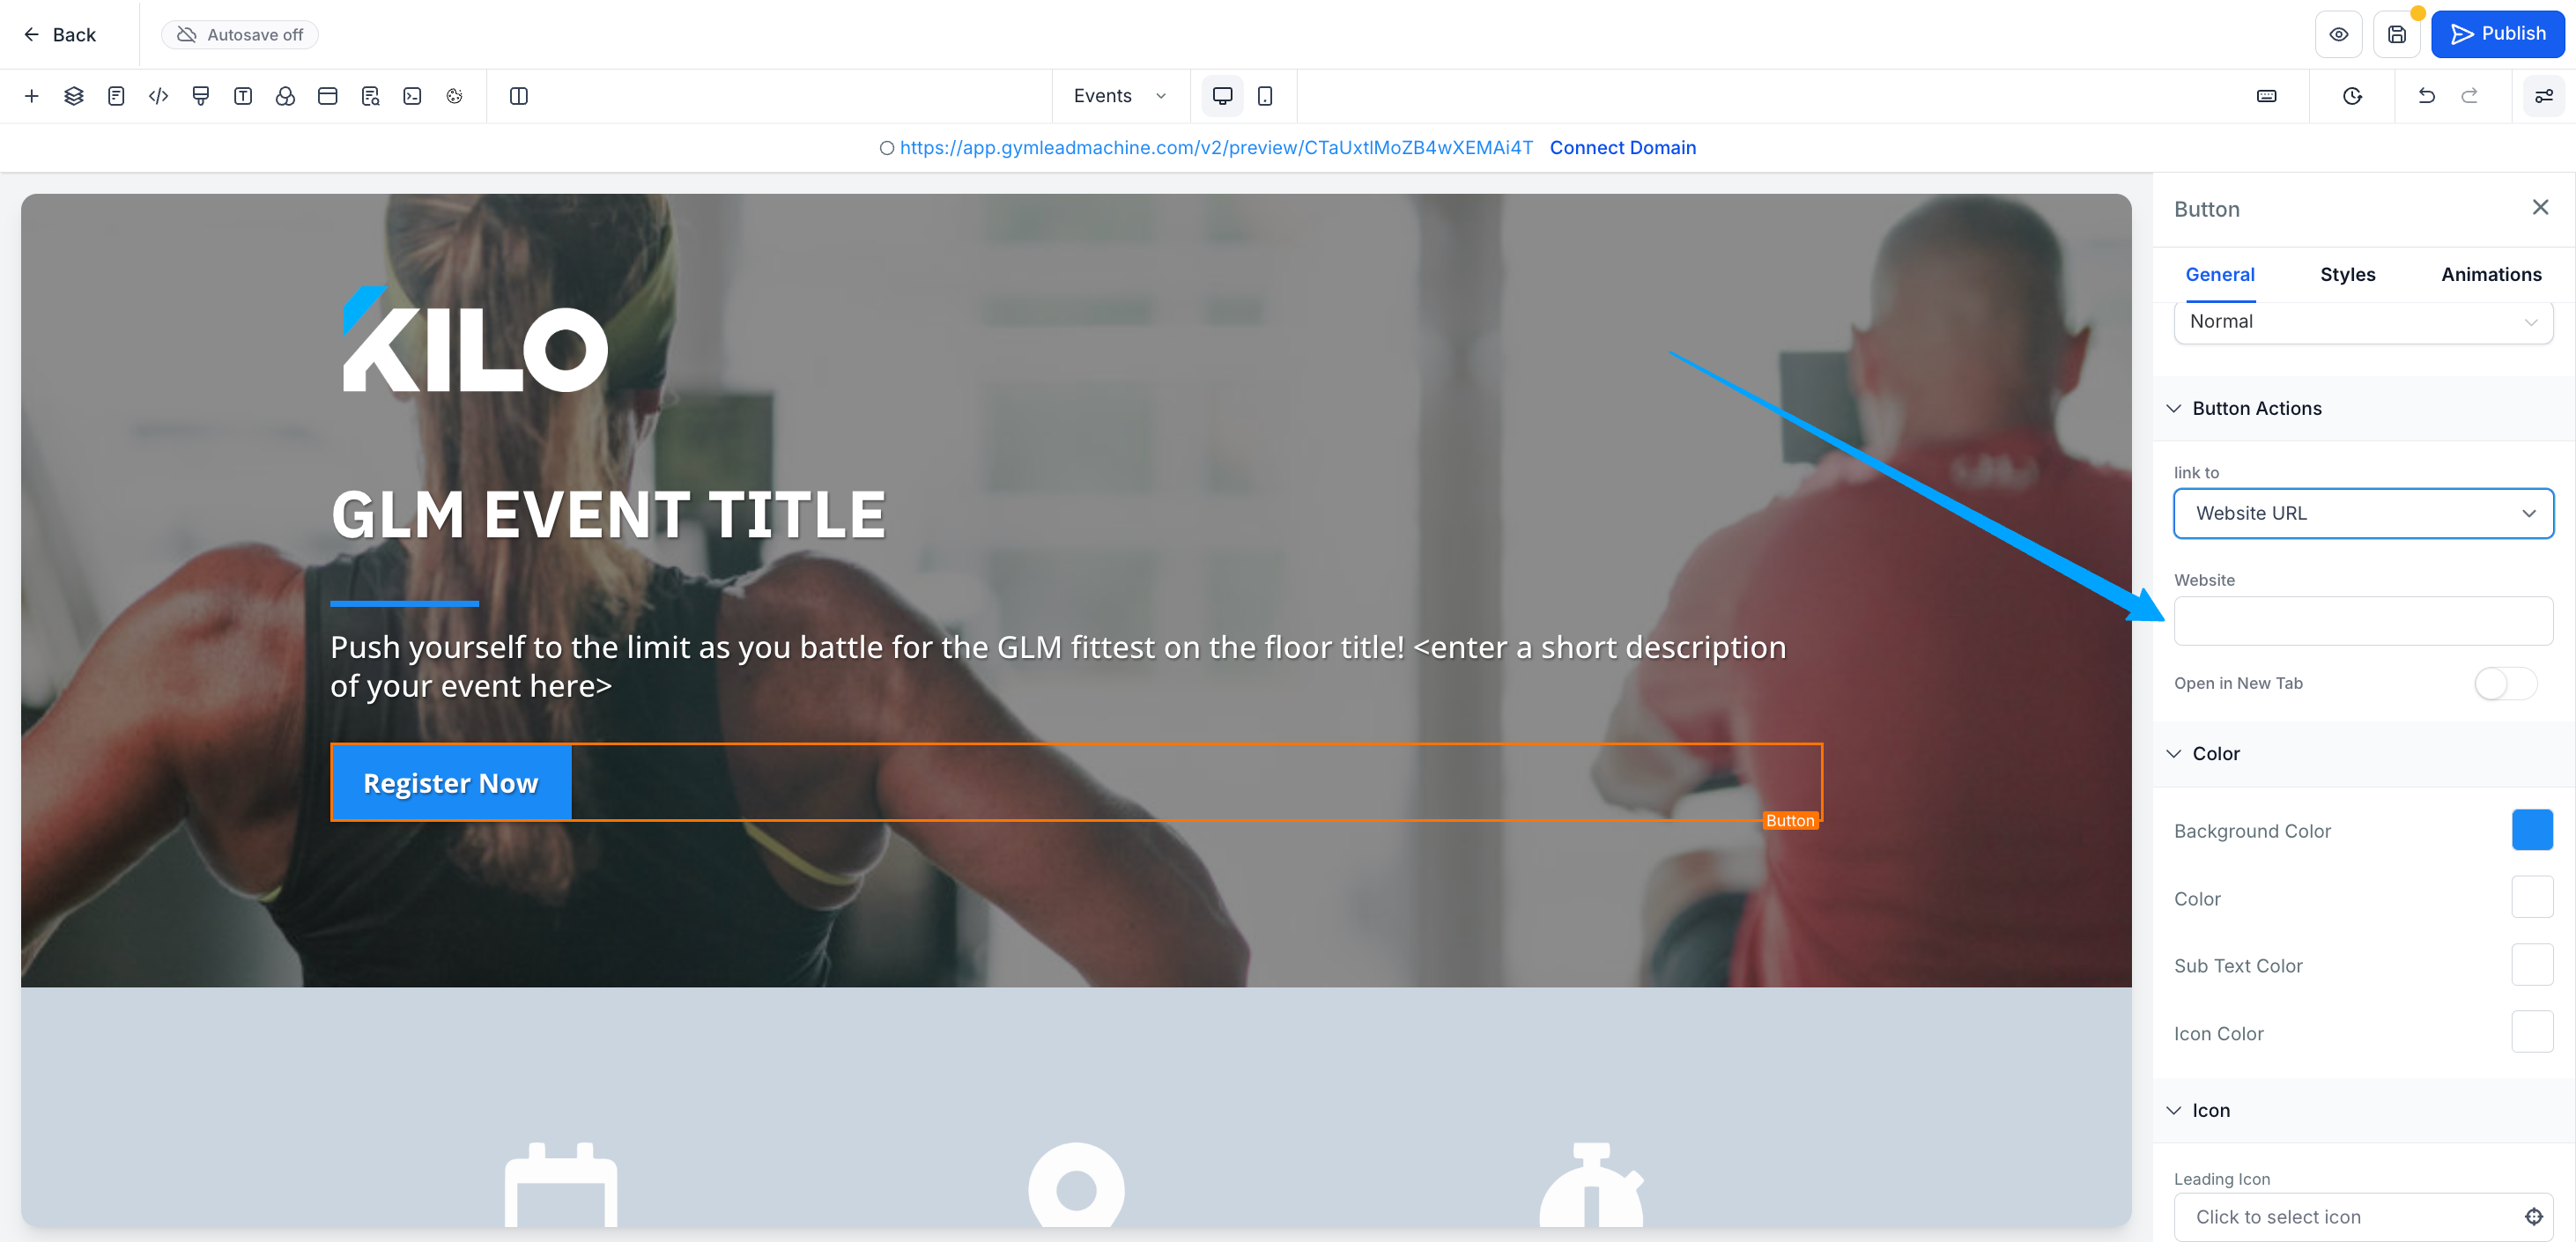
-
For a pop-up: select the pop-up you want to trigger, or create a new one
-


Editing the form inside a pop-up
If your button opens a pop-up with a form, you'll want to make sure that correct form is used to collect the information for your event or offer.
-
Open the pop-up for editing by clicking the icon highlighted below. Click on the Popup in the right sidebar.
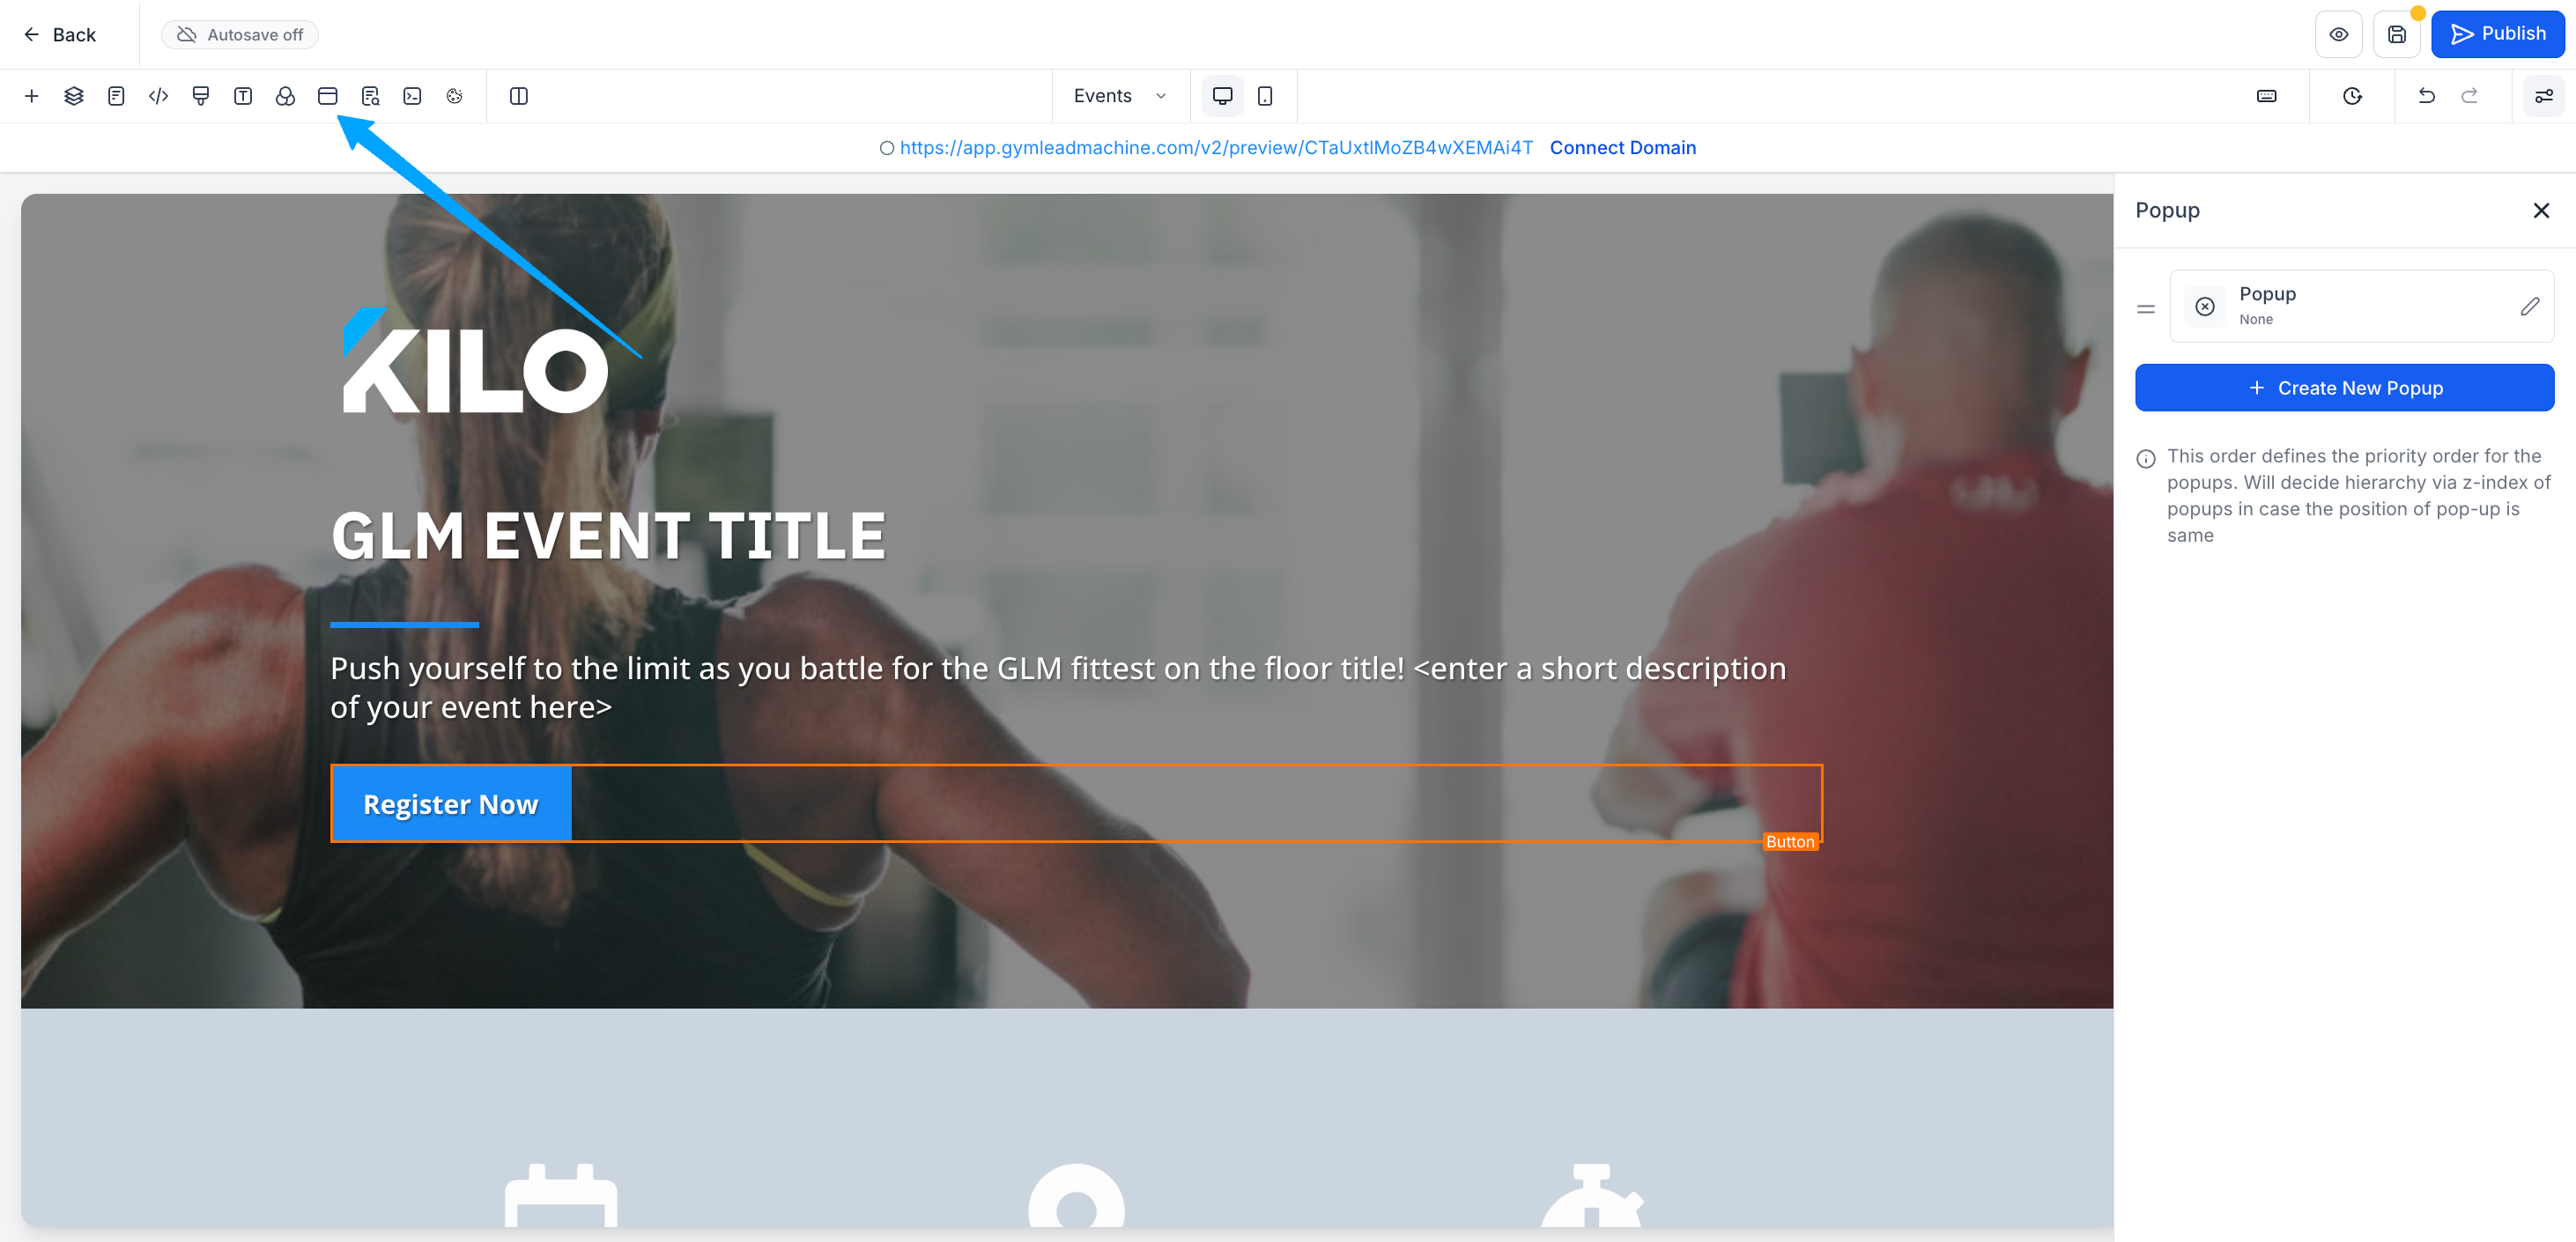
-
When the pop-up appears, add a Form section if one does not already exist
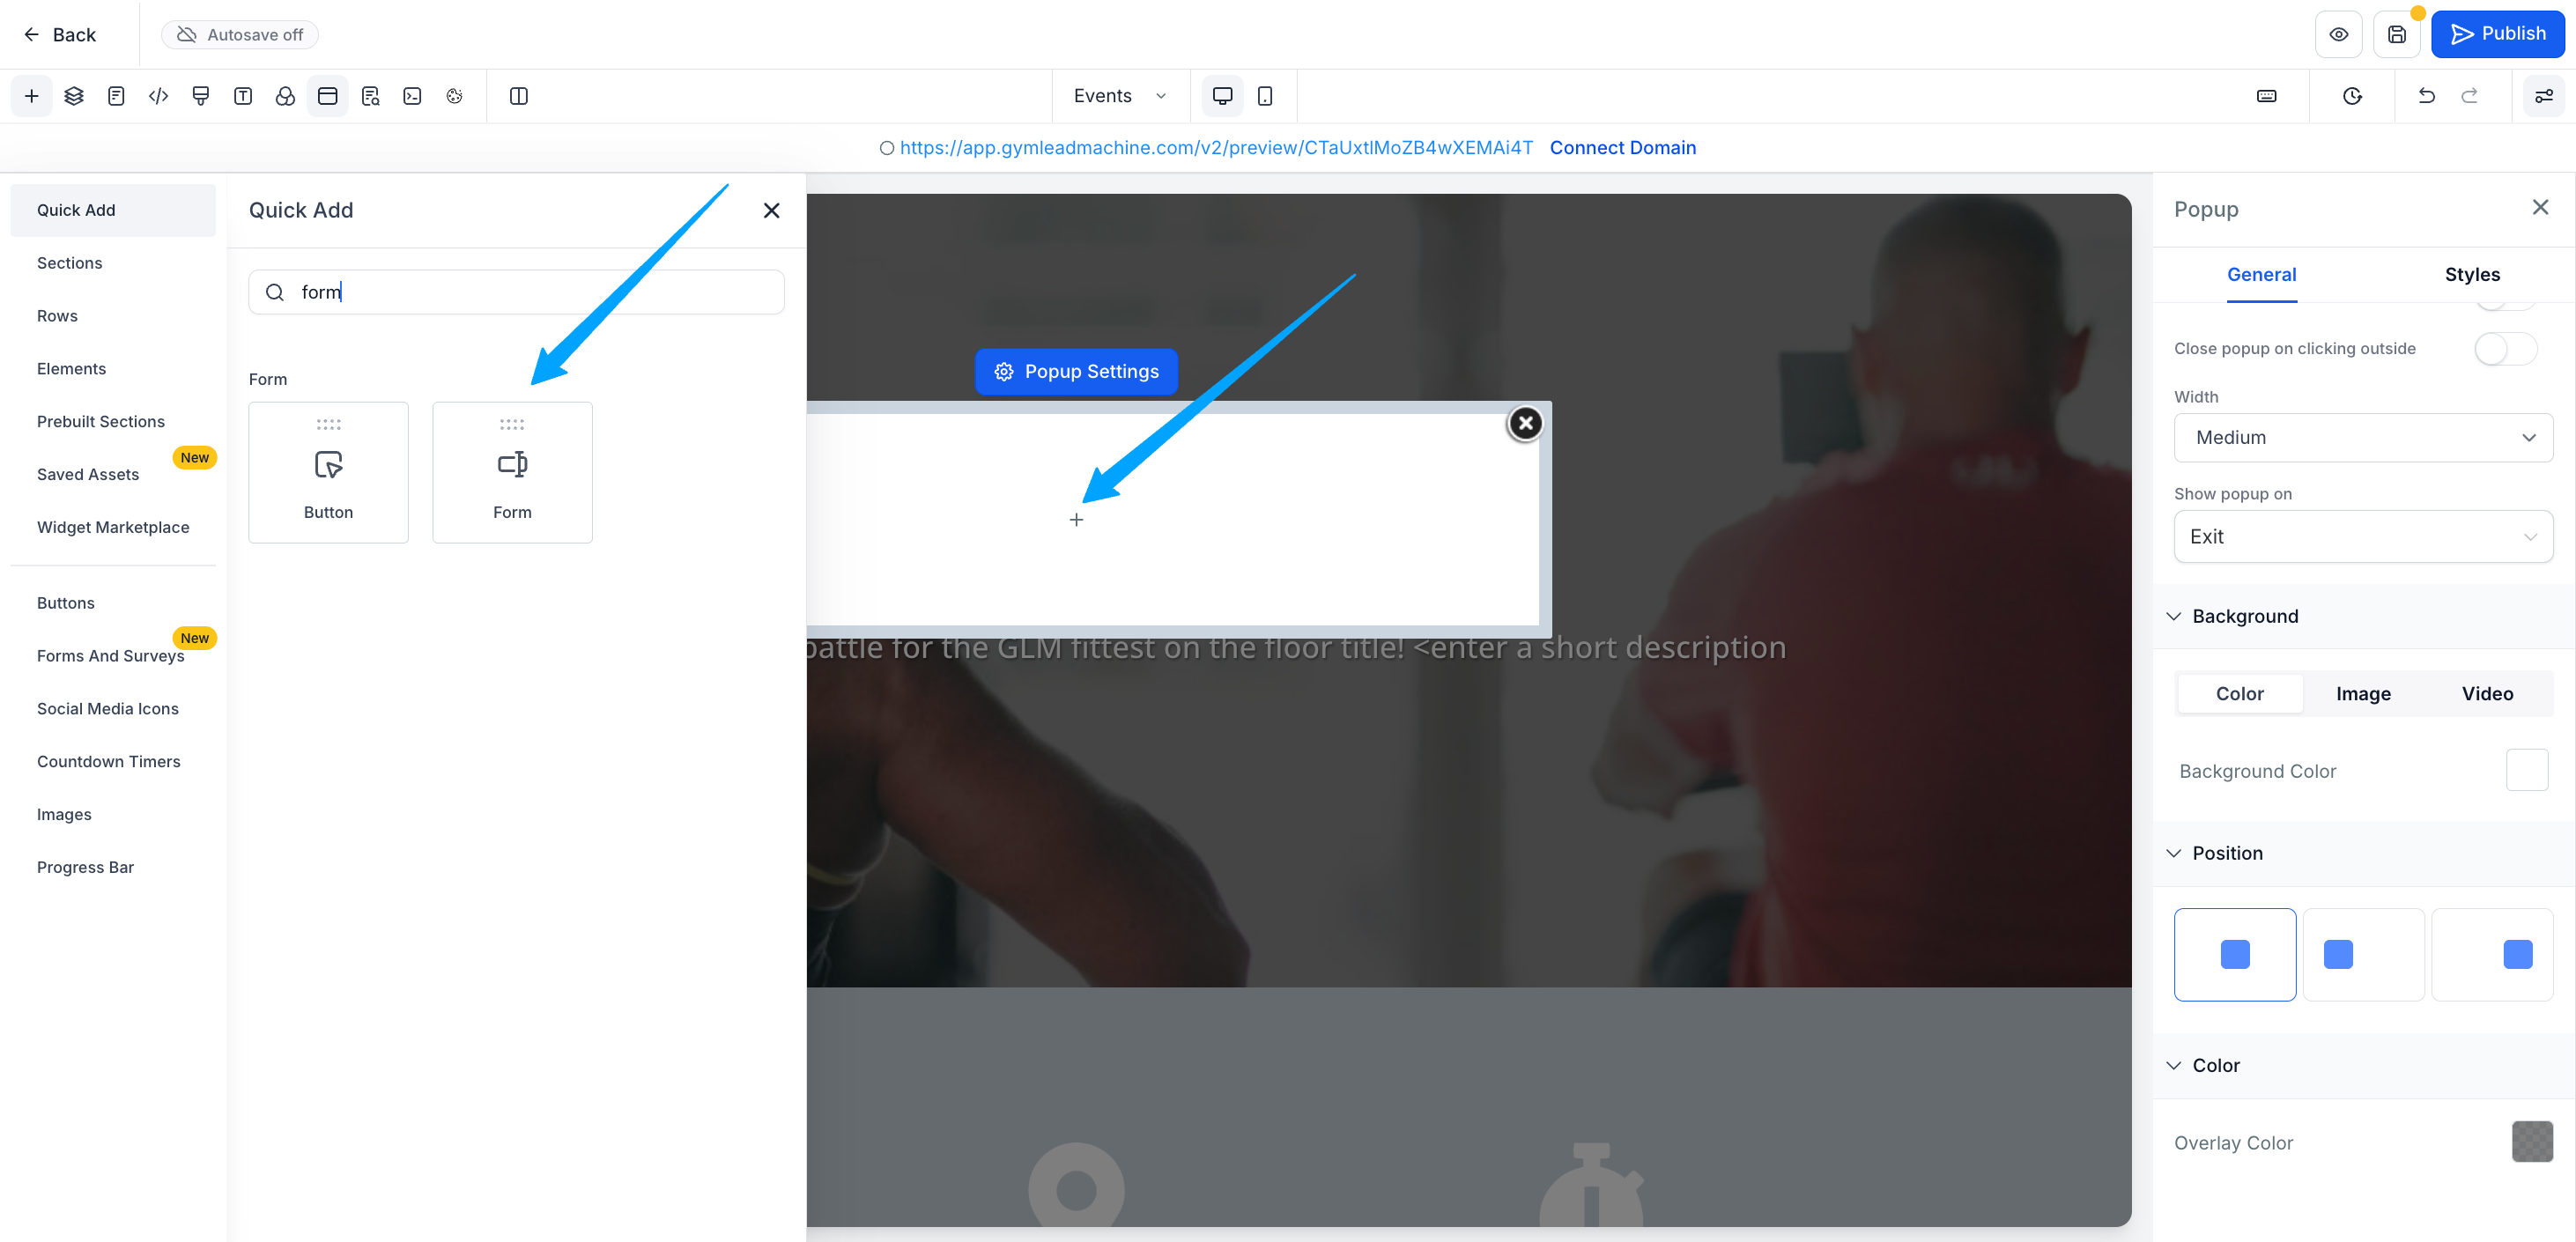
- Select the correct form from the list of available forms in your GLM account
-
In the right sidebar, click the option to edit the form (this opens the form builder) if needed
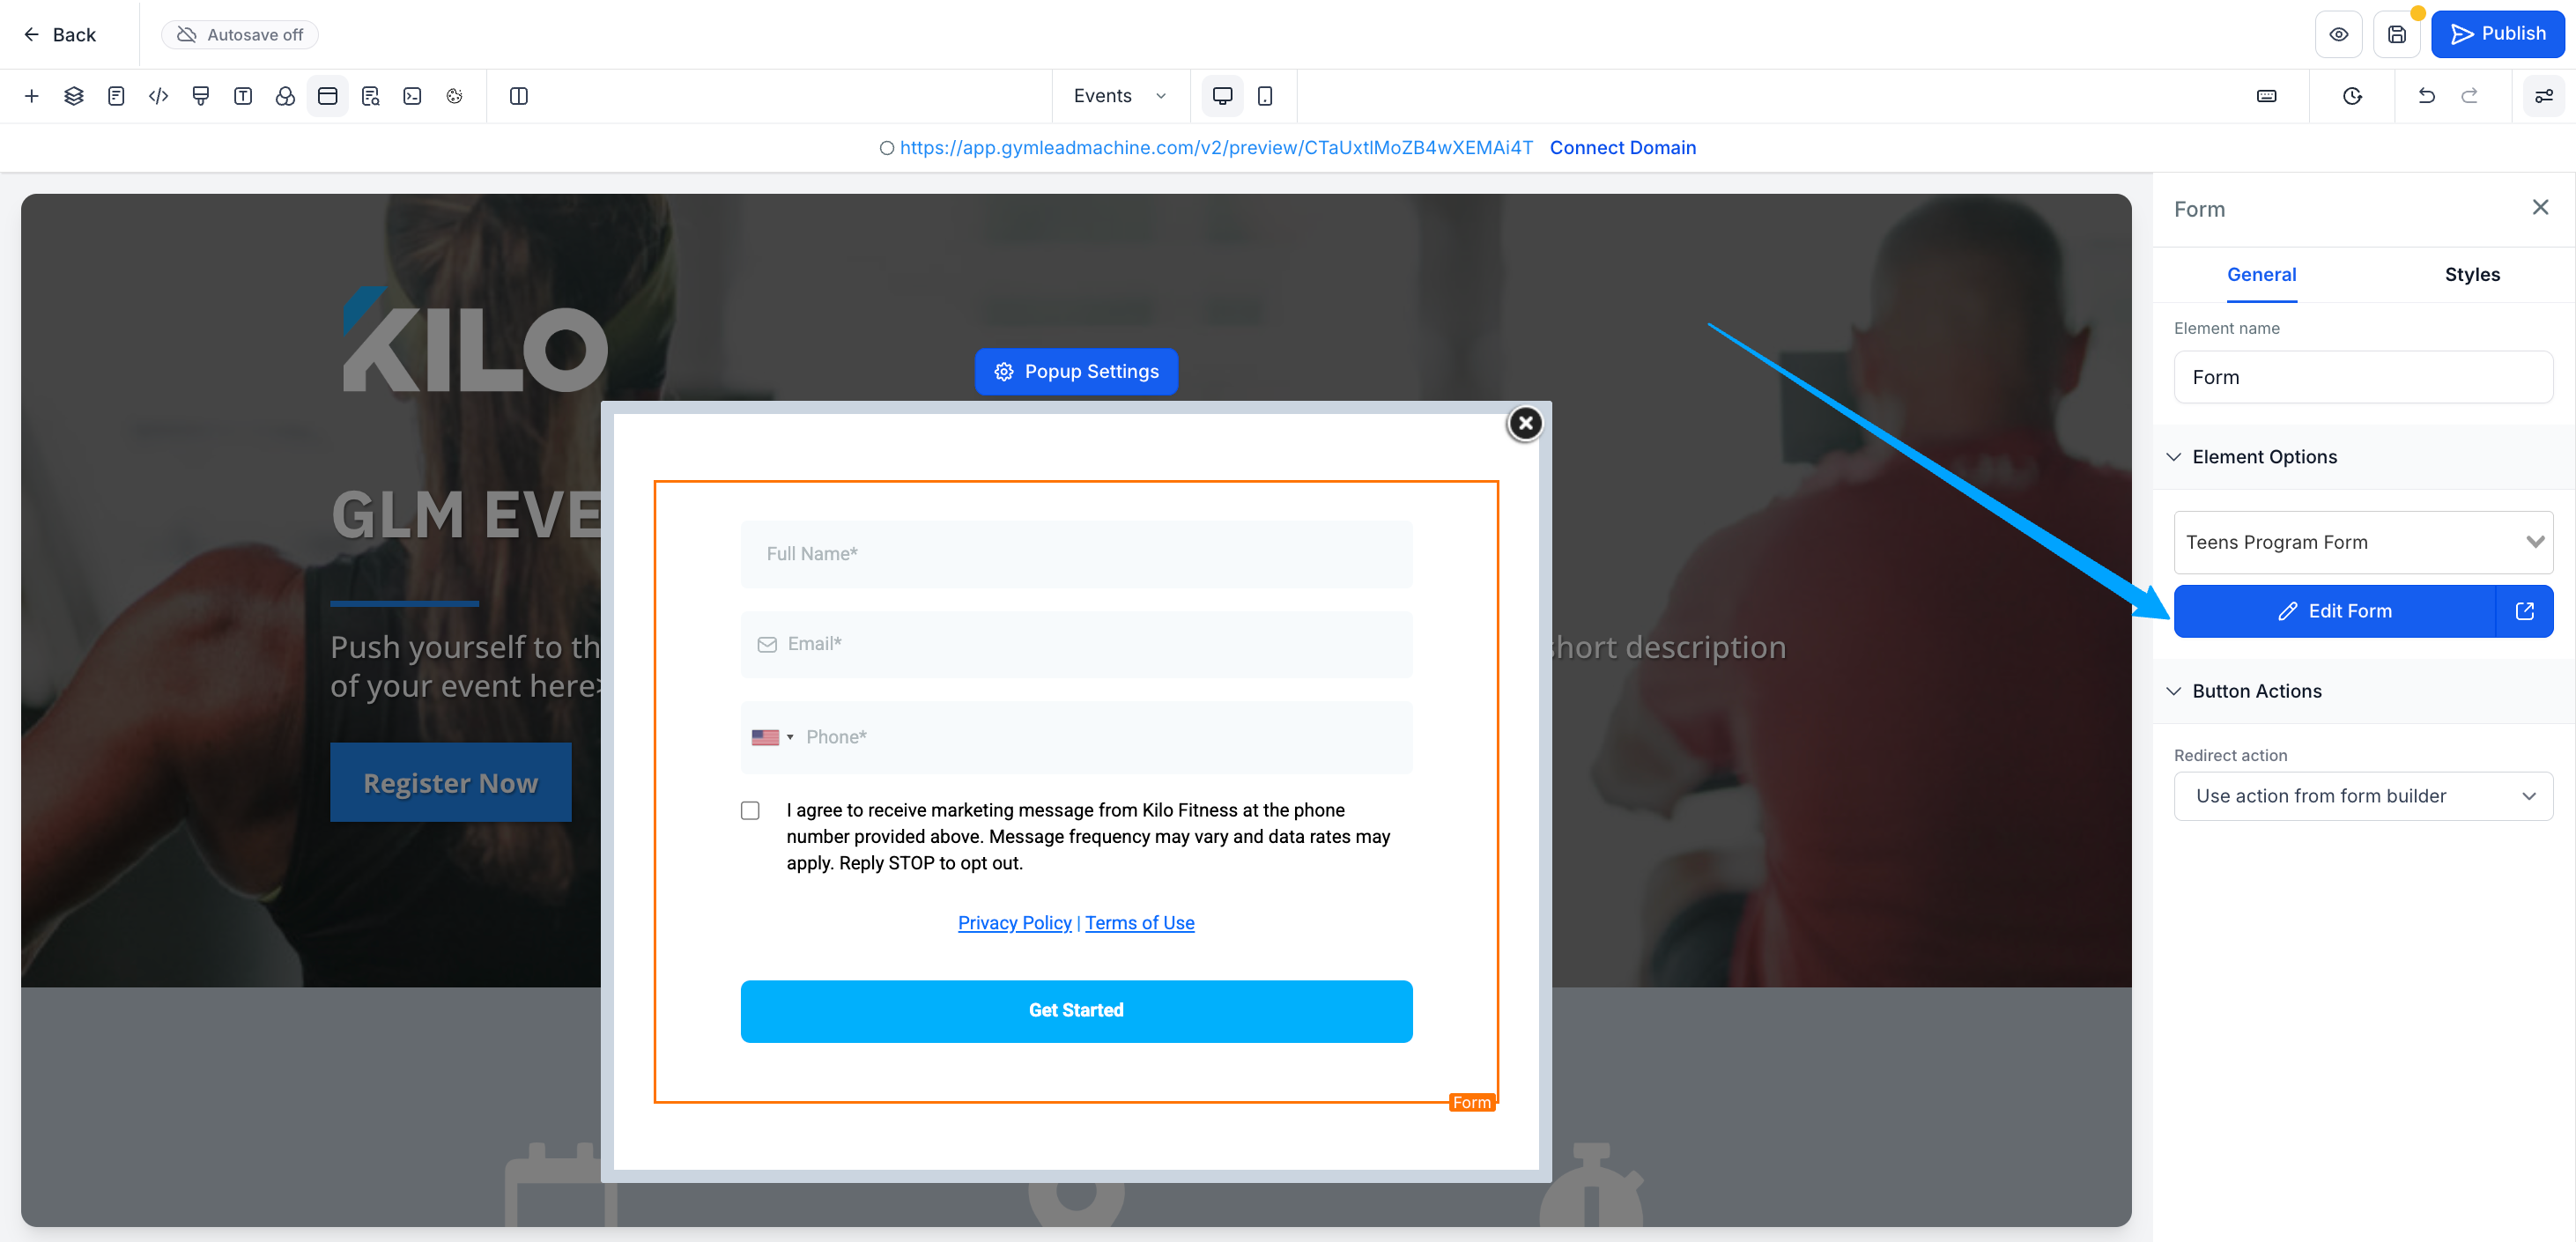
-
Add, remove, or reorder fields, change the button text, and set the post-submit action - same as you would for a form embedded directly on the page
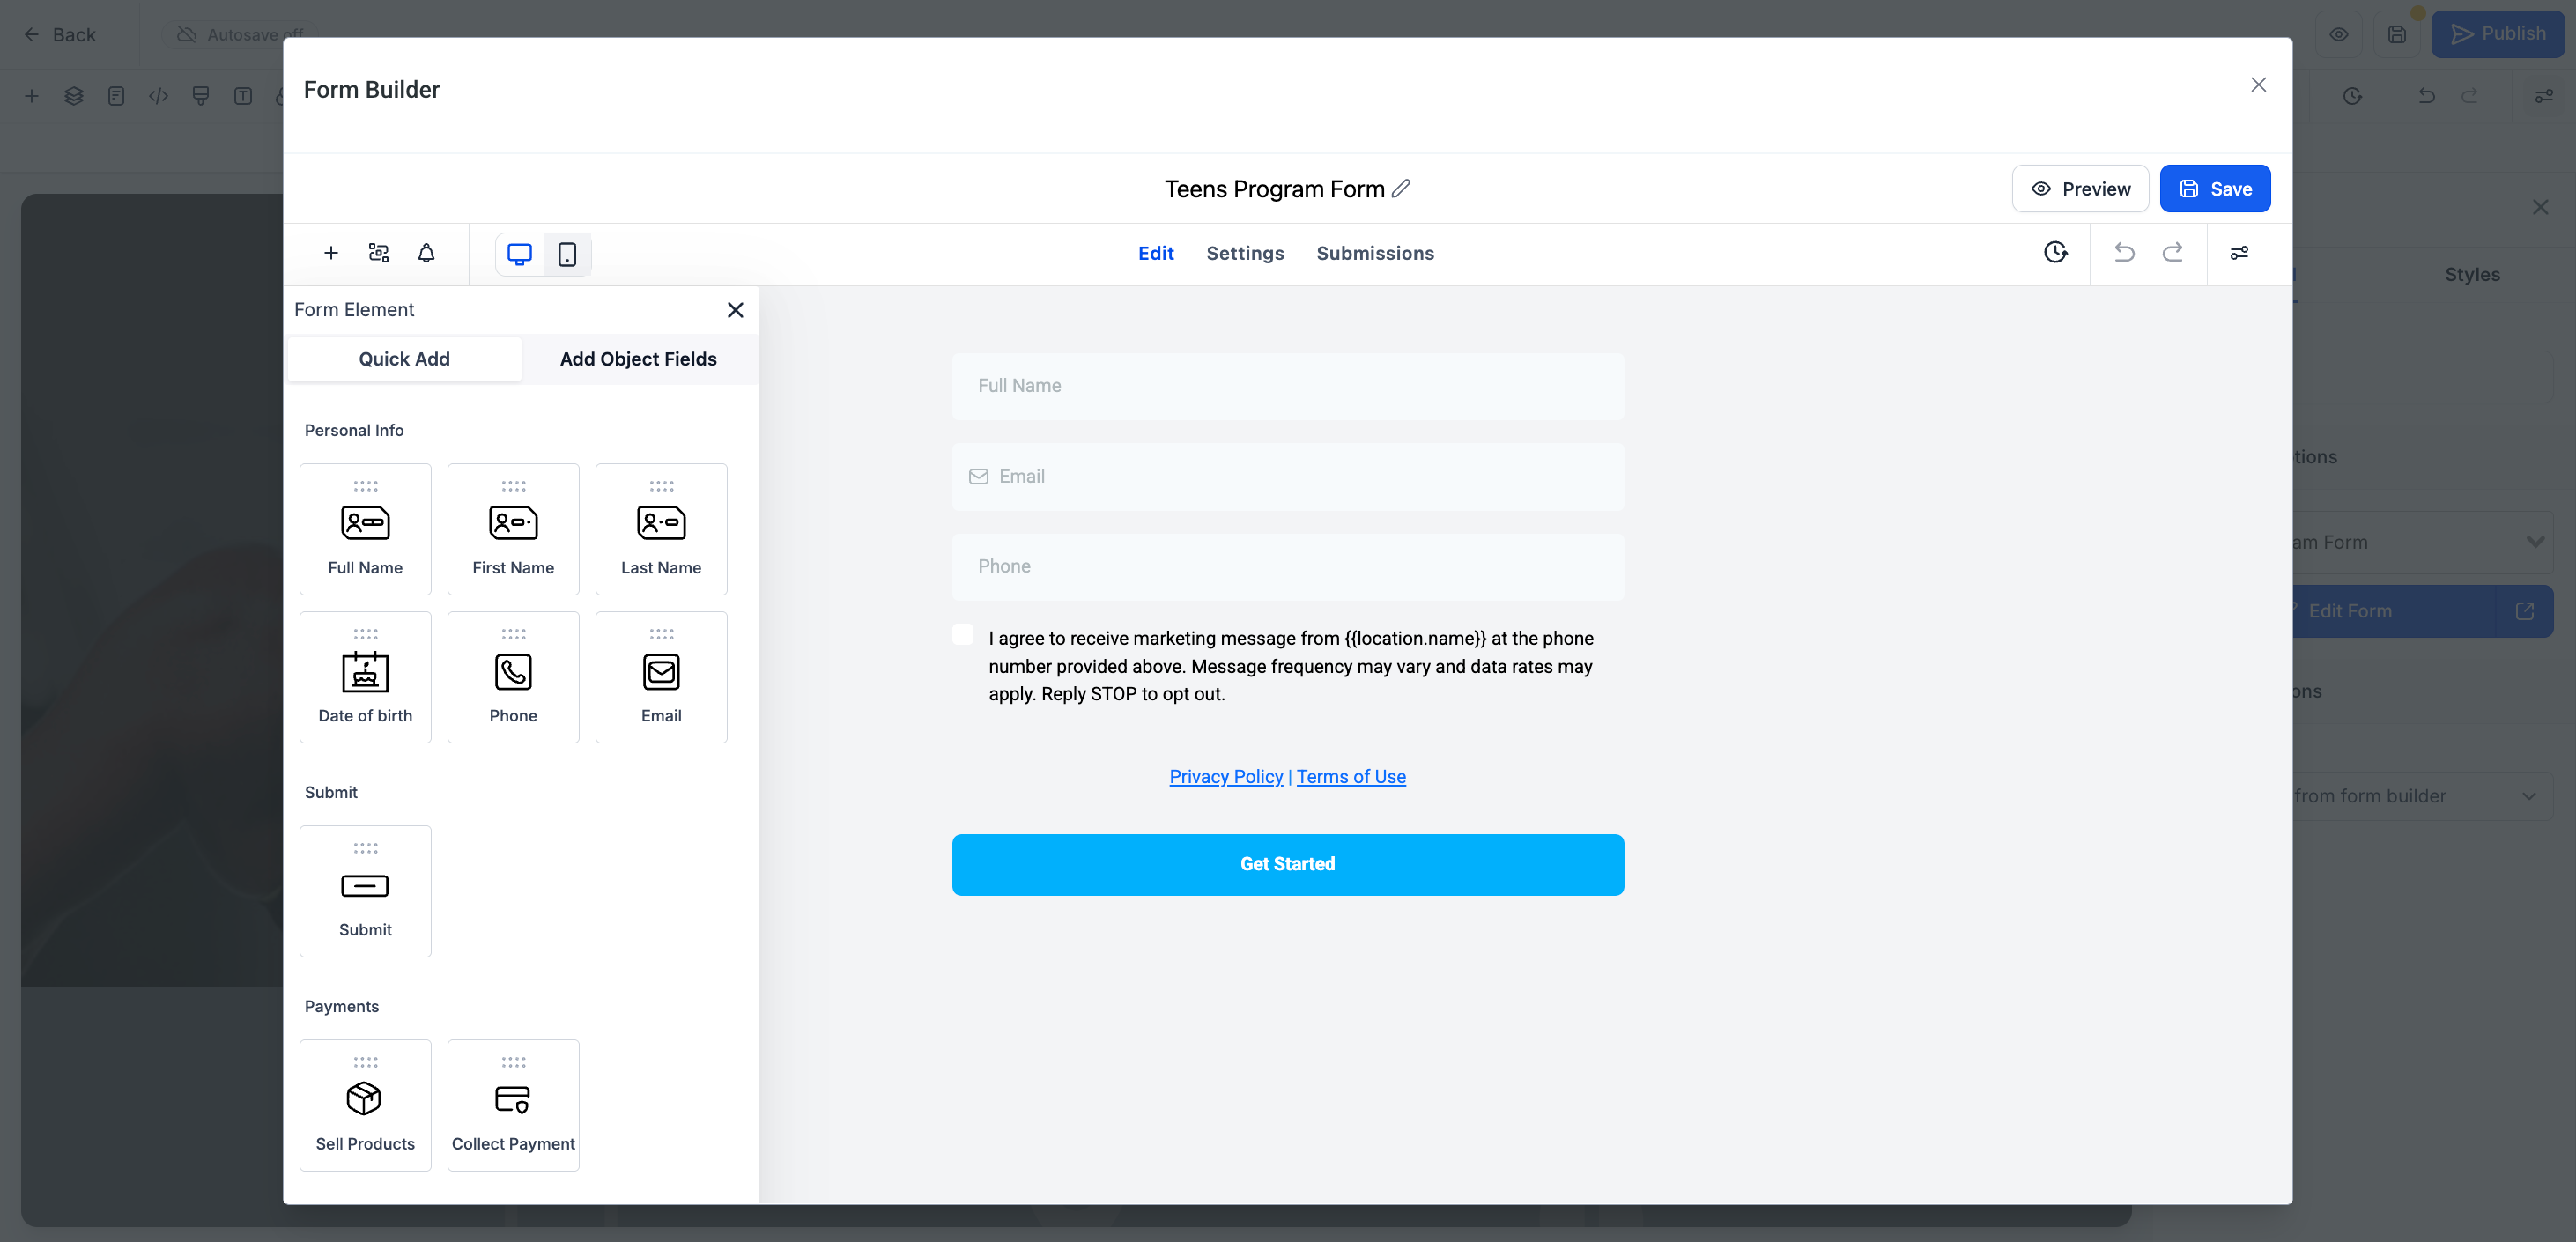
- Save the form, then save the pop-up


For full form documentation, see Create or Edit Forms in the Sites in GLM category. Everything that applies to a form on the page also applies to a form inside a pop-up - the only difference is where the form lives.
Domain and URL
Your landing page needs a web address. You'll set the domain and are able to customize the URL path for the page.
To set the domain (so your page lives at go.yourgym.com/bring-a-friend )
This is handled in your landing page/funnel's Settings. Select the domain we prepared for you at launch and scroll down to save.

To set the URL path for a page (the part after the domain, like /bring-a-friend ):
- In the funnel view, click into Publish
- Update the Step URL path or slug field
- Enter a short, readable path (lowercase, hyphens instead of spaces, no special characters)

Wondering why GLM is adding numbers to the end of your URL path?
The Path field in the funnel settings and the Step URL field cannot be the same. If GLM automatically adds numbers to your Step URL, it means they are. Go into Settings > Path and adjust the field. Then, return to Publish and remove the numbers from the Step URL > Update.
SEO settings
Even for a landing page that mainly gets traffic from ads, SEO settings matter for two reasons: they control how the page looks when shared on social media, and they help if anyone does search for your event.
Each page has its own SEO settings. To edit them:
-
In the funnel view, click into the page settings via the SEO Meta Data icon
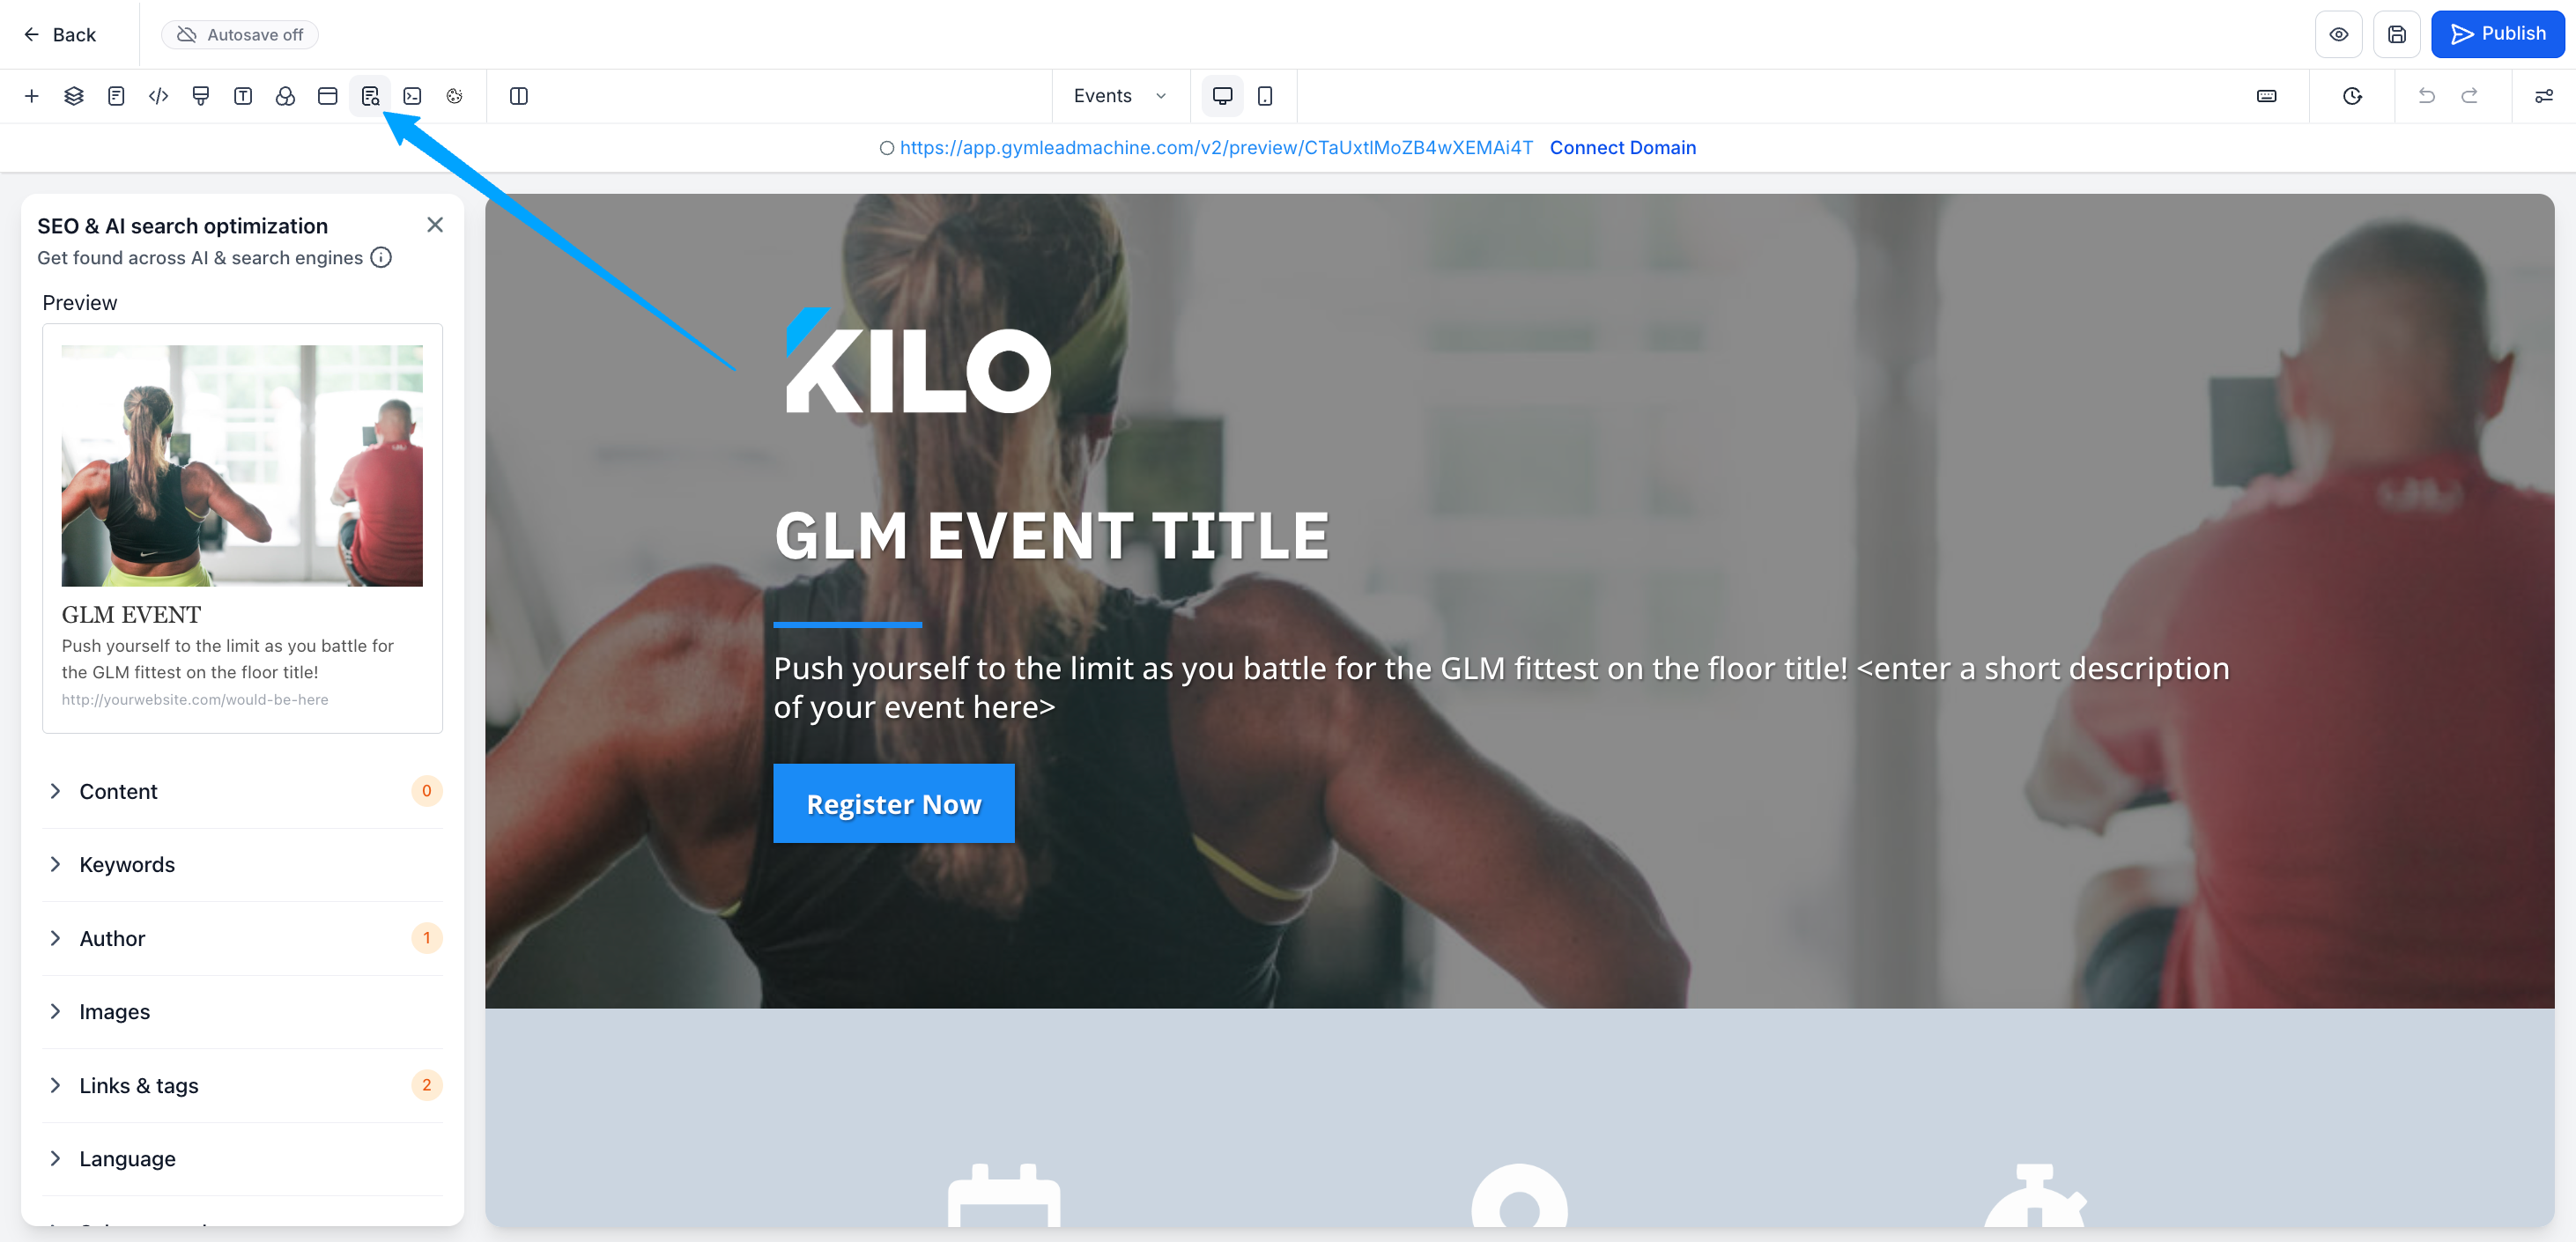
- Fill in:
- Page title - what appears in the browser tab and as the headline in search results
- Meta description - the short summary shown under the title in search results and social shares
- Share image - the preview image that appears when someone shares the page link on Facebook, Instagram, or in a text message

Saving and publishing your changes
You must save your work as you go and the small yellow icon on the save button will remind you to do so. Save as your work progresses, but changes don't go live until you publish.
-
Click Save in the top right to save your progress

- Click Preview to see how the page looks before going live
- When you're ready, click the Published button

Saving saves your changes. Publishing publishes them to the live link. You can work on updates in the background and save them, then opt to push them live by publishing when you're ready.
After publishing, visit the live URL in a new browser tab (or in an incognito window) to confirm everything looks right. If you make further edits after publishing, you'll need to save and republish for the changes to appear on the live page.
Editing on mobile vs. desktop
GLM lets you preview and adjust how the page looks on mobile devices separately from desktop. Toggle between views using the device icons in the top toolbar.

A few elements (font sizes, padding, image cropping) often need adjustment for mobile to look right. Always preview both views before publishing.


Next steps
- Connect your form to a workflow so new leads get automatic follow-up - see Automations in GLM or contact Support at hello@usekilo.com.
- Need a template that doesn't exist in your account? Request one through the Template Request Form