


Every photo on your website lives in your WordPress media library. Uploading images there first, then pointing a page at them, keeps your photos available for future swaps and makes replacing an image on any page a short job. This article covers what makes a good website photo, how to upload images to your media library, and how to replace an image that is already on a page.
Watch the video below for a walkthrough, or read on for the full guide.
What you can do with your website images
Upload photos to your WordPress media library
Add an image inside a post
Replace an image already placed on a page
Reuse the same photo anywhere on your site
Keep your photos available for future swaps
Photo best practices
Use high-quality original photos. Photos of your own facility give visitors the best experience and show up clearly on your site. If you do not have professional photos of your gym, you are welcome to use the Kilo photo library, which holds gym-specific stock photos.
Add alt text to every image you upload. Alt text describes what is shown in the image, for example "Women working out at Kilo gym."
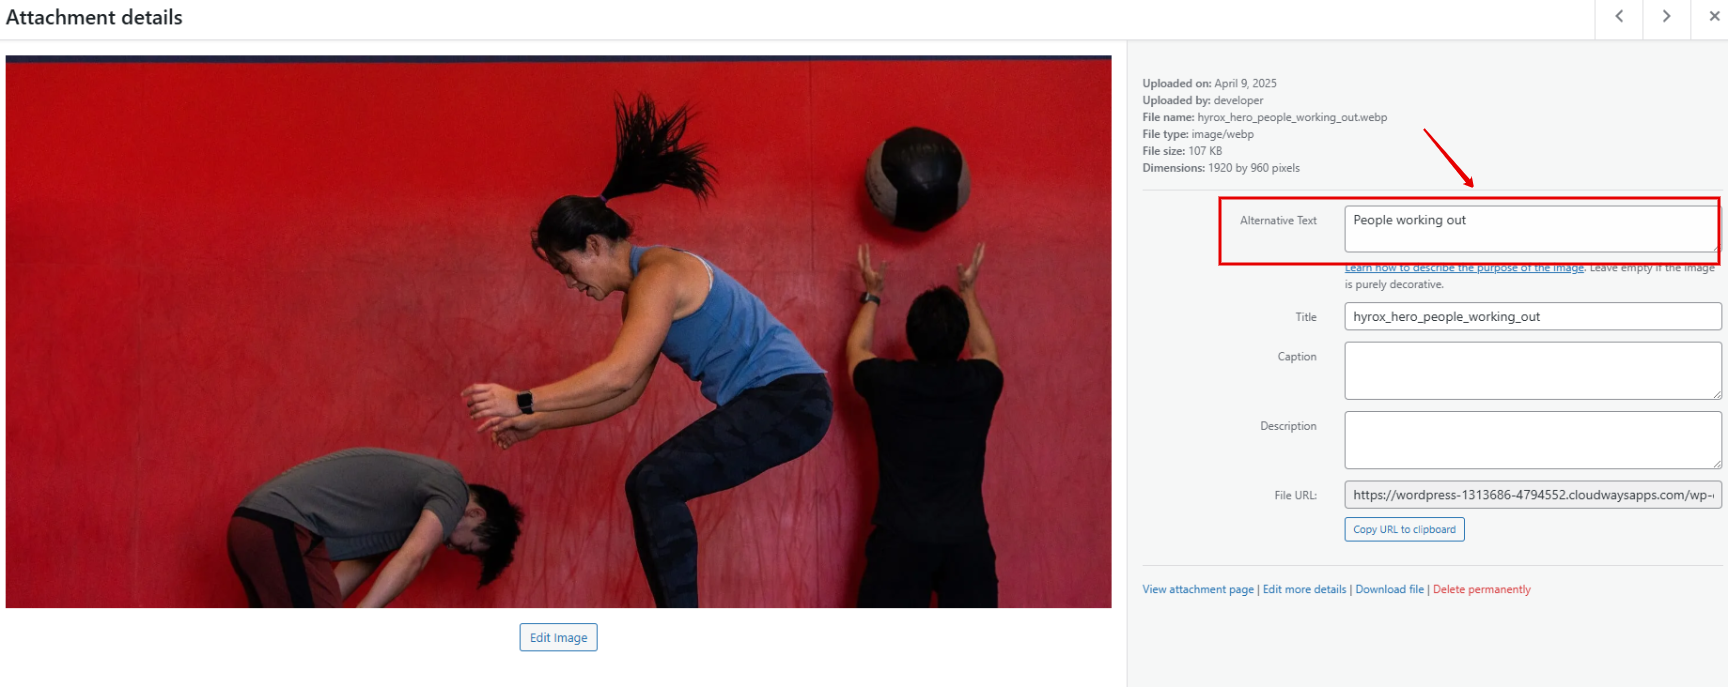
Crop images appropriately. Follow the photo dimension recommendations for your template. A free tool such as BeFunky Photo Editor can handle the cropping.
Compress images for faster loading. When you edit an image, compress it as much as you can. A free tool such as TinyPNG can do this.
Rename images before you upload them. Use your gym name and the contents of the photo, for example "kilo_gym_women_working_out."
Avoid AI-generated images. They often look unnatural and can make your website feel impersonal or even confusing to visitors.
How do I upload images to my media library?
Log in to your WordPress dashboard.
Click Media in the left sidebar. The page shows every image currently in your WordPress account.
Click Add Media File.
Drag and drop your files, or select them from your computer.
Look for your new images in the top row of the media library.
How do I add an image inside a post?
Type / where you want the image to go.
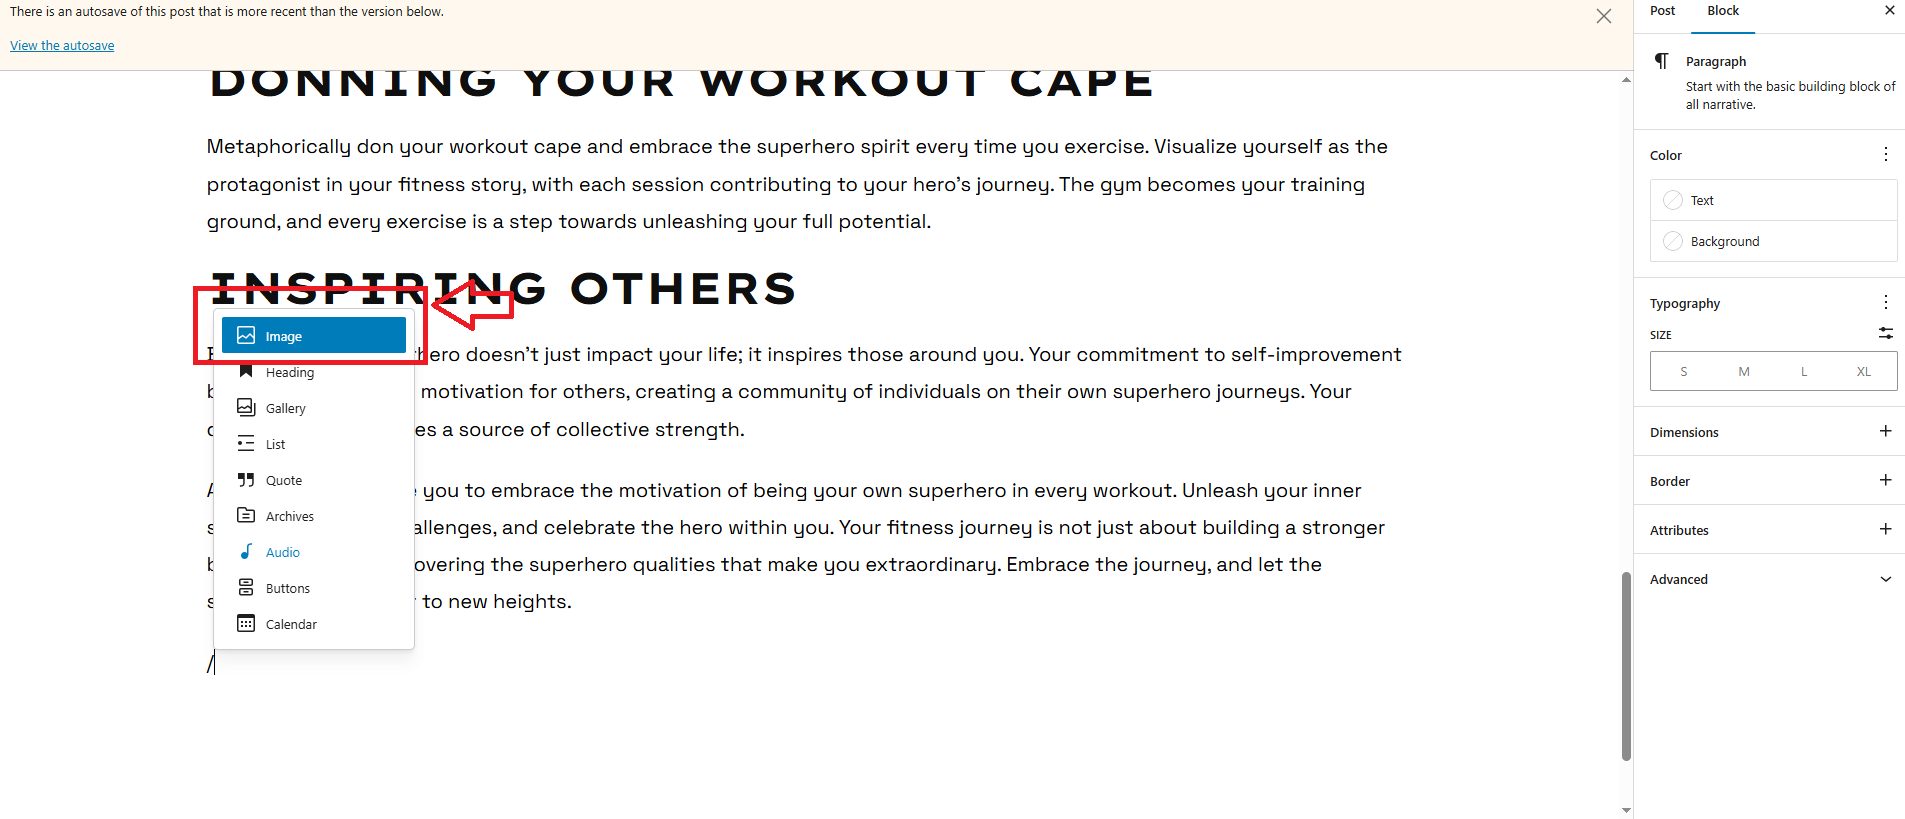
Select Image.
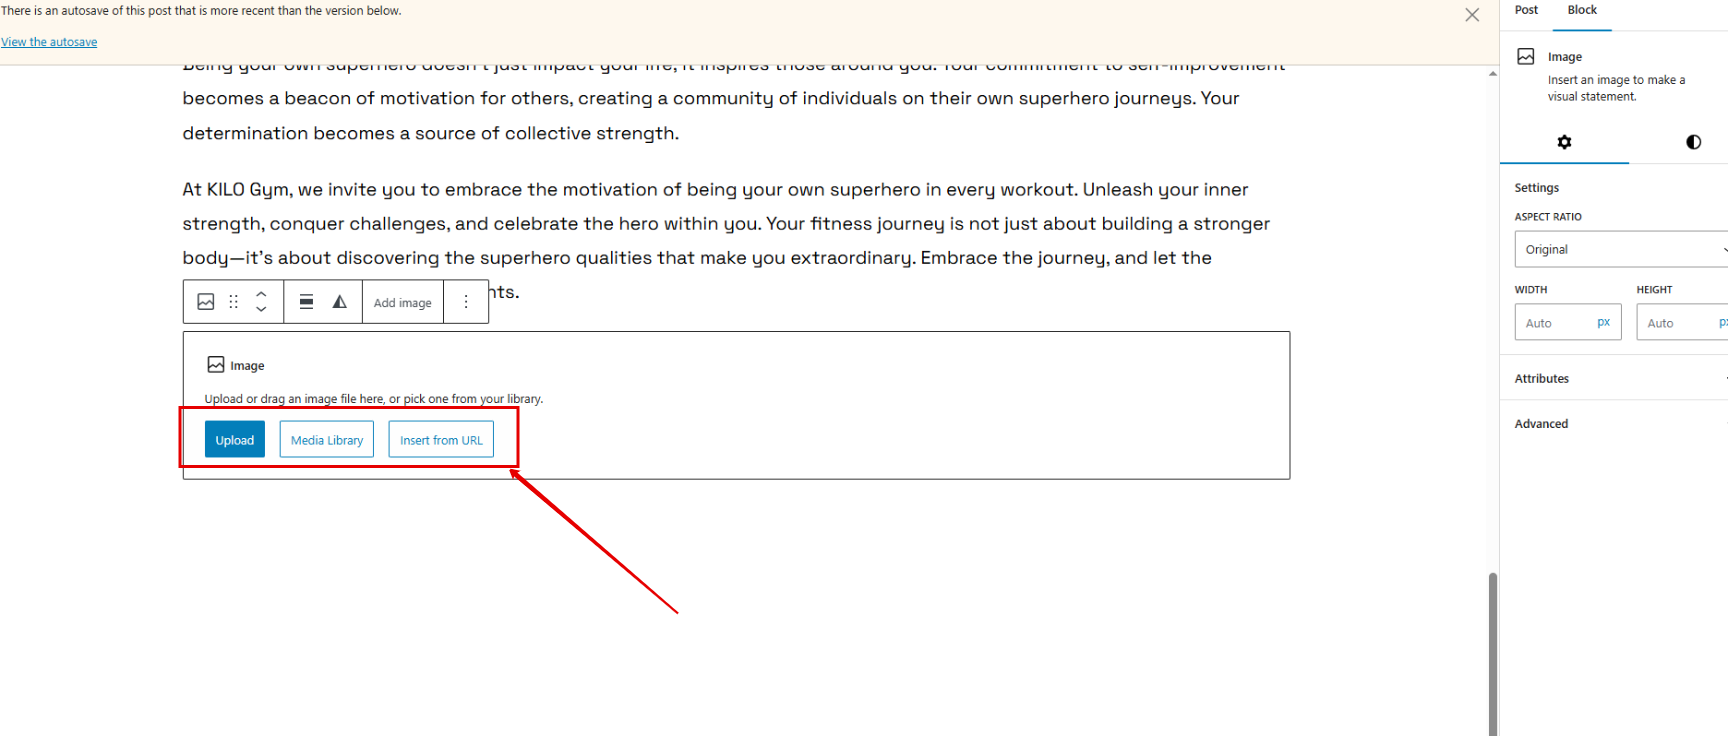
Click Upload, or choose an image already in your media library.
How do I replace an image already on a page?
The order matters here. Remove the existing image before you add the new one.
Open the page you want to change. For example, click Home to open your home page.
Open the Settings tab for the section holding the image.
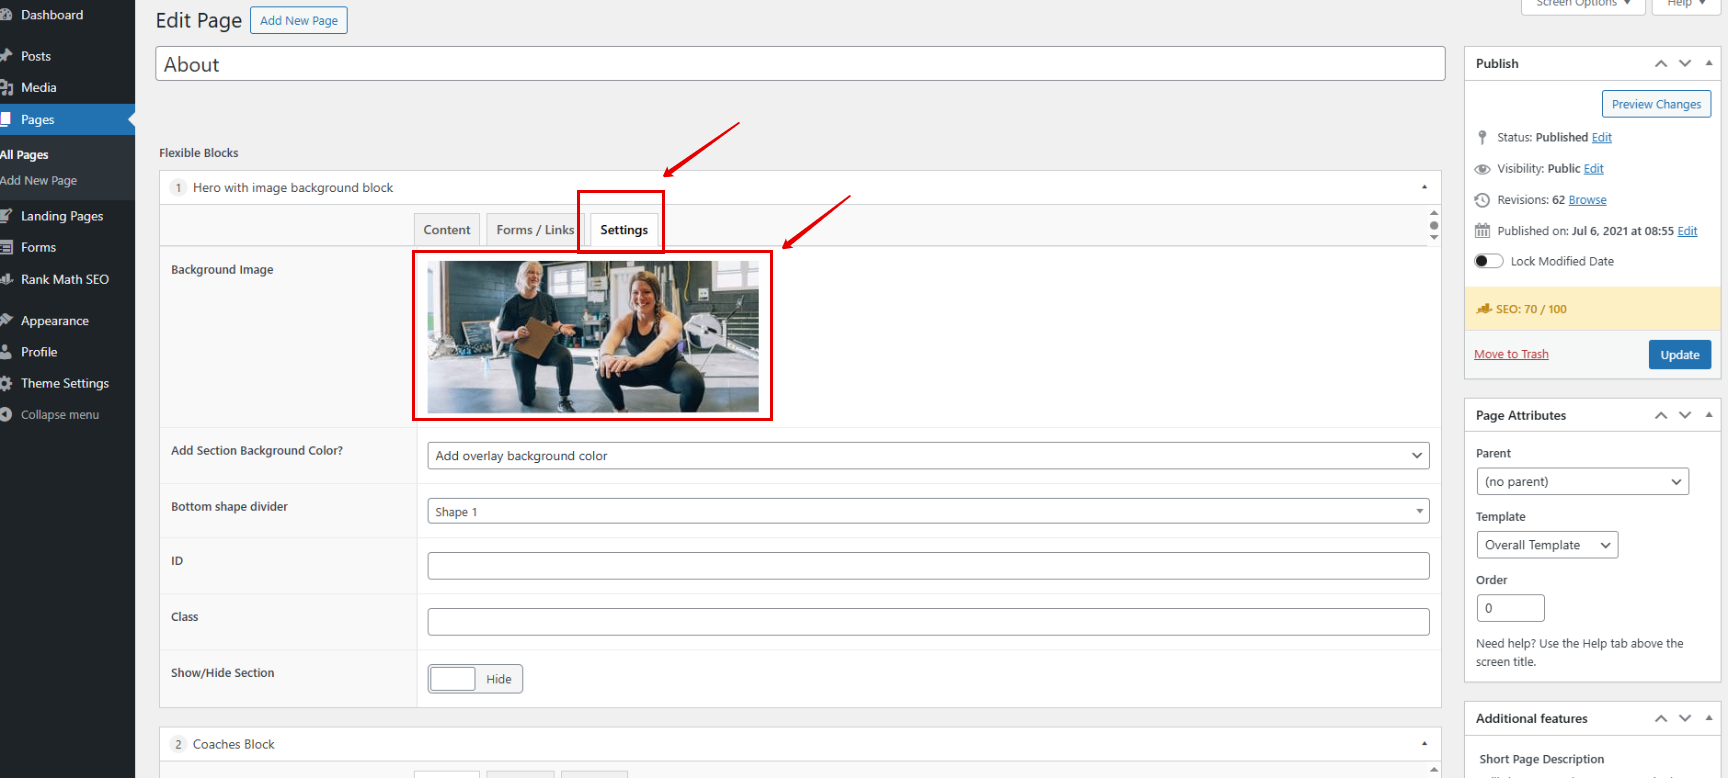
Hover over the image and remove it. Do not click the pencil icon.
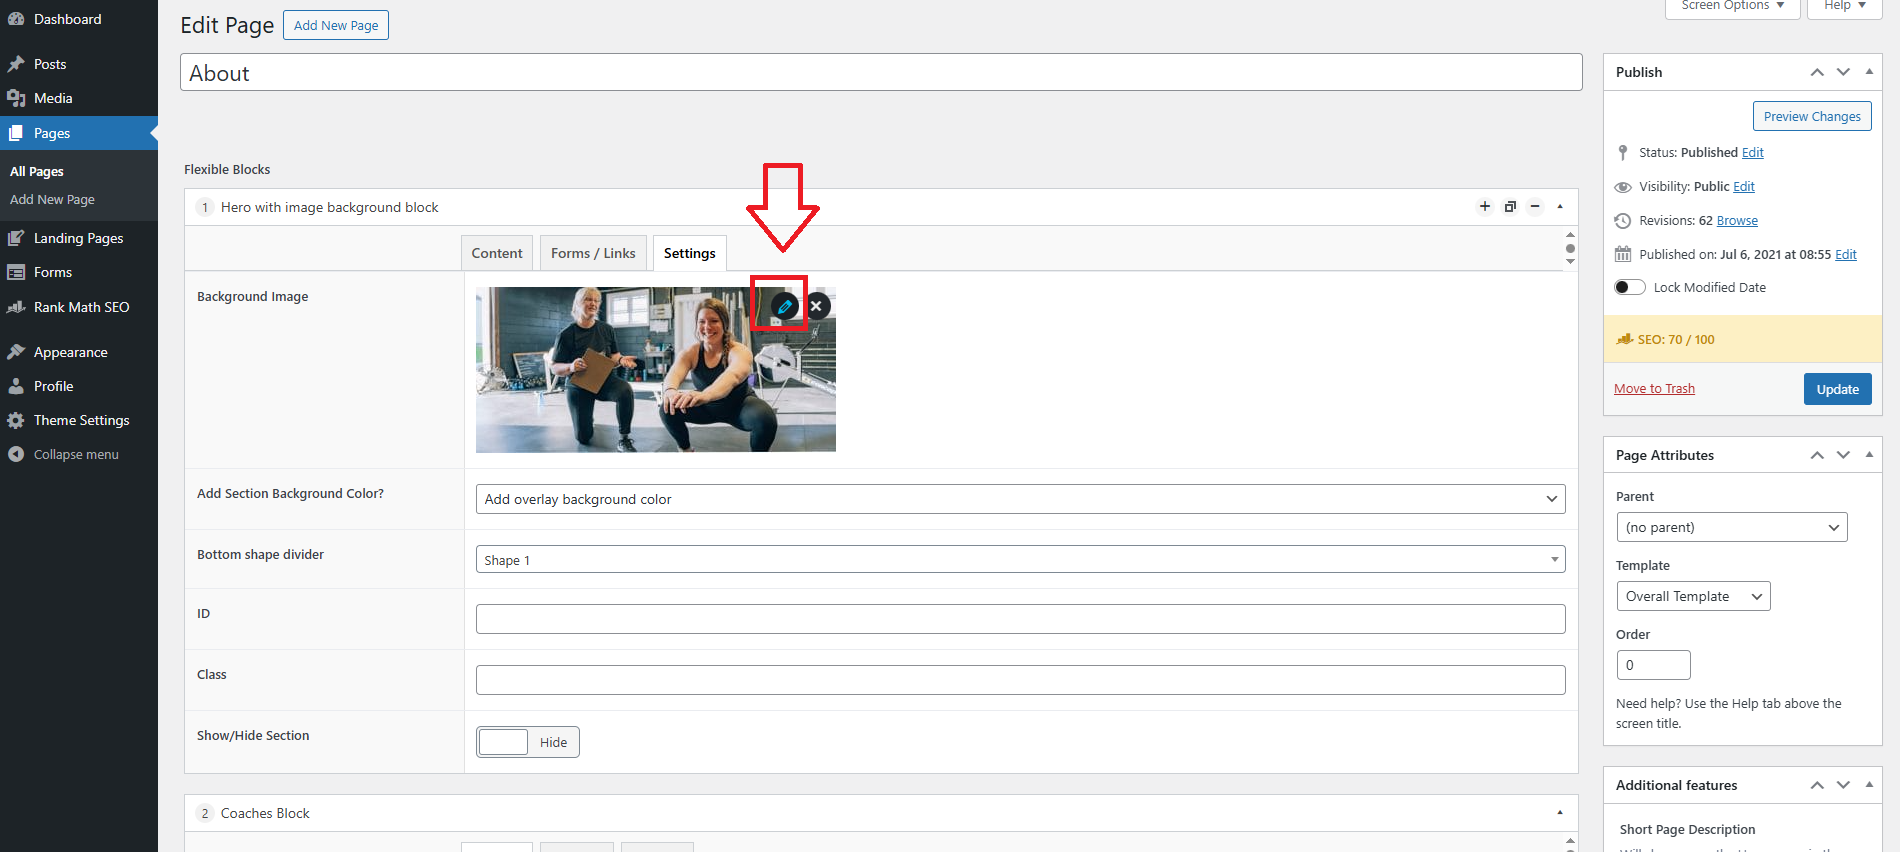
Add an image in the empty spot.
Select the image you want from your media library.
Click Update.
Your new image appears on your website.
The pencil icon looks like the way to swap an image, but the reliable path is to remove the existing image first and then add the new one.
You can upload a file directly from the page instead of using the media library, but uploading to the media library first keeps the photo available whenever you want to reuse it or swap it back.
Frequently asked questions
How do I swap out an image that is already on my website?
Remove the existing image first, then add the new one in its place. Open the page, open the Settings tab for that section, hover over the image and remove it, then add your new image from the media library and click Update. Do not use the pencil icon to change or switch out an image.
Where can I find photos if I don't have any of my own facility?
Kilo has a photo library of gym-specific stock photos you are welcome to use on your website. Original photos of your own gym are the better choice when you have them, since they show visitors your actual space.
Should I upload images to the media library or straight to the page?
The media library. Uploading there first keeps every photo available for future swaps and lets you reuse it anywhere on your site. Uploading straight to a page also works, but the photo will not be waiting for you the next time you want to make a change.
Can I use AI-generated images on my website?
We recommend against it. AI-generated images often look unnatural and can make your website feel impersonal or even confusing to visitors. Photos of your own gym, or photos from the Kilo photo library, are a better choice.
Helpful tips
Upload every photo to your media library before you place it on a page
Rename and compress photos before uploading, not after
Remove an existing image before adding its replacement
Open your website after clicking Update to confirm the new image appears
Keep your original photo files on hand for future swaps
When this is most helpful
Replacing placeholder photos after your site is built
Adding photos from a new shoot at your facility
Refreshing the images on your home page
Swapping a coach photo when your staff changes
If you have questions about the images on your website, or you want to request a complimentary annual redesign using one of our editable website templates, our Support team is happy to help. Reach us at hello@usekilo.com.