Payroll Features in Kilo
Payroll features are listed under the Payroll tab in Kilo and are available only to the account owner/administrator by default. Account admin may opt to allow a Staff member access to the “Payroll” feature in Staff Permissions.
Get started learning about Payroll features in Kilo with the videos and tutorials below.
How to Assign Roles
With the flexibility of payroll reporting in Kilo, the same coach can have several rates assigned for various event types or roles that they fulfill (head coach vs. assistant coach).
A coach can also be assigned roles that are outside of coaching class or appointments including sales calls, administrative work, and cleaning.
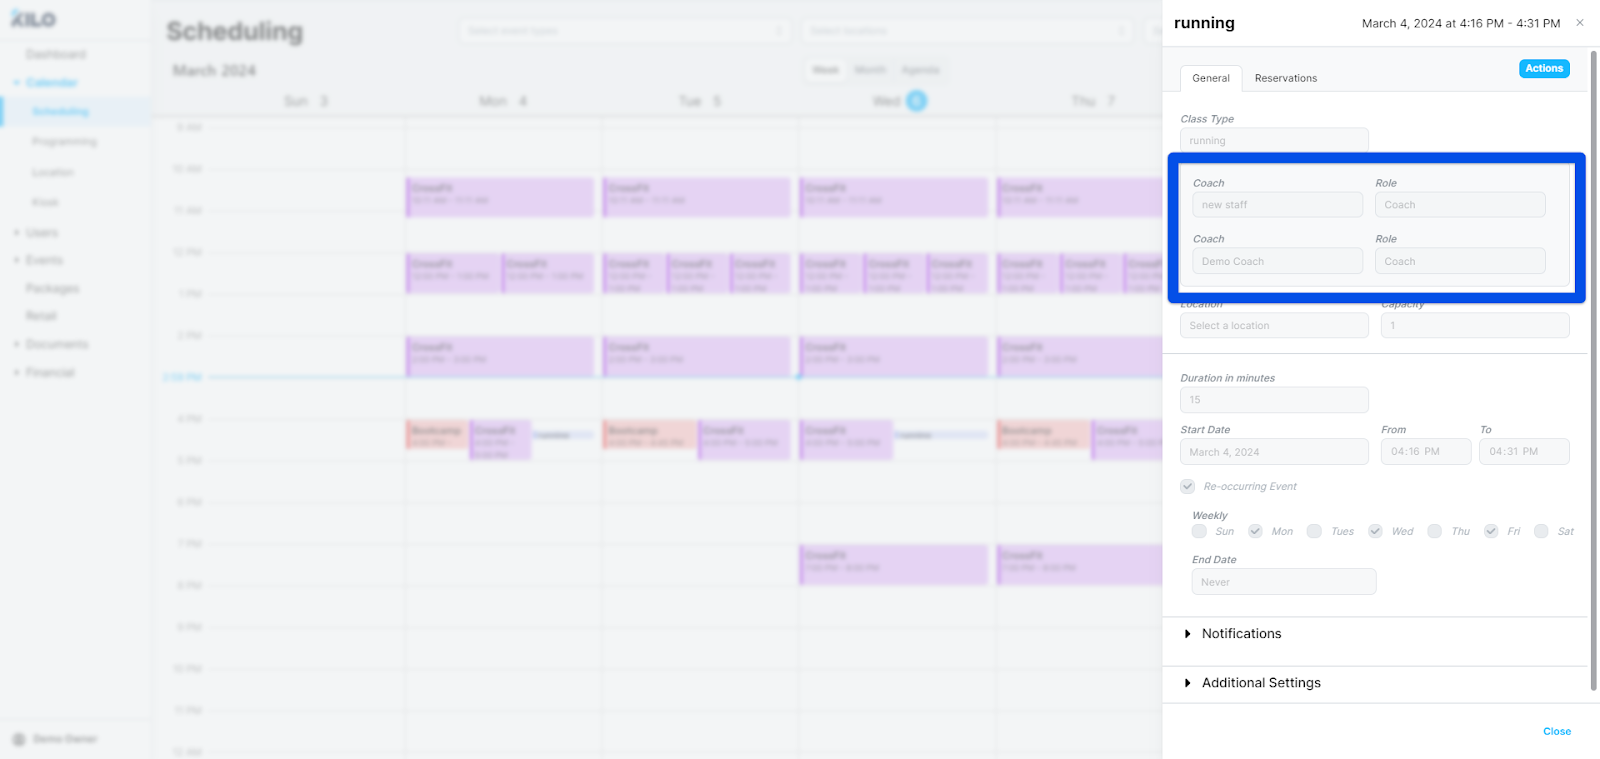
When creating a Class or Appointment on the Schedule you will now add a Coach and the ‘Role’ associated with that class or appointment.
- More than one coach can be assigned to the same event on the Schedule.
- Coach payout amounts are no longer visible from Scheduling in Kilo.
Creating Pay Rates
When creating pay rates in Kilo, you can add multiple pay rate types including Base Rate, Hourly Rate, and an additional rate per head.
- Go to Payroll in the left menu of your Kilo system → Pay Rates
- Click the blue action button → Add Pay Rate title
- Add Name,
- Select Base or Hourly Rate
- Add the amount
-
Click Save.
Anytime an Event is attached with this pay rate, the coach will be accounted for on the Payroll Report for this amount.
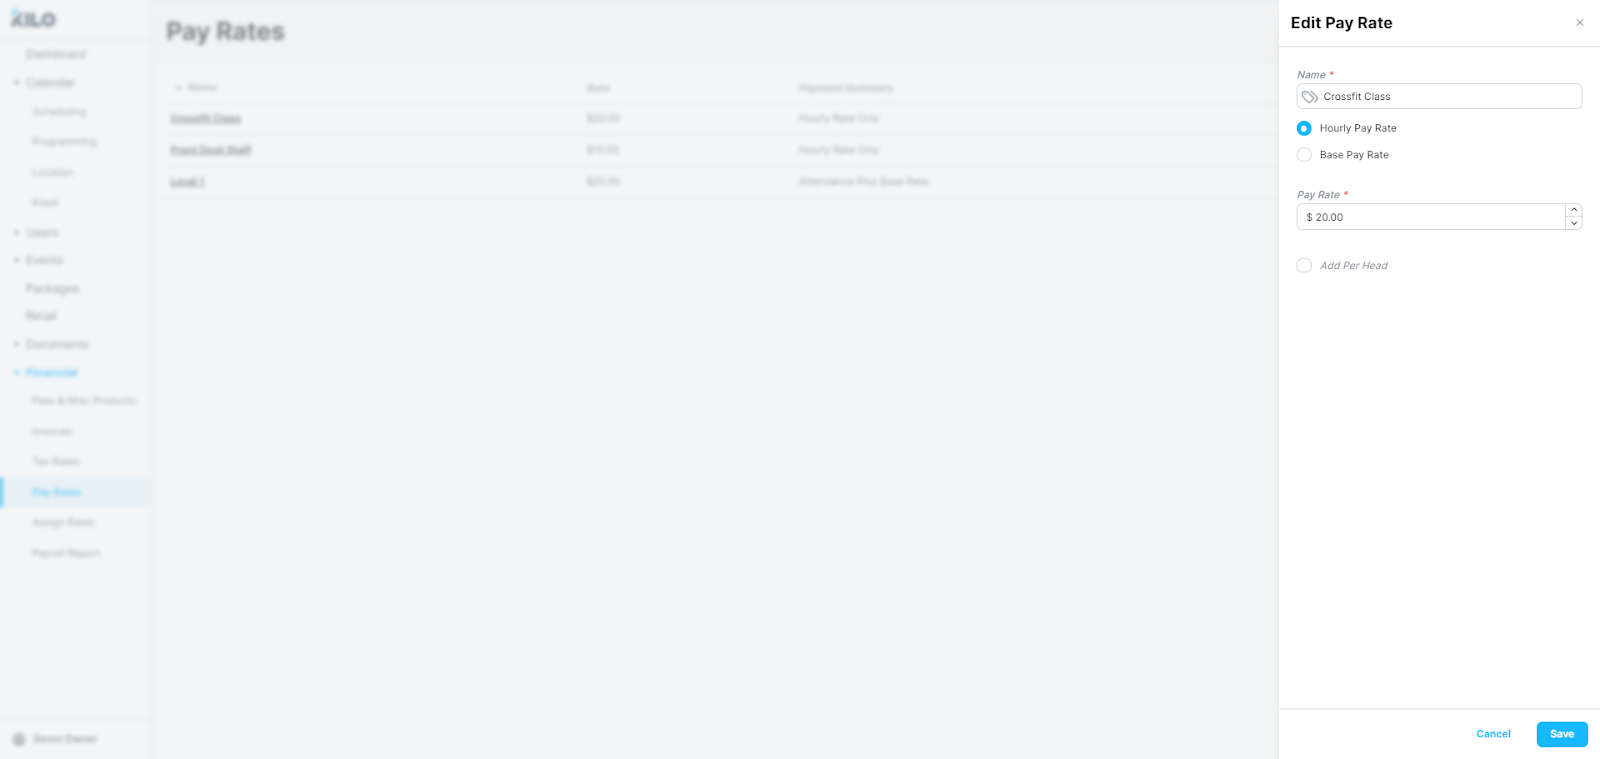
Pay a Base Rate
- Name the Base Rate (i.e. CrossFit Head Coach, Group Fitness Assistant Coach, Intern)
- Select Base Pay Rate in the slide out
- Enter the dollar amount associated with this pay rate
- Save
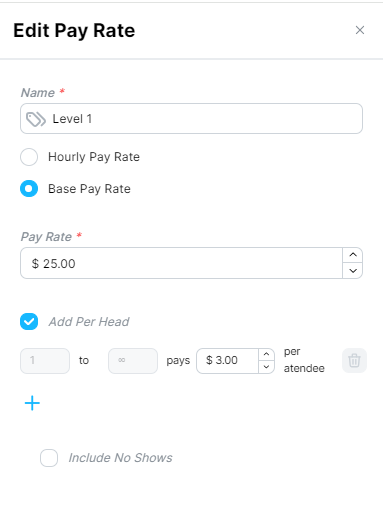
Pay a Base Pay Rate + Add Per Head
-
Select Base Pay Rate and click the “Add Per Head” button.
- Add the number of attendees and associated rates.
- You may opt to have one rate per head, as in the screenshot above where every attendee from 1 to infinity will add $3.00 to the $25 base rate.
- You may also opt to have several per head rates based on the number of attendees, such as "1-3 pays $1.00 per attendee." Then, click the plus sign and add "4-10 = $2.00 per attendee," etc.'
- It is possible to have a $0 Base Rate and opt to only pay-per-head.
- Check the box "Include No Shows" and/or "Include Late Cancels" if you prefer to include members who sign up but are a ‘No Show’ or 'Late Cancel' in the per head rate.
- Save
Note: The Payroll Report will not count anyone who is left as 'reserved' in the reporting when using the Base Rate pay rate.
To ensure coaches are not compensated for appointments that may be 'uncredited reservations' or until the athlete has been checked in, the configuration should be as follows:
Pay an Attendance based Tiers
- Select 'Base Pay Rate' and click the “Add Per Head” button.
- Add the number of attendees and associated rates.
Examples of Tiered Pay Rate:
Example 1: Coach is paid $0 for Base Rate
1st Attendee, coach paid $33
2nd Attendee, coach paid $15
3rd Attendee, coach paid $15
4th Attendee, coach paid $10

Example 2 for a Tiered Pay Rate:
Coach is paid $20 for Base Rate
1st Attendee, coach get's $0
2nd Attendee, coach get's $0
3rd Attendee, coach get's $12
4th Attendee, coach get's $0
5th Attendee, coach get's $0
6th Attendee, coach get's $12
Pay an Hourly Rate
The Hourly Rate allows flexibility to pay for events like supervising Open Gym, completing administrative work, or cleaning hours. In these cases, the staff is paid for more than a simple event on the Schedule.
- Name the Hourly Rate (i.e. Cleaning, Lead Outreach, etc.)
- Select Hourly Pay Rate in the slide out
- Enter the hourly dollar amount associated with this pay rate
- Save
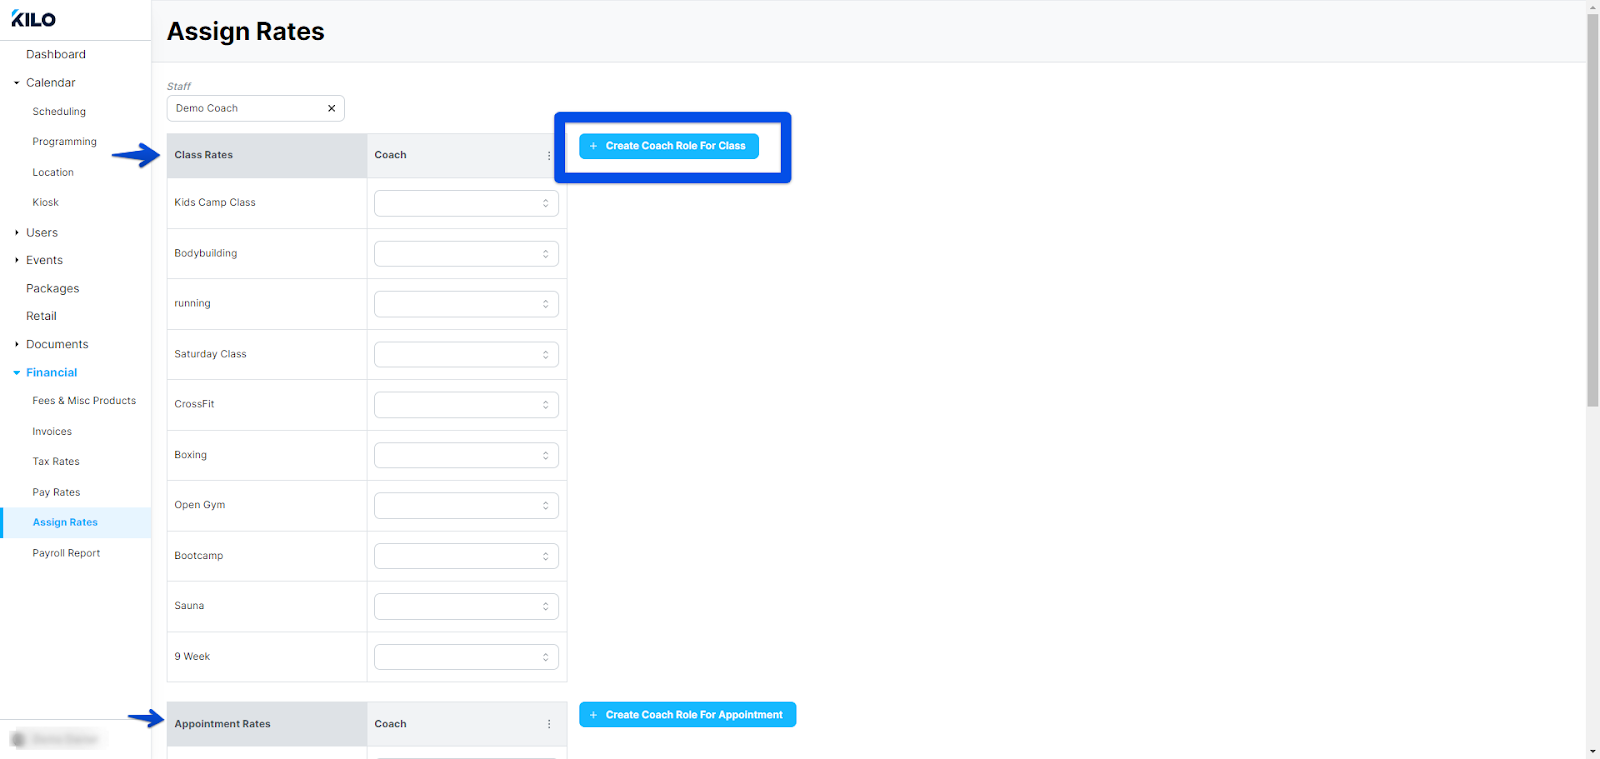
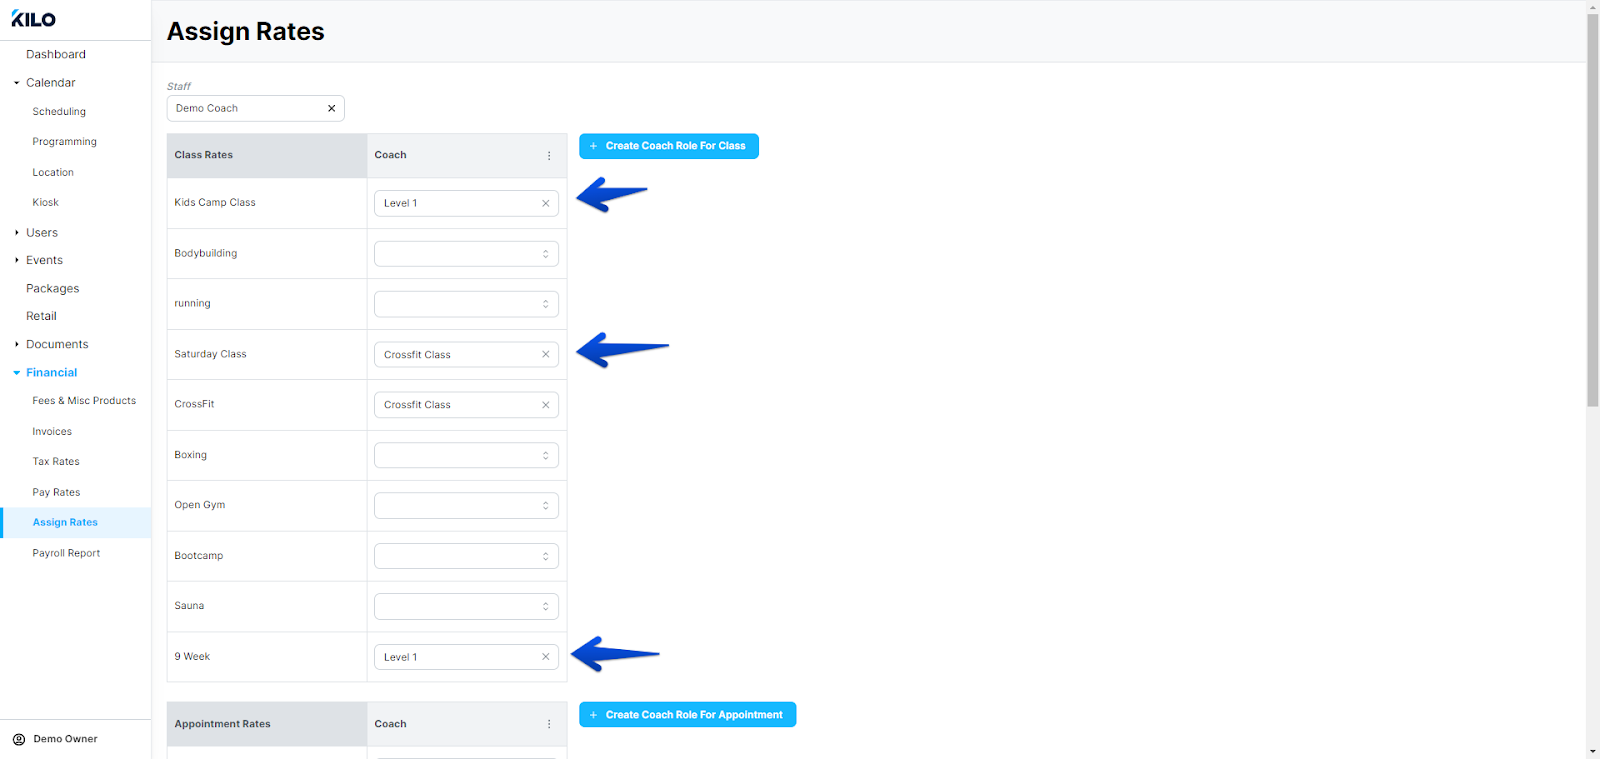
Assigning Pay Rates
- Go to Payroll -> Assign Rates
- To begin assigning rates, first select the coach to which you'll be assigning rates.
- Only 5 coaches will show by default so you may need to search for a coach by typing their name into the Staff field at the top of the page.
- You will see all your available Class Rates, Appointment Rates and Other Rates. You can create roles by clicking the blue +Create Coach Role for (Class) (Appointment) and (Other Work type).
- Roles will be added to all Coaches as you add the different types into the system.
-
You are now ready to assign the Coach role for each particular Coach. In the example below, Demo Coach will receive Level 1 pay for Kids Group Classes and the 9 week specialty course. Pay rate for CrossFit Class and Saturday class will be the CrossFit class rate.
Log Work Hours
Gym owners can add these hours for any staff member or a coach can log their own hours.
Select the work done and how many hours were worked in order to log hours. Staff members are unable to currently view their logged work hours. Owners may download the Staff members' csv report for the Staff member to review.
If you have further questions about the Payroll Reporting features in Kilo, please email our Support team at hello@usekilo.com.