Kiosk and Athlete Check-In
The goal of the Kiosk and athlete check-in experience is to make check-ins faster, clearer, and easier for both staff and members. If you're looking for a smooth check-in process with clear visibility into class eligibility, the Kiosk feature helps keep everything simple and easy to manage.
🎥 Video walkthrough can be viewed here!
Check-ins via Events on the Schedule
-
Event Navigation When you open an Event on the Schedule, the Reservations tab appears first instead of the Details tab, so you can get straight to check-ins.
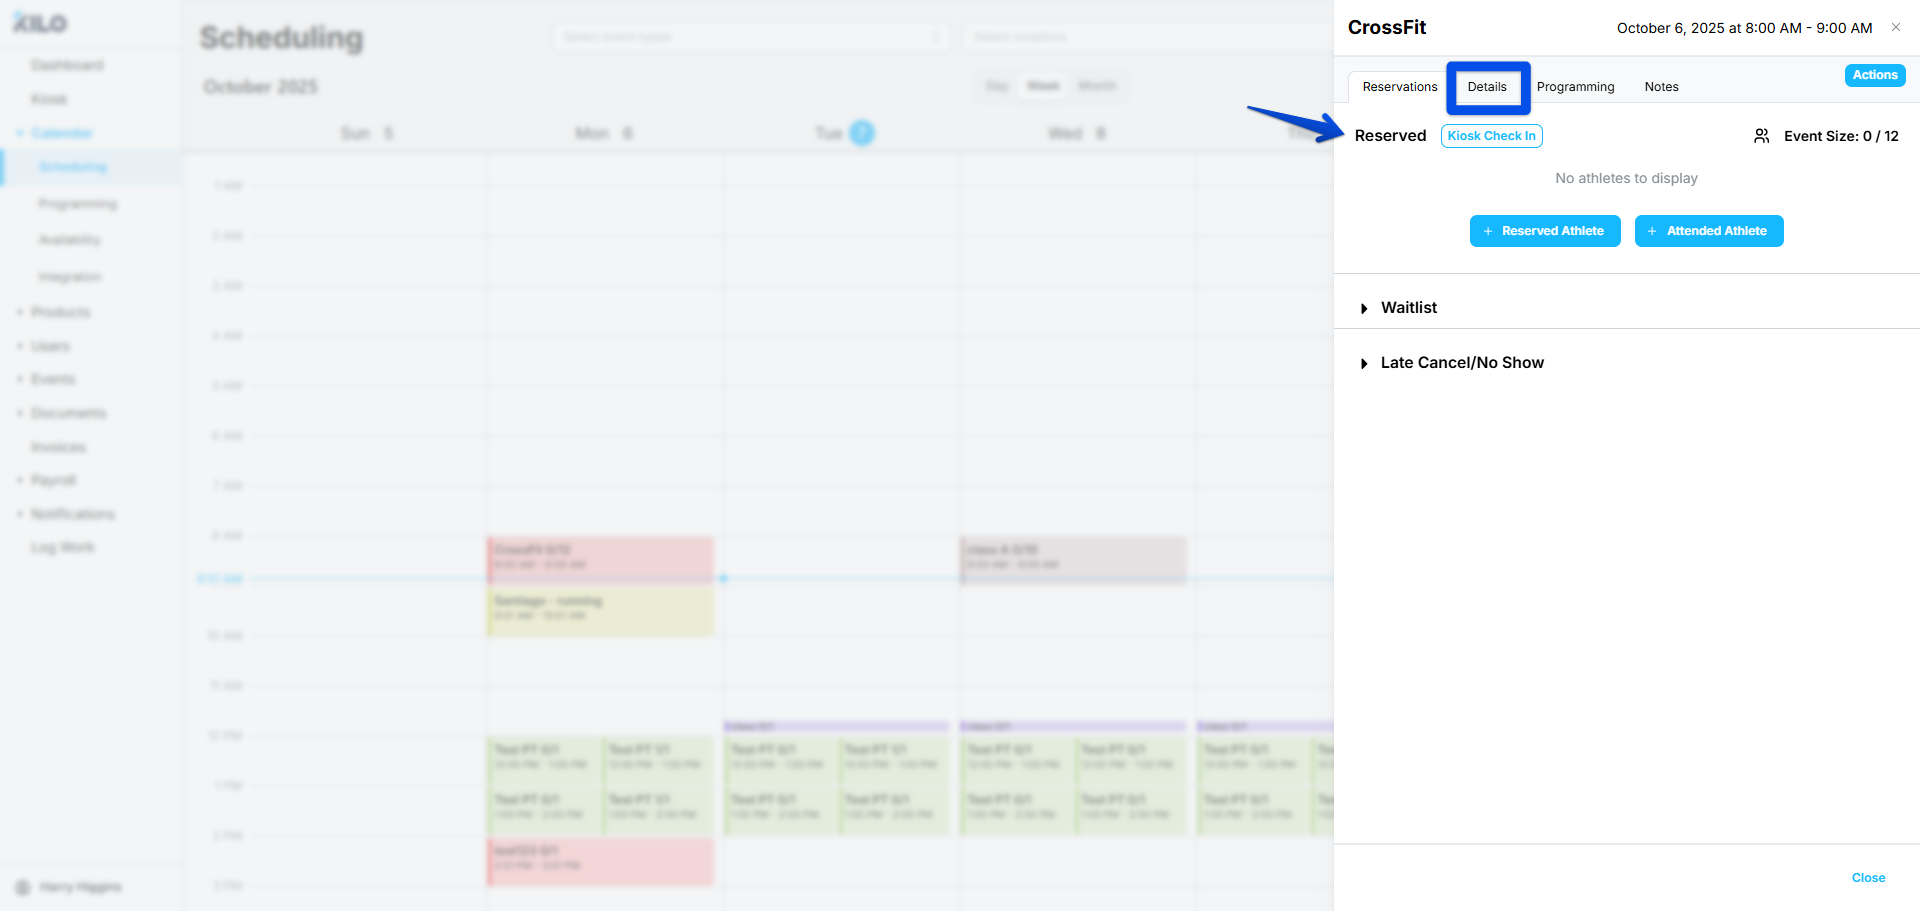
-
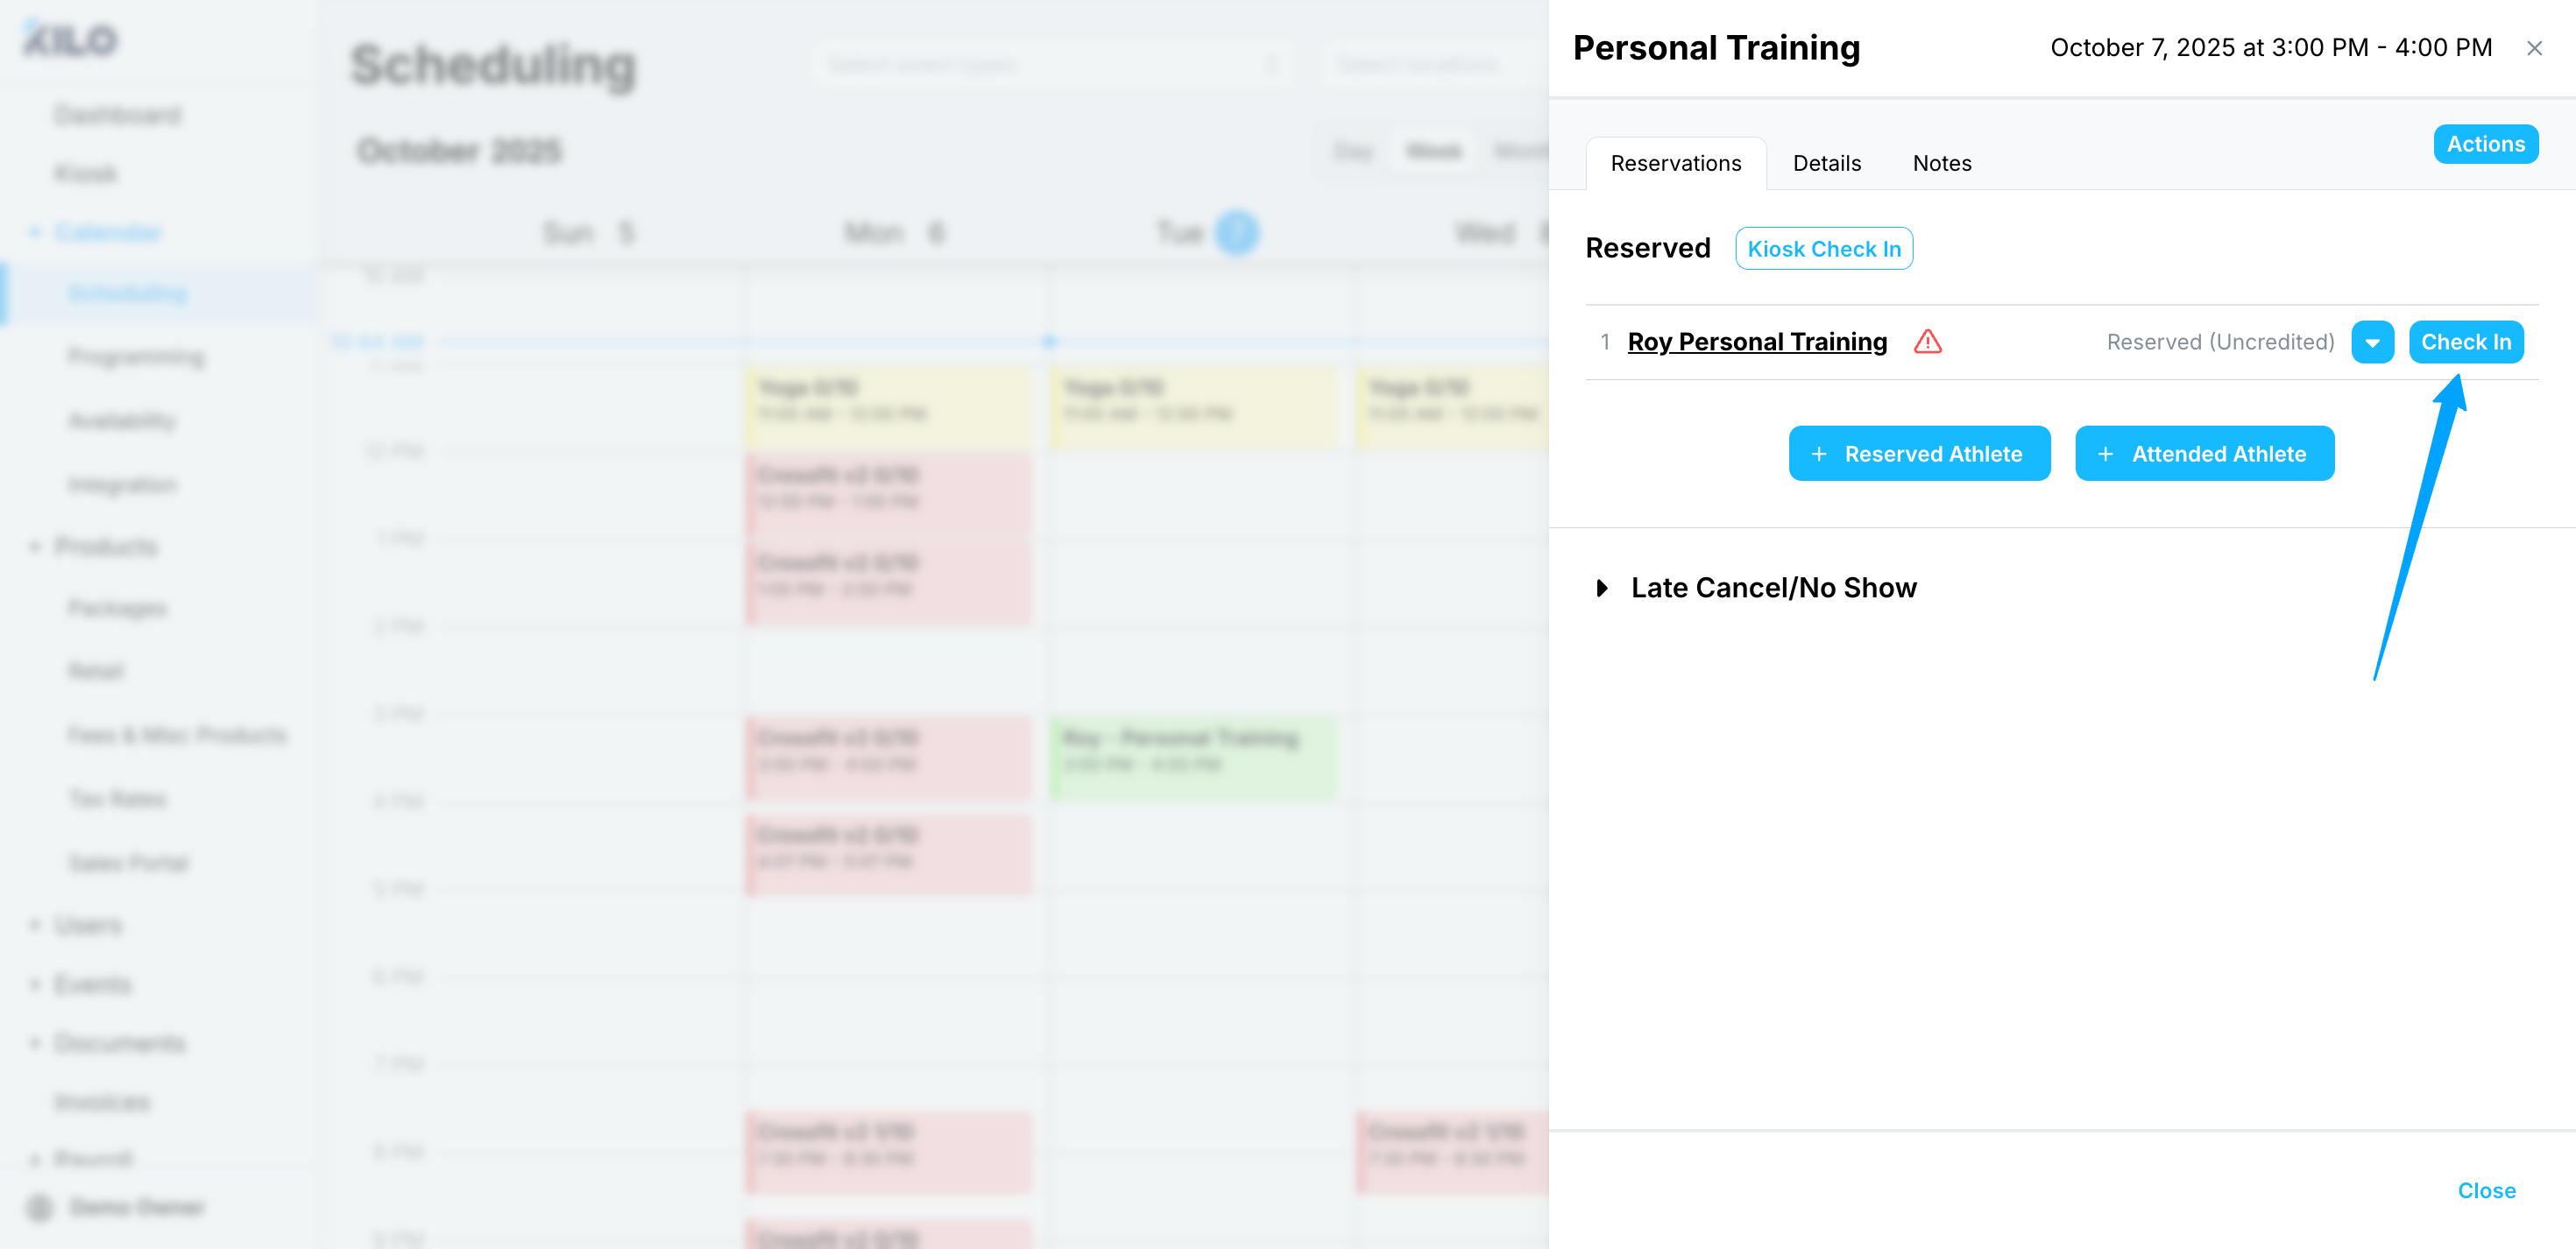
Fast Check-Ins The Check-In button appears within the Reservations tab. Checking in an athlete from the Schedule takes only two clicks.


Check-ins via the Kiosk
Staff Kiosk View
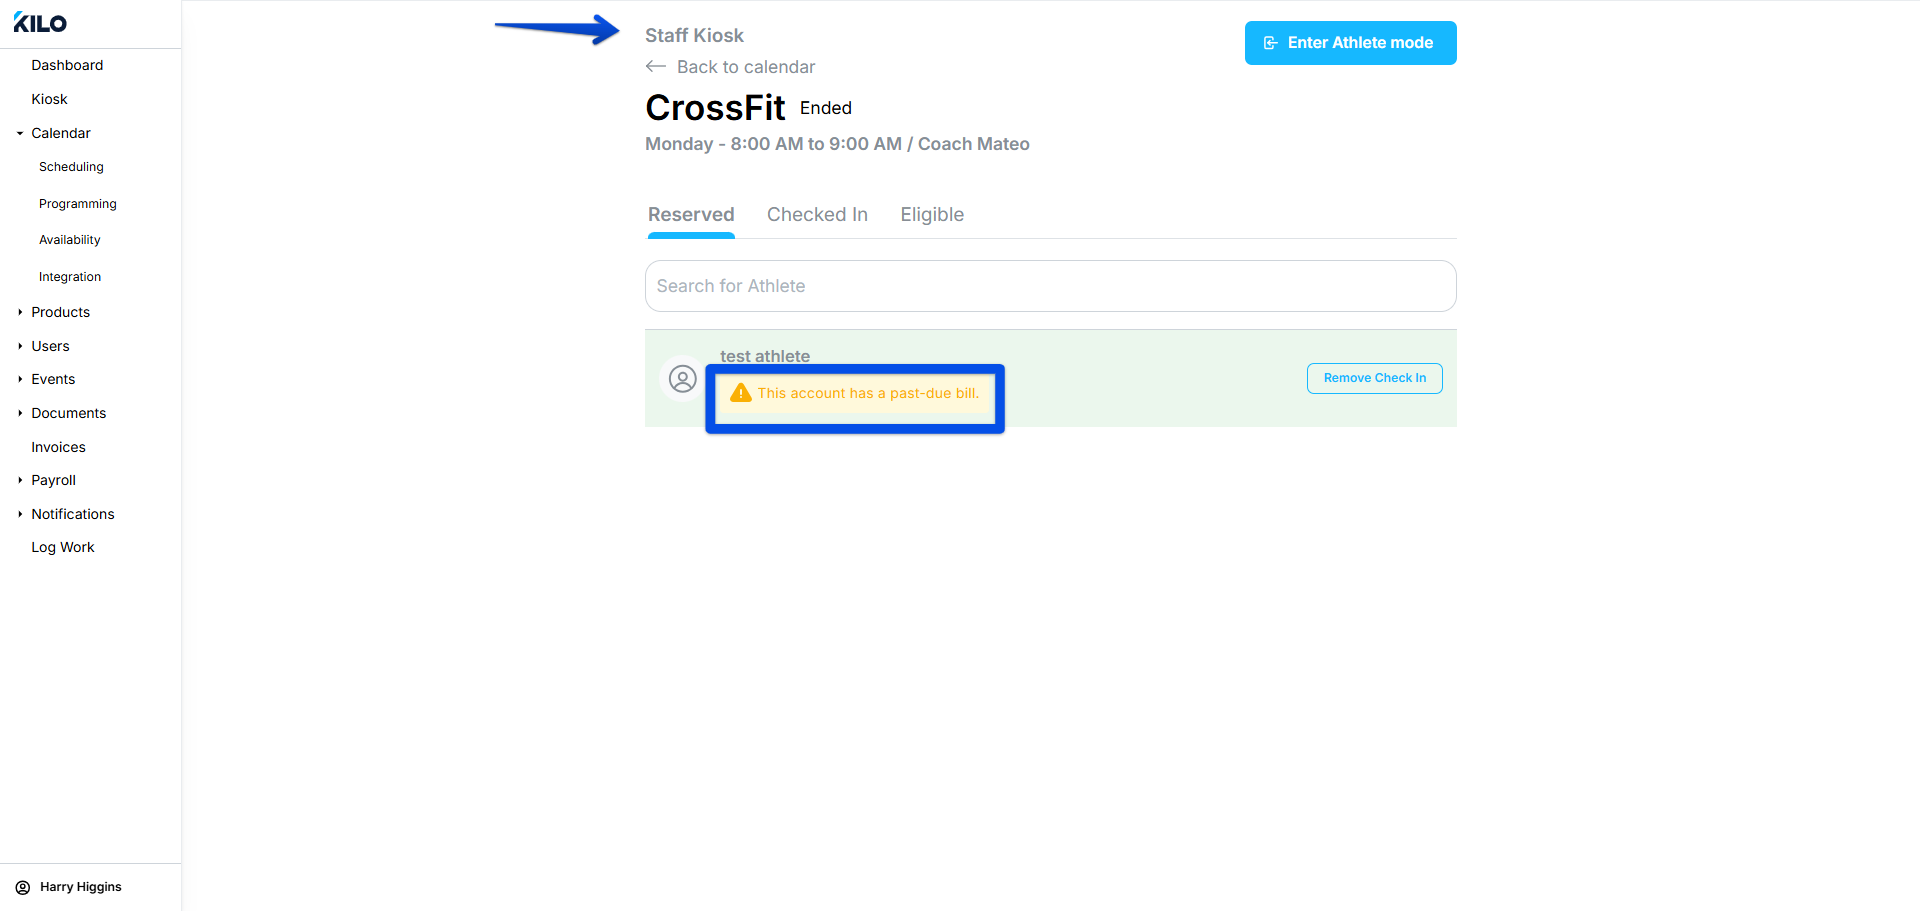
Staff can view all classes happening that day, check athletes in, and see who is eligible for a class even if they haven't reserved. The Eligible view is also available from the Reservations tab in the Event menu.

How the Staff Kiosk behaves:
- Athlete alerts (such as a past due bill or an unsigned document) stay visible under each tab, giving staff full context at check-in.
- Once you check an athlete in, their name leaves the Reserved tab and appears only in the Checked In tab.
- When you search for an athlete and submit an action (check-in, no-show, and so on), the search bar clears and you stay on the tab you're working in.
-
The check-in screen is sized for easier viewing.
Desktop view of Staff Kiosk

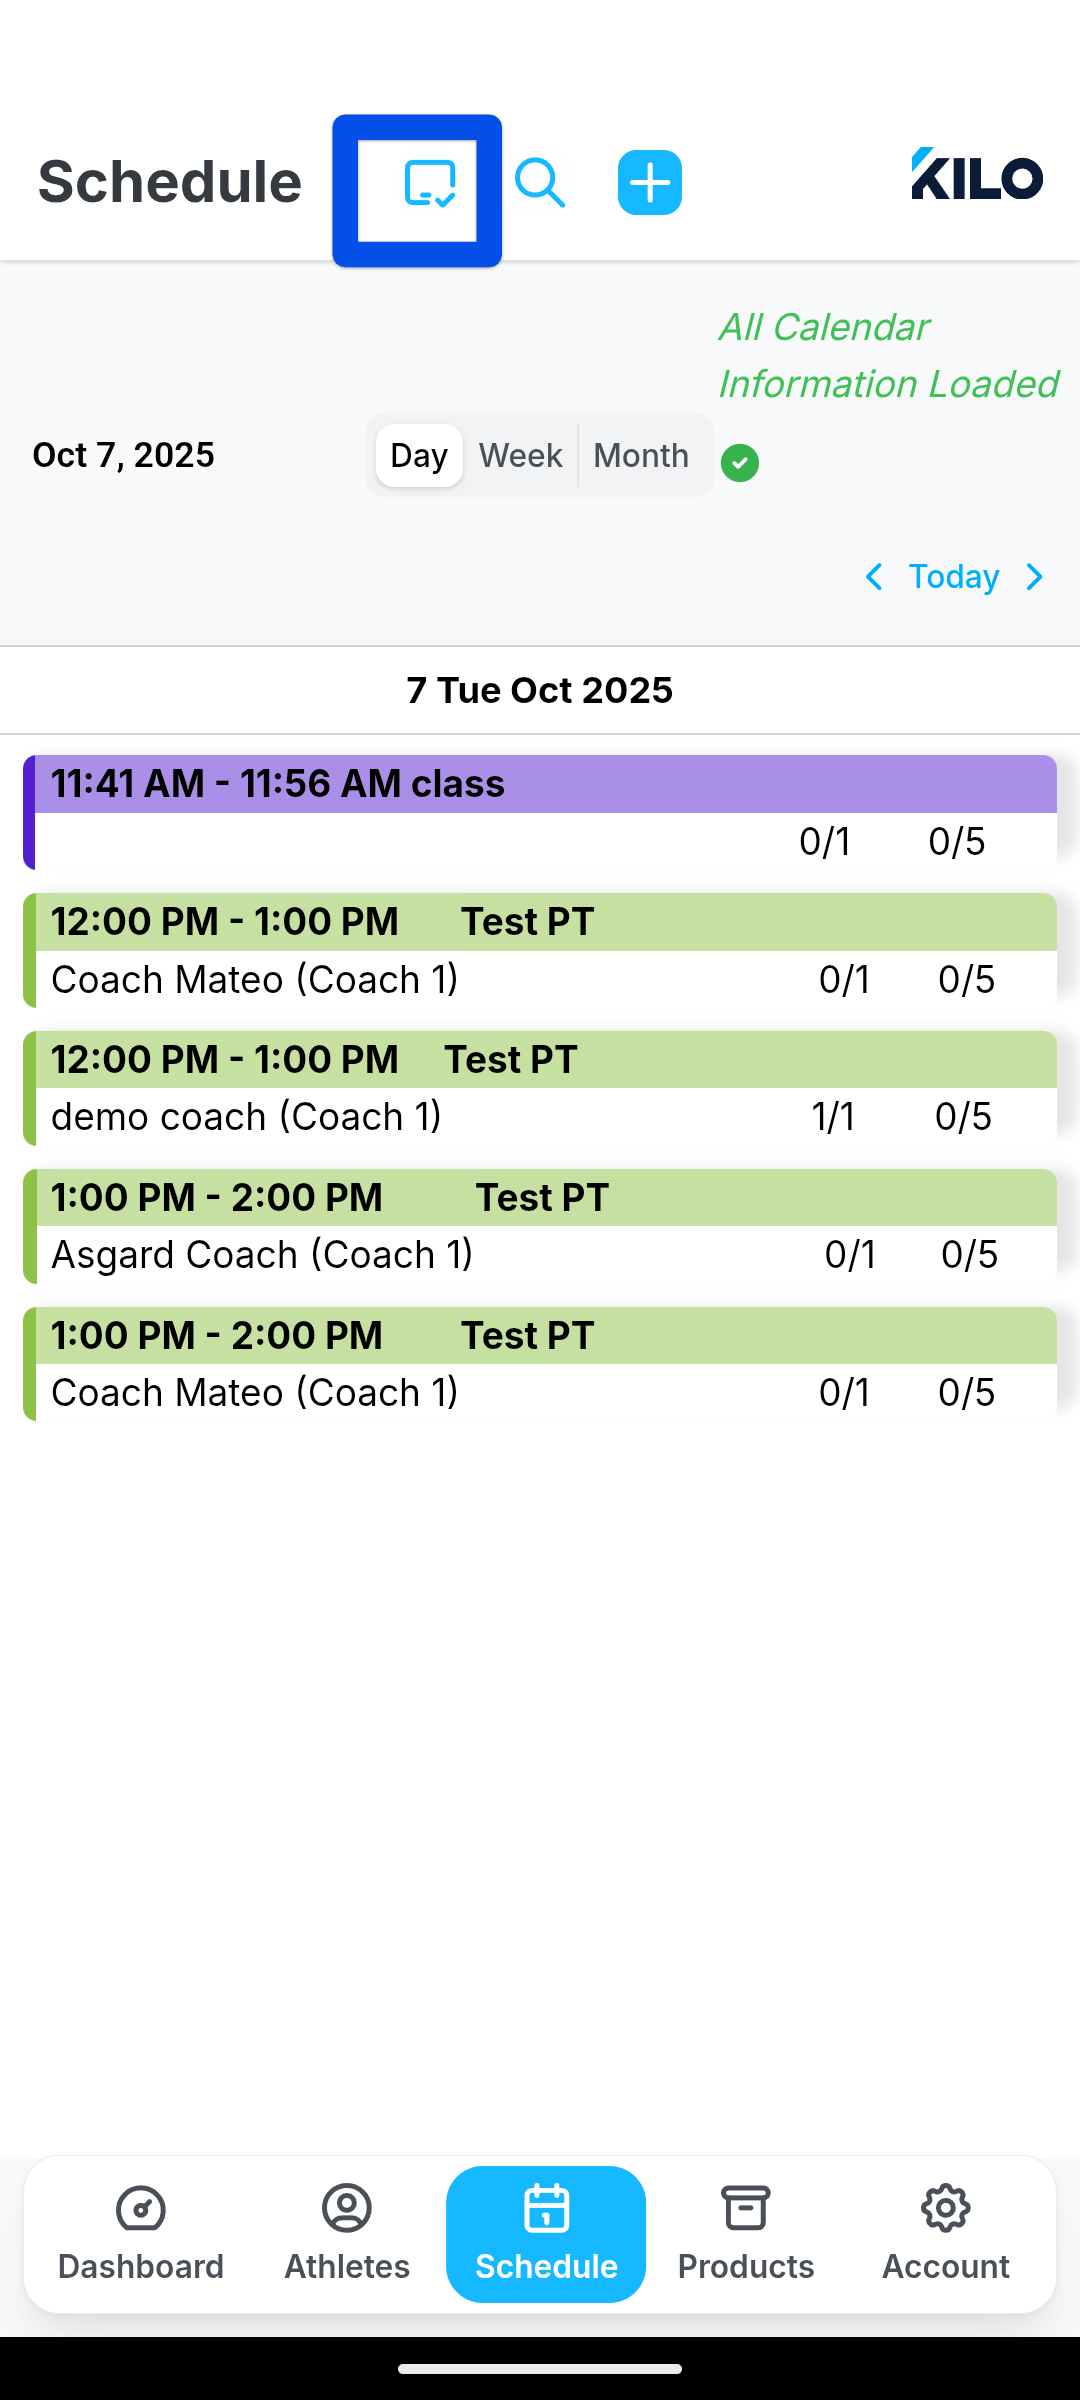
From the mobile app, staff can tap the screen icon to launch the Staff Kiosk view — giving them a quick look at all upcoming events and easy access to check-ins.
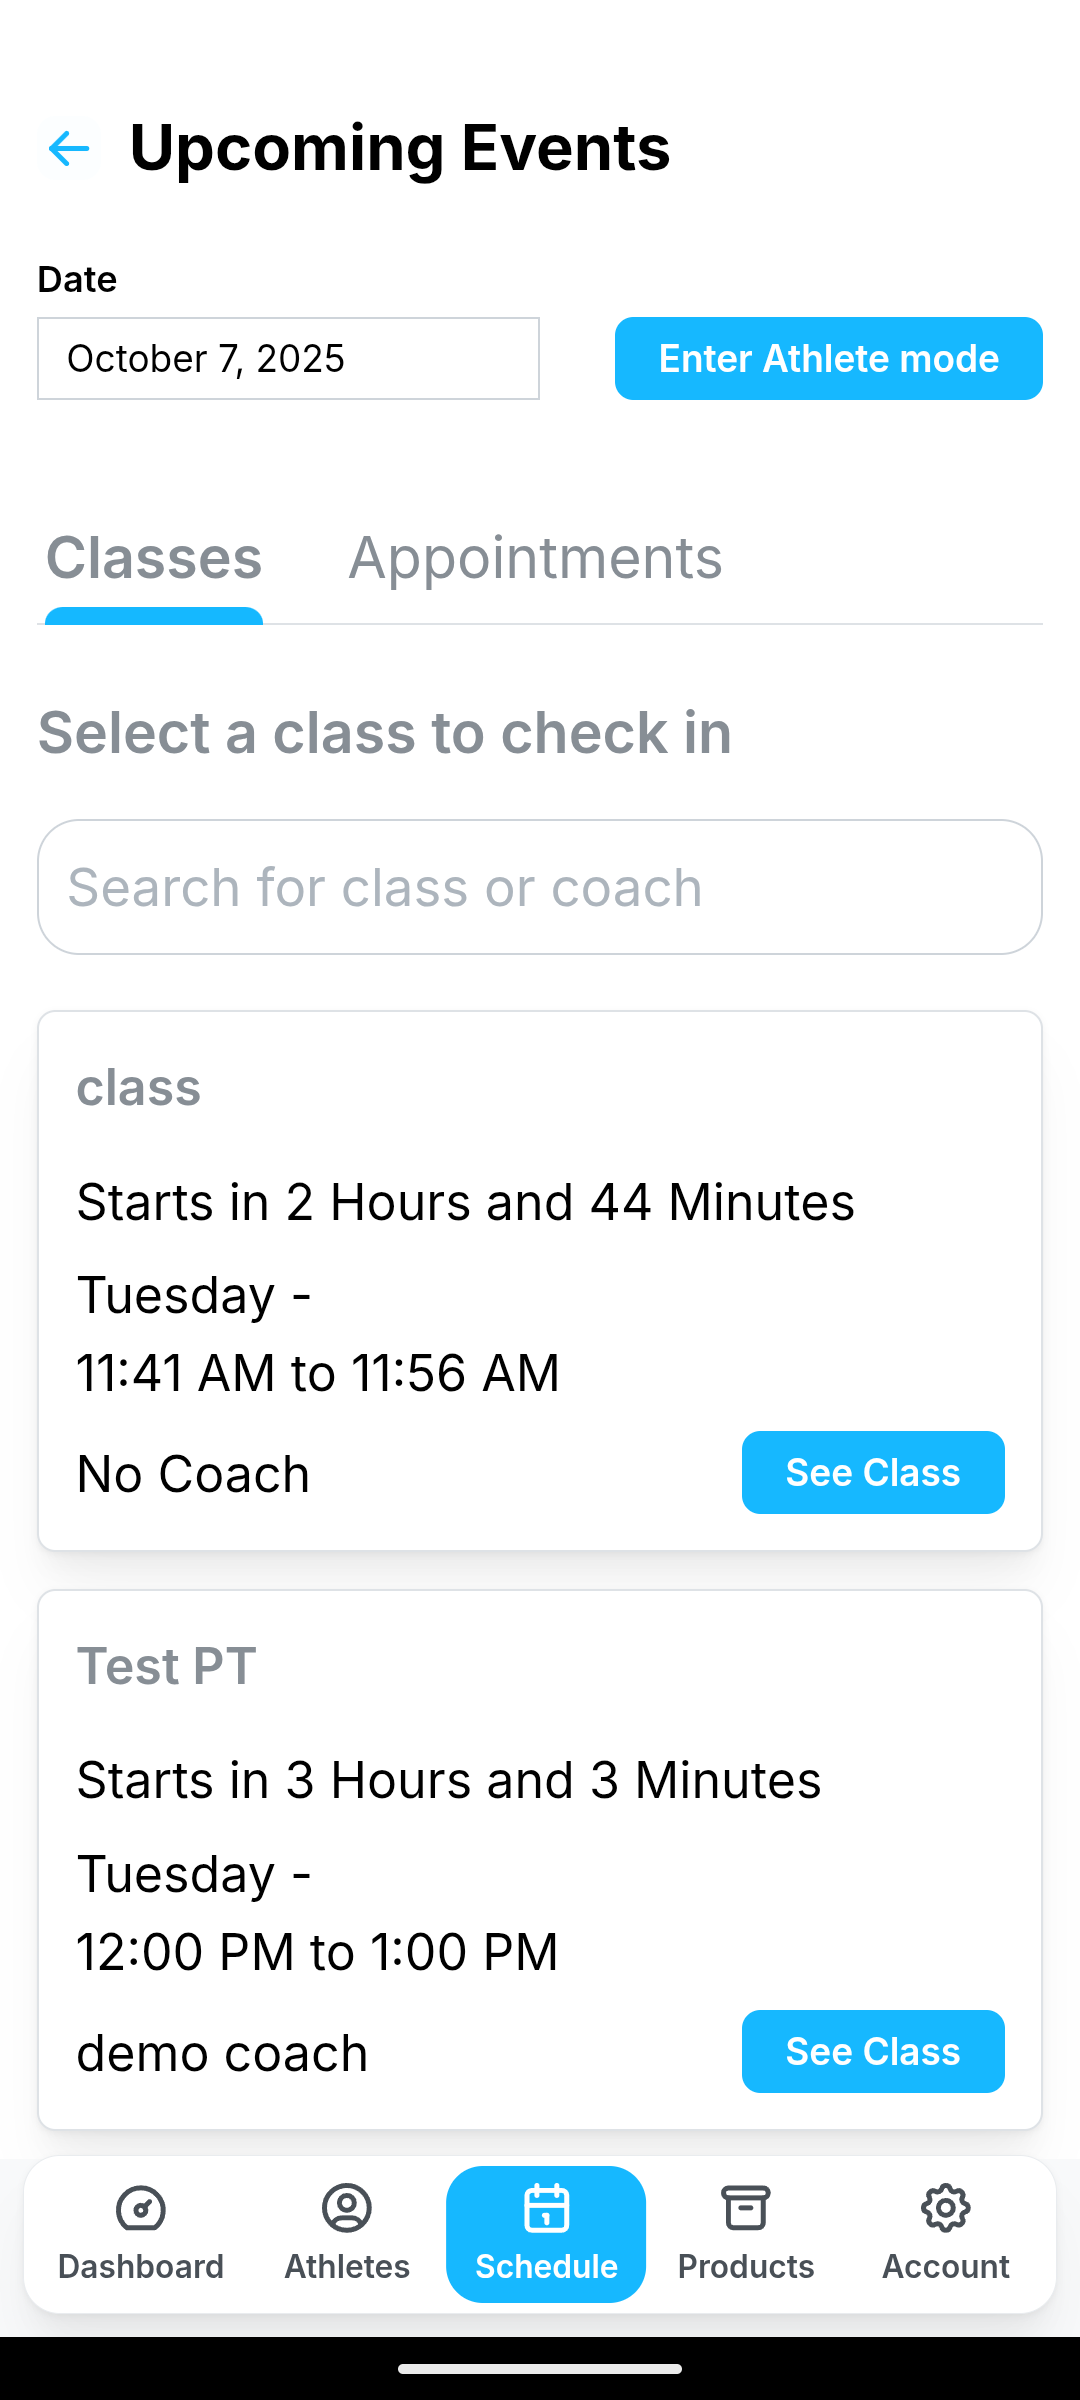
Athlete Kiosk Mode
Athletes can find their name on the Reserved, Checked In, or Eligible tabs.
- Open an upcoming class with the See Class button, locate your name on the reserved list, and check in with a single click, no searching required.
- If needed, athletes can search for their name on the Reserved or Eligible lists.

How the Athlete Kiosk behaves:
- Once an athlete checks in, their name leaves the Reserved tab and appears only in the Checked In tab.
- After a successful action, the screen returns to the class list (Reserved) view.
- When a class or appointment has ended (past its end time), its card is removed from the list to keep the check-in flow clean.
- After check-in, the Check-In button is replaced by Checked in text with a checkmark icon.
- Athletes can still check in even if they have a past due bill or an unsigned document.
- Athlete alerts are hidden in the Athlete Kiosk to protect member privacy.
Locking the Kiosk in Athlete Mode
You can lock the Kiosk on a front-desk iPad or computer by entering Athlete Mode using the button in the top right. This mode prevents athletes from seeing sensitive data when they self-check in to classes or appointments.

If you have questions about using the Kiosk in Kilo, contact our Support team at hello@usekilo.com