Google Ads Tracking Options with Kilo Sites
Available Conversion Tracking Options
It is important to note that only certain type of Google Ads tracking is support on Kilo websites.
Supported Conversion Tracking:
- Opt-In Conversions (Free Intro Page): This is the most common type of conversion tracking for Kilo users. A global site tag is placed on every page of your site, while an event snippet is added specifically to the Free Intro page. This allows you to track the number of opt-ins from prospects who land on this page after completing the form.
- Scheduling Conversions: Upon request, we can add a custom "thank you" page to your site, where prospects are redirected after booking a Free Intro appointment. This lets you track lead conversions for those prospects that go on to schedule an appointment.
Limitations:
- Button/Click-Specific Conversions: Due to the custom, in-house template design used for most Kilo sites, it is not currently possible to track conversions from individual buttons on your website.
- Form-Specific Conversions: The forms on your website are embedded from your Gym Lead Machine (GLM) system. At this time, GLM forms cannot be coded with specific Google Ads conversion tracking tags.
Applying Tags in Google Tag Manager (GTM) vs. Your Website
If you are running Google ads, your ad setup will include a step where Google provides tags for your website. Tags can be added to your Google Tag Manager (GTM) account (preferred) or to your website directly.
The use of Google Tag Manager is preferred since Administrative access to Kilo websites is reserved for our Development team. If your tags are installed in GTM, rather than directly to the site, you can share access with Google Support and other services as needed when tag updates are required.
You may already have a Google Tag Manager account with administrative access. If you are unsure you can:
- Go to tagmanager.google.com and try to log in with your email address
- Email our support team at hello@usekilo.com and ask if we have a Tag Manager email address on file for you.
Add Opt-In Conversion Tags to Google Tag Manager
If you require assistance setting-up ads or retrieving site tags, please reach out to Google Support directly at https://support.google.com/google-ads/.
Add Google Site Tag
- Log into https://tagmanager.google.com/ with your Google email address.
- Click on "Add a new tag"
- Rename the tag "Google ads" where it says "Untitled Tag" in the upper left
- Click on the Tag configuration box
- Select "Custom HTML" from the list that appears on the left-hand side
- Paste the code provided by Google in the HTML field. The one you are pasting in this step is the Google Tag.
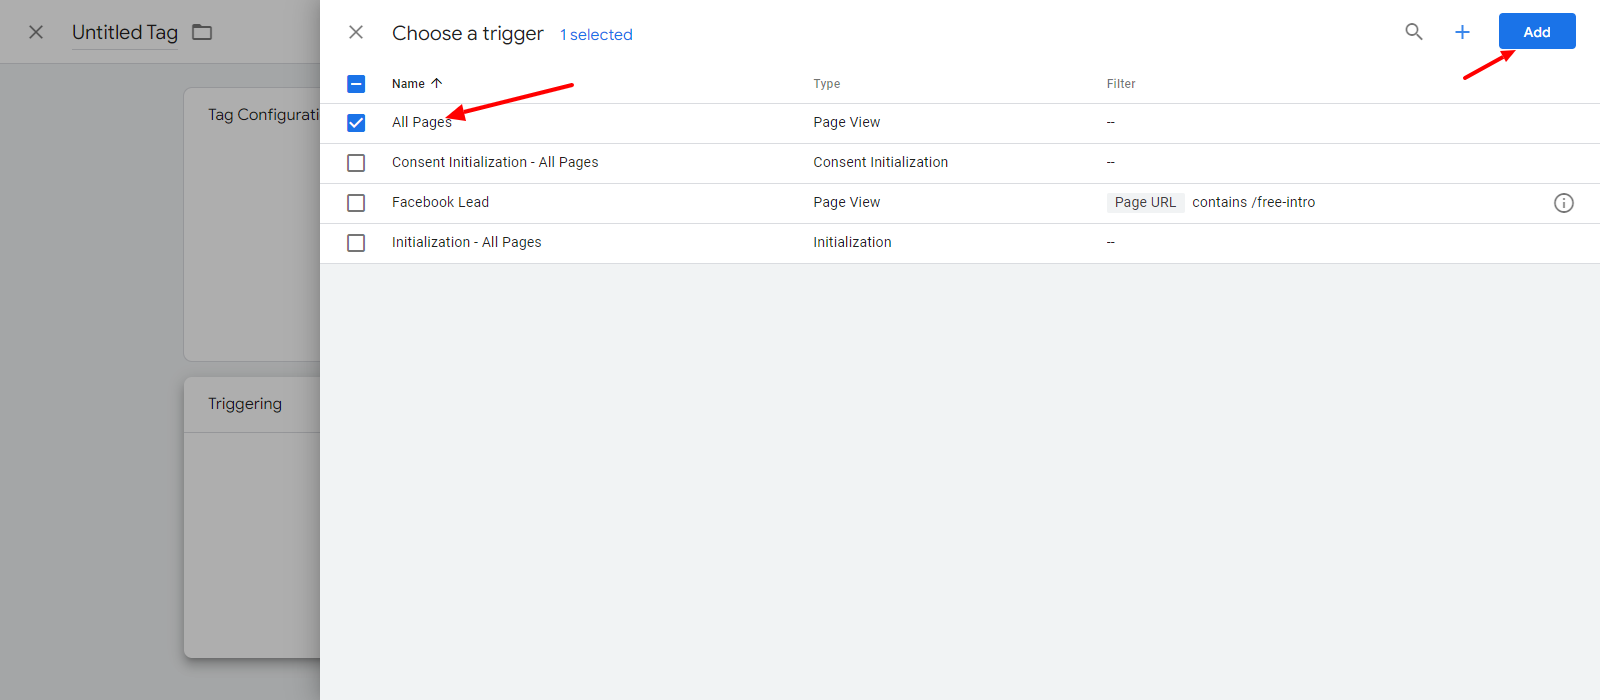
- Click on Triggering
- Select "All Pages "
- Click Add in the upper right
- Click Save in the top right corner


Now your Google Tag is added to your GTM account! Next, you will add the Event snippet for conversion
Add Event Snippet
- Click "Add a new tag" again (as in step 1 above)
- Rename the tag “Google conversion snippet” in the upper left
- Click on the Tag configuration box
- Select "Google Ads Conversion Tracking"
- Look at Event Snippet that you got from Google. It should look like this:
<!-- Event snippet for Submit Free Intro conversion page -->
<script>
gtag('event', 'conversion', {'send_to': 'AW-111222333/AAAbbbCCC'});
</script> - In the "Conversion ID" field add the numbers between AW- and /. In the example above, the Conversion ID is 111222333.
- In the "Conversion Label" field add the symbols after / and before '. In the example above, the Conversion Label is AAAbbbCCC.
- Click on Triggering
- Select Facebook Lead or Free-intro (these may be named differently in your account, but the Filter will be for the URL that contains /free-intro)
- Click add
- Click Save in the top right corner


2 down and 1 to go! We have a final tag to add, then you're all set.
Add Conversion Linker
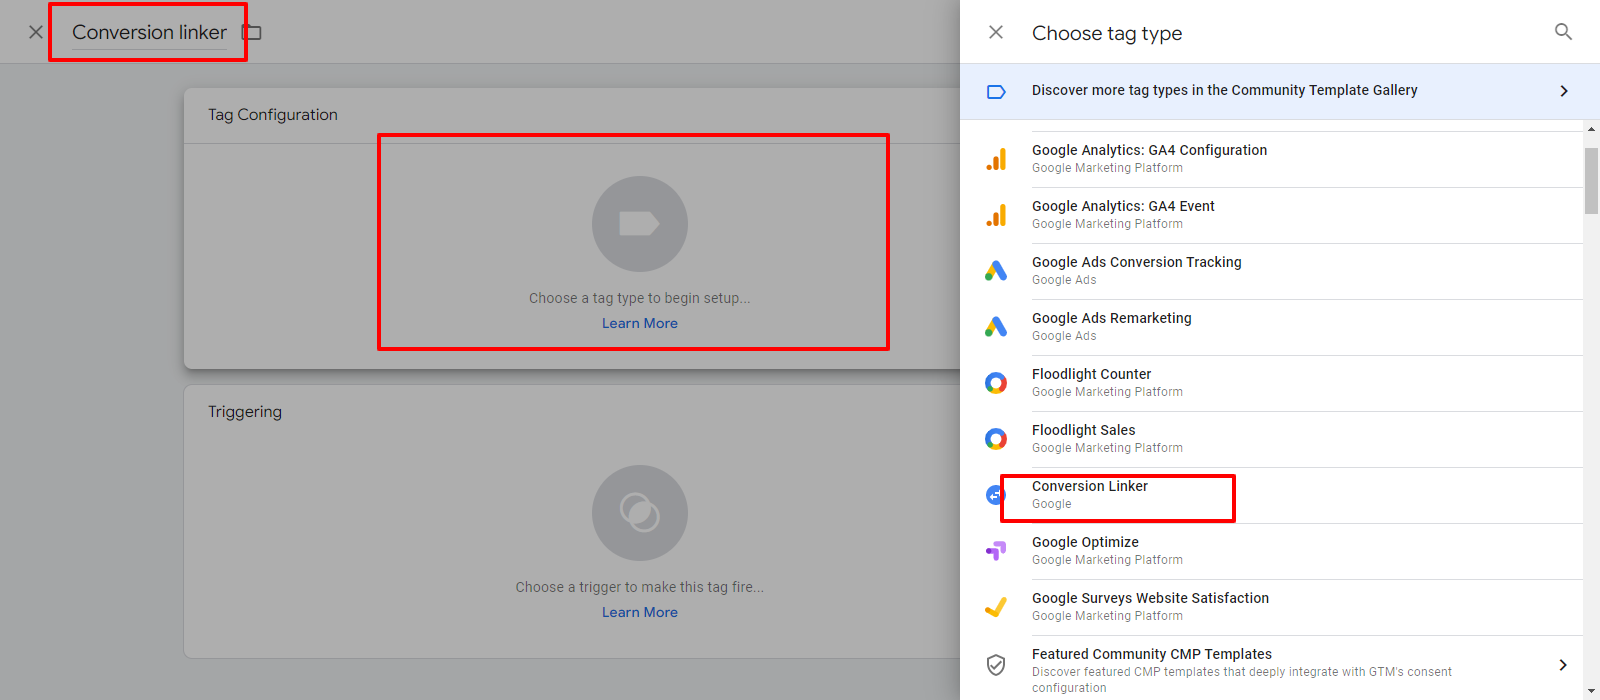
- Click "Add a new tag" one more time! (this is the last one)
- Rename the tag "Conversion linker" in the upper left
- Click on the Tag configuration box
- Select "Conversion Linker" from the left menu
- Click on Triggering
- Select "All Pages"
- Click Add
- Click Save in the top right corner
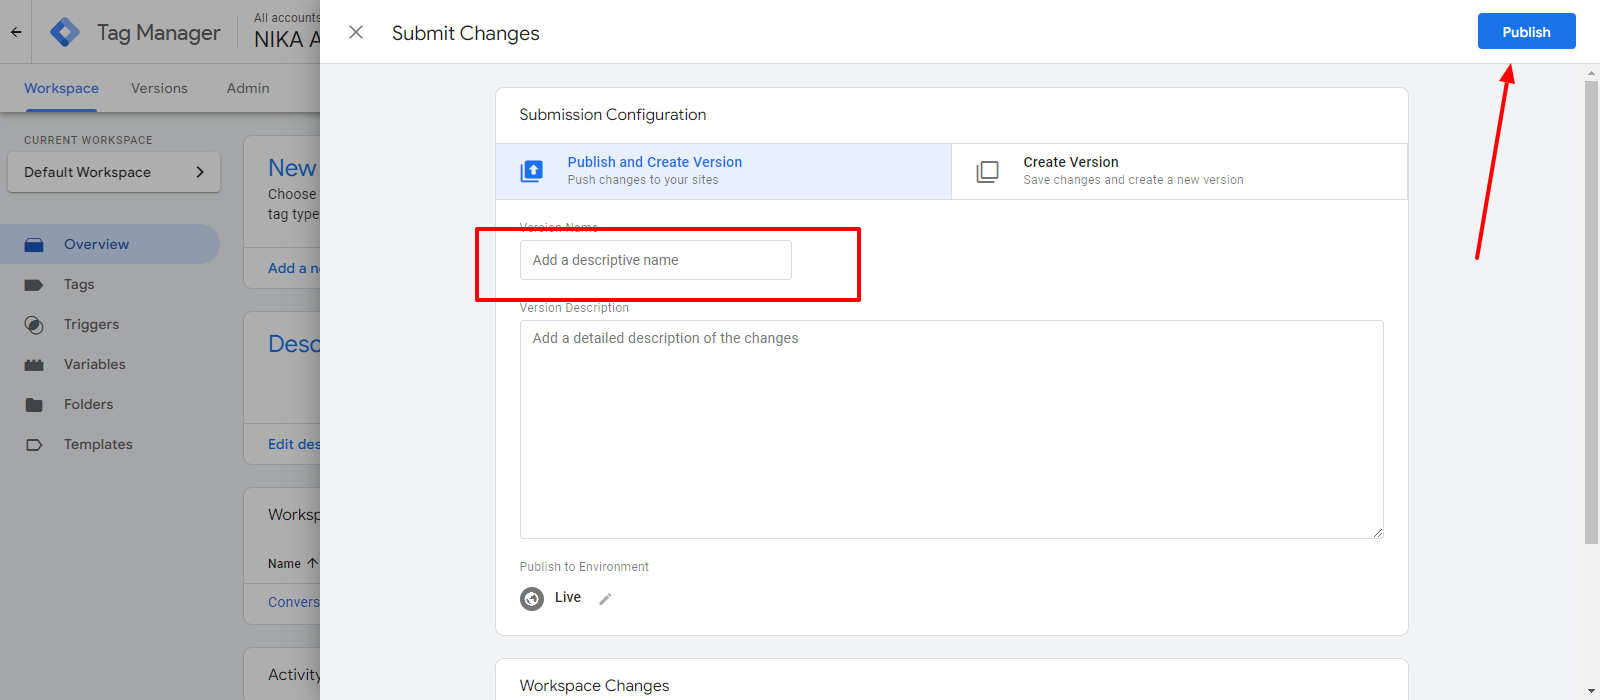
Submit Changes
- Click Submit in the top right corner
- Give the new version a name (like Google ads added)
- And click Publish

Add Thank You Page to Track Scheduling Conversions
To track the number of leads who book appointments through your website, you’ll need to request a "Thank You" page be added to your site. Once the page is created, our team will connect your GLM Sales Calendar to this page so that it becomes the redirect after a booking is completed.
By applying a Google tag to the Thank You page (via Google Tag Manager or directly on the site), you’ll be able to track how many leads schedule appointments after visiting the Free Intro page.
To request this setup, simply copy the email below and send it to our team at hello@usekilo.com:
Email Template:
Hi Kilo Team,
I’m setting up Google Ads tracking to monitor conversions from the Free Intro page. Could you please have the Website Team create a "Thank You" page for my site and set it as the redirect for any Sales Calendars in my GLM account?
Thank you!
If you have questions about Google Ads, Google Ads Tracking, or Tags, please reach out to the Google Support team through any of the following links: https://support.google.com/google-ads; https://support.google.com/tagmanager/.
If you have questions about your Kilo website, need a Thank You page, or would like to know if we have a Google Tag Manager email address on file for you, please email our Support team at hello@usekilo.com.